Support the cause, see something you like below? I may earn from the sale, it helps support the site.
Loading…
The back story
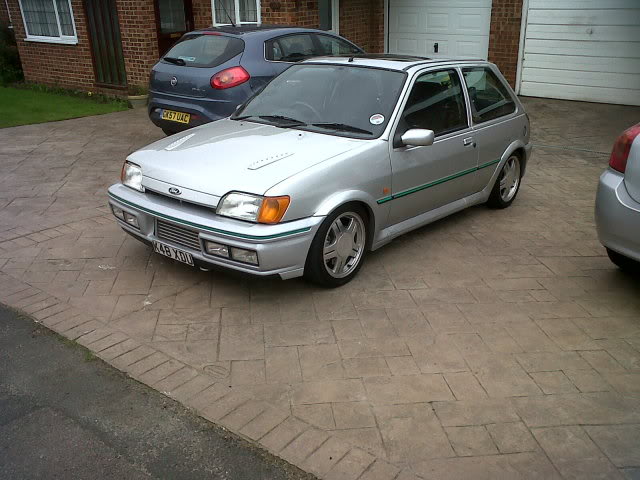
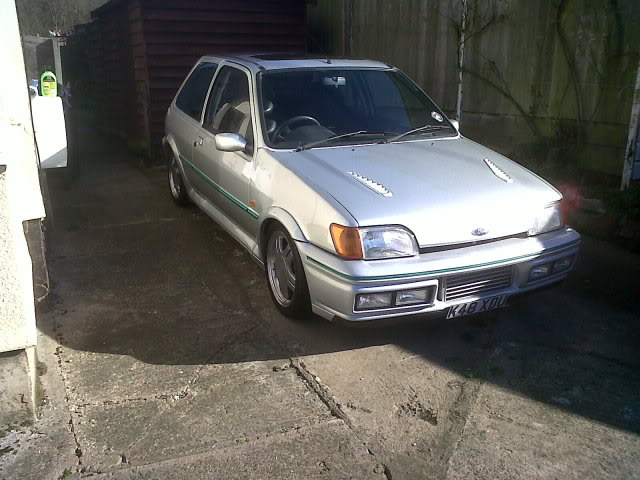
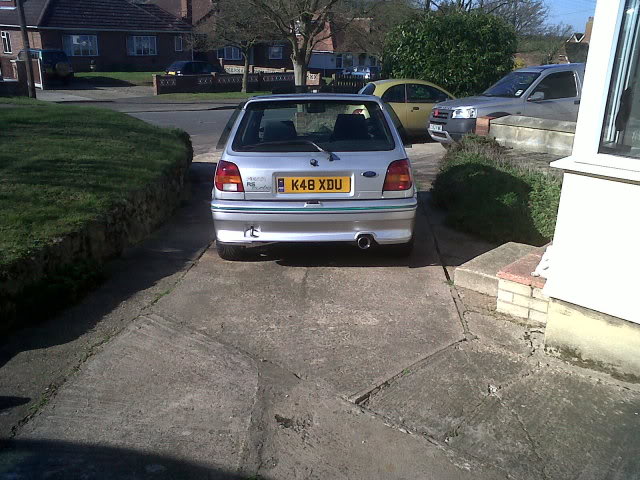
Tired 1992 Moondust Silver XR2i CVH rescued from Ebay for £155.
Here’s where it all began at the start of 2008
One very abused and forlorn 1992 K-reg XR2i 1.6 CVH
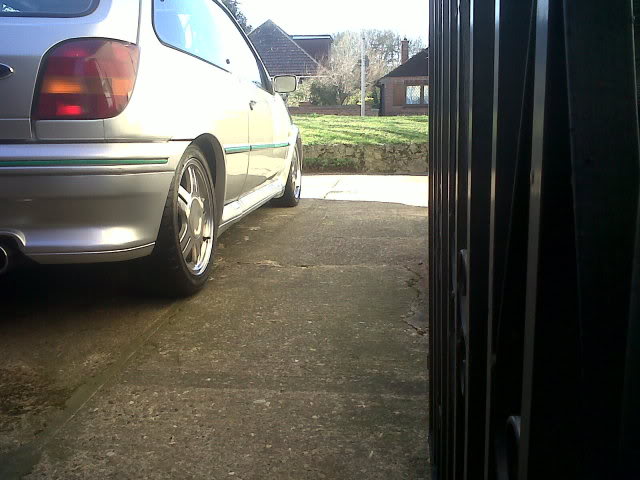
It’s still at the seller’s house in these pics
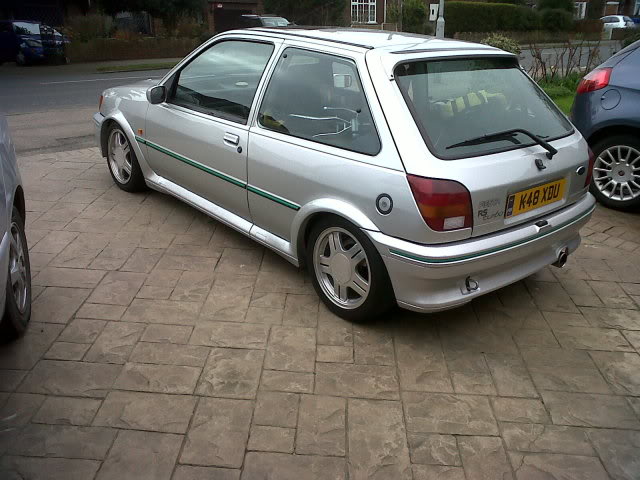
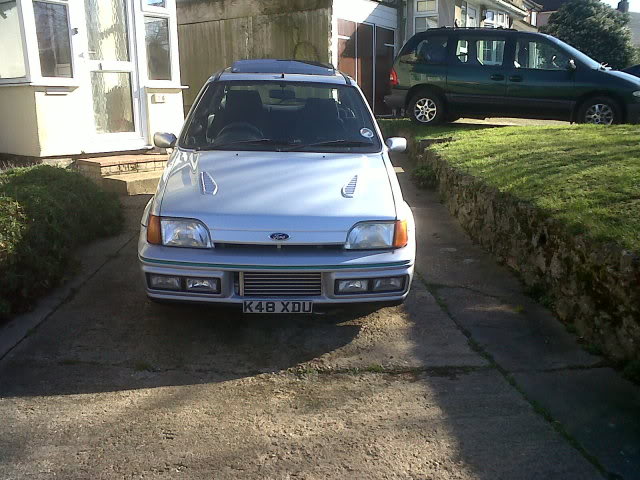
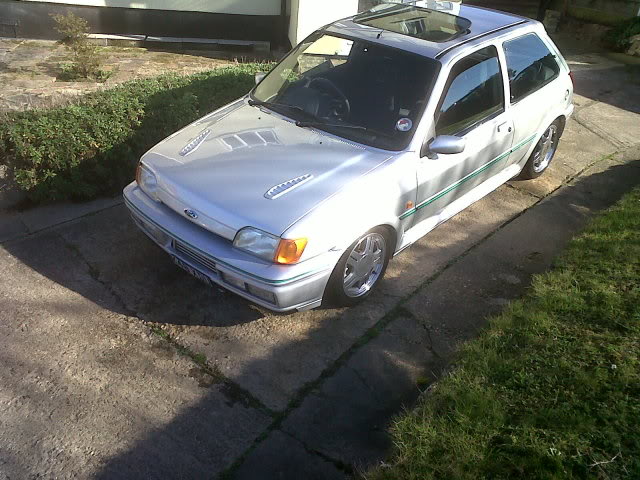
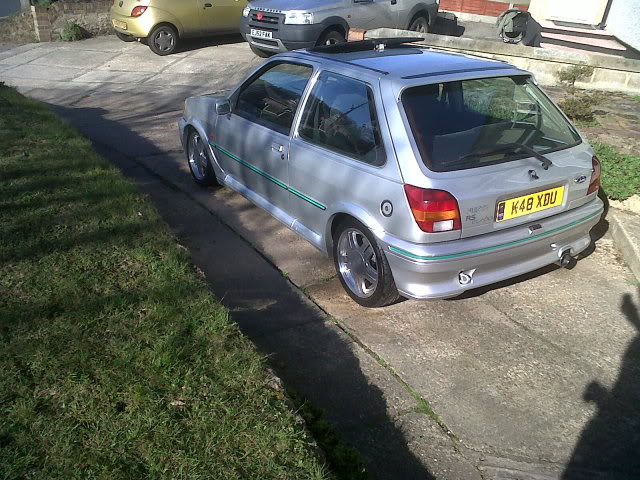
Exterior Modifications Completed: FRST bonnet, pop-outs, rear spoiler, and MK3.5 electric mirrors.
Interior Modifications Completed: Full FRST Recaro interior, clocks, steering wheel, green stripes set, and FRST decal.
Stripped down and resprayed.
Off to BodyTone in Wokingham where untold horrors were found and subsequently rectified
Bodywork Repairs: The car received a new front panel, x-member, and doors. The bodykit was removed, and rust was repaired.
Interior Upgrades: A full “raven plastic” dash and plastic trim from a donor car were installed.
Additional Replacements: The cracked front screen was replaced with a heated one from the donor car.
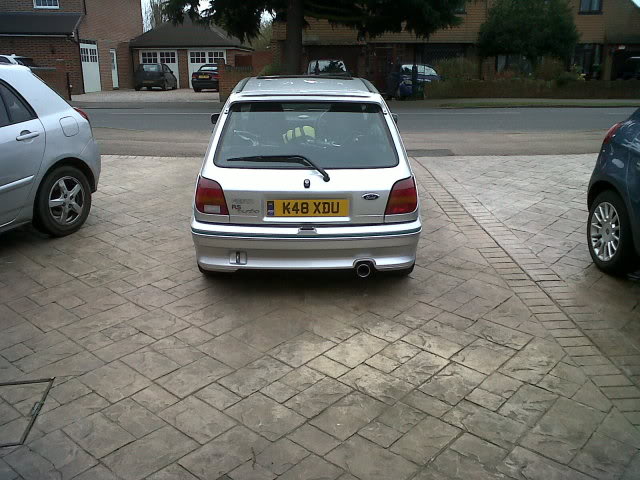
Collected from the bodyshop, doors reassembled, windows all fitted, decals all stuck where they should be etc.
Bonnet is not sitting straight due to old, bent hinges.
Current Wheels: Not ideal, but functional for now.
Future Wheels: 15” RS2000 diamond-cut alloys with 195-45-15 tyres, currently awaiting refurbishment at Lepsons.
Future plans: New rims, rear discs, coilers, blacktop zebec, mtx75
List of parts replaced
It was listed on ebay as “just needs a radiator and will be driveable“!
So far I’ve fitted:
1. Rad & FRST Fan. 2. New EDIS module. 3. New battery. 4. New Exhaust Centre-Section. 5. New alternator belt. 6. Countless bulbs (had to replace a load of blue ones! 7. Front N/S wheel bearing. 8. 8 X new Valve Stem Seals. 9. New Rocker Cover Gasket. 10. New front panel & x-member. 11. Full FRST interior (inc clocks & steering wheel.) 12. Full FRST decals. 13. New Number Plates. 14. Orange square side repeaters. 15. New Ford Badges. 16. 2 X new doors (mk 3.5). 17. Full Raven Dash & Plastic trim. 18. New heated front screen. 19. Black Carpet & Parcel shelf. 20. FRST Bonnet. 21. FRST Rear spoiler. 22. New weather seals. 23. Frst Rear pop-out windows. 24. New HT Leads & Plugs.
Lets go – Duratec turbo
A 2.3L all-alloy Duratec engine from the U.S. Focus was selected as the powerplant for the project. Compared to other UK cars based engine options such as the Focus RS Mk1 (Zetec-E Turbo), Focus Mk2 ST 2.5 (Volvo), and Fiesta ST150 (Duratec 2.0), the 2.3L offers a lighter weight, a front-mounted inlet for more efficient turbo layout, and greater cost-effectiveness.
The engine was sourced for $500 with $200 shipping to the UK, taking advantage of a favorable exchange rate and U.S.-based shipping services.
Planned upgrades include forged rods, pistons, ARP bolts, and Cosworth components. The engine will be turbocharged with a target output of 300+ BHP, managed by an aftermarket ECU. The original alloy rocker cover will be replaced with a black version commonly found on 2.0 Duratec models.
Focus RS clocks purchased.
Initial plans are to to use a Getrag MT285 6-speed gearbox (used in ST170, Mini Cooper S, and Mondeo SCi), which lacks a mechanical speedometer drive. Retrofitting a mechanical drive is not feasible or cost-effective.
To address this, Focus RS electronic instrument clusters are being used. These rely on a Vehicle Speed Sensor (VSS)output, this feeds to the engine ECU and then that signal is sent via CAN to the instrument closer
Note – project later scraps the Getrag Box in favour of MTX
Rough spec list decided
The target power output is 300–350 BHP, achievable using a modified 2.3L Duratec (originally 2261cc, rebored to 88.5mm for full 2.3L capacity). The 2.3 is preferred over the 2.0 due to increased displacement and compatibility. Mazda’s 2009 revision of this engine increased it to 2.5L with the same physical dimensions, providing a future upgrade path.
Engine Specification:
88.5mm Wossner 8.5:1 Pistons
Eagle Forged Steel Rods
ARP Fasteners throughout
Cosworth Duratec Main & Big-End Bearings
Cosworth Duratec Valve Springs
Cosworth Duratec D-Power Inlet Manifold
Cosworth Duratec 67mm Throttle Body
Cometic Head Gasket
Focussport Turbo Manifold & Downpipe
Garrett GT28RS Turbo
Wideband Lambda Sensor
Omex 710 Engine Management
Coil-On-Plug Ignition
Focus or Mondeo Duratec Engine Mount
Pro-Alloy Intercooler & Radiator
Drivetrain Specification:
Fiesta Mk3.5 or Mk4 Front Hubs & Carriers (compatible with ST170 driveshafts)
ST170 Driveshafts (including one custom billet steel shaft)
Quaife ATB Differential
ST170 Gearbox Mounts
Note – Changed at a later date; Omex management, Focussport Turbo Manifold & Downpipe, gearbox, gear linkage, bell housing.
MTX 75 gearbox & mount arrives.
A decision was made to use an MTX75 5-speed gearbox from a Mondeo MK3 Duratec.
To match the gearbox, MK2 Focus 2.0 Zetec driveshafts were also sourced. These are compatible, with left side shaft to be shortened as required for fitment.
Additional components include a SPEC Stage 3 clutch for the U.S. Focus 2.3 and a Fidanza lightweight flywheel, both ordered from the United States. A Quaife ATB differential will also be installed in the MTX75 gearbox. This differential is the same type used in the Focus RS.
Ordered at this time also;
Steel connecting rods
ARP con-rod bolts
Cosworth big-end bearings
New cam chain
Head gasket
Cosworth bearings & forged rods arrive.
Eagle Forged H-Section con rods with ARP 2000 Fasteners:
Focus 2.0 MTX 75 Transmission Mount:
For ignition, planning to use a single-coil system, allowing the use of Omex 600 ECU instead of the more complex and expensive Omex 710 required for coil-on-plug setups.
An ignition system and starter from a Mondeo Mk3 was sourced to keep options open in regards to ignition. Starter motor compatible with the MTX box.
Alternator setup talk
Initial thoughts were to use Burtons Duratec alternator kit – but it’s pricey.
Given that the vehicle is being converted to power steering using components main components from a Fiesta MK3.5 and a Fiesta ST150 power steering pump, it made more sense to just use the Mondeo/Focus Duratec 2.0 alternator.
The standard Duratec alternator is controlled by the engine ECU using a single wire – later the project is changed to using the Focus RS Mk1 Engine ECU so works out quite well.
The alternator mounts at the top rear of the engine, while the power steering pump mounts at the top front.
The system will use a non-aircon Focus 2.0 Duratec auxiliary drive belt.
Side view of the 2.3 Duratec.
Haul so far / Still to buy
The haul so far (in addition to items already shown earlier in the thread):
1. Cosworth inlet manifold. 2. Pro-Alloy full-width radiator & Fan. 3. GRS Front-Mount intercooler. 4. Garrett GT28R Ball-Bearing turbo. 5. Mondeo MK3 2.0 Duratec Engine mount. 6. MK3.5 Power steering pipework. 7. Fiesta ST Power steering pump. 8. “Duratec Inside” Sticker for the rear ‘screen!
Still on the shopping list:
1. Pumaspeed Fiesta ST Turbo Garrett GT Turbo Exhaust Manifold. 2. Fuel Injectors. 3. Management. 4. Fuel Pump. 5. Quaife ATB Diff. 6. Coolant/Boost/Fuel Pipework. 7. Map Sensor. 8. Decent FRST Exhaust (& some kind of downpipe 9. Pay the machine shop to bore my block to 88mm and also shorten 1 driveshaft.
Various pics of bits acquired
Pistons
Forged 9:1 compression 88mm Pistons.
Cosworth Inlet.
Caterham CSR200 Cosworth Inlet Plenum (later realised it won’t fit!) Even come with a 70mm Throttle body.
ARP Flywheel Bolts
MK6 ST PAS pump.
Engine Mount
Mondeo 2.0 Duratec MK3 Engine mount (for dummy-fitting purposes)
Fidanza Flywheel / Spec clutch
Fidanza flywheel to replace the old, nasty dual-mass one
Fiesta MK4/5 Brake cross-linkage (Mk4 Pedal has different attachment for brake linkage than earlier MK3)
Fitted some piston rings
It was a rainy day. This was done and some figuring out of wiring for the Focus Rs instrument cluster wiring to work with the fiesta…
Illuminated RS clocks
Quick pic of the clocks illuminating
Few bulbs removed for features not present on the Mk3 – ABS, Airbags, Traction control, seatbelt warning lamps
Scrapyard Haul – Fiesta MK 3.5 power steering components.
Fiesta MK3.5 Si steering column.
Fiesta MK3.5 Si Power steeing Rack and track rods.
Fiesta MK3.5 Si Power steering pipework
Fiesta MK5 Zetec S Power steering L/P pipework with cooler.
Mondeo MK3 2.0 Duratec Power Steering H/P pipework (will be taken to hose specialist and a hybrid pipe made with the pump-end of this one and the rack-end of the Fez Si hose)
Mondeo MK3 2.0 Duratec Fuel Rail Inlet pipe.
Mondeo MK3 2.0 Duratec Alternator/Starter Motor wiring.
The white blanking-plate on the left is what the late-MK3 Mondeo MTX75 ‘box was fitted with (they must use some other means of speed measurement, wheel speed etc…)
On the right you can see the the early-MK3 Mondeo Vehicle Speed Sensor (VSS) in its place – This sensor is the same one that 5-speed MTX ‘boxed Focus models (2-litre & RS) used too.
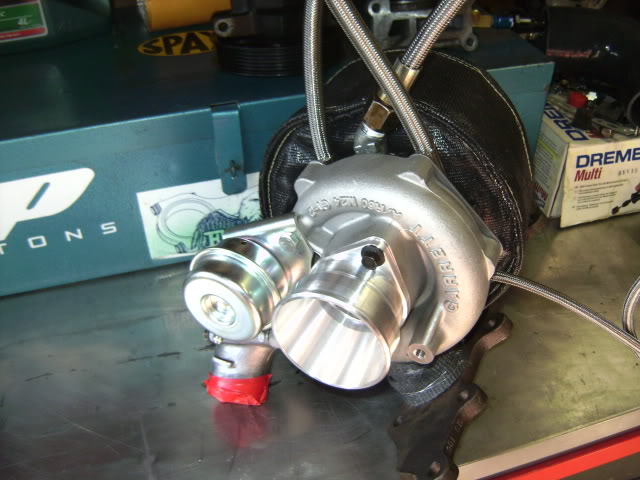
Turbo arrives, Exhaust manifold ordered
Garrett GT28R Ball-Bearing to be precise, should be just what the car needs for a nice bit of poke but (hopefully) next to no lag – 2.3 Litres & 9:1 Comp should see to that!
Pumaspeed manifold ordered. Compact design.
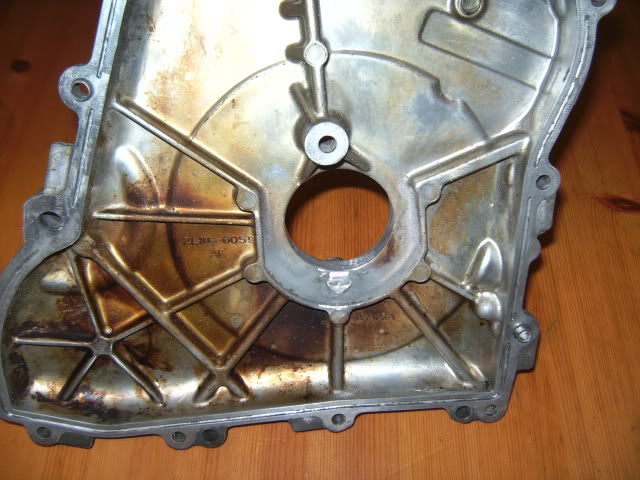
Engine stripdown.
Ancillaries all stripped from the engine and it’s now mounted on the stand ready for stripdown and re-bore
Engine Stripdown – Duratec has a cover over the timing chain which needs removing first.
Timing chain
Cams need removing to enable head removal.
Cam Bearing-Caps all labelled using good old Army Issue Mine-Tape
Oil Pump chain and pump need removing prior to block machining.
Ready for Head removal.
Head Removed
Here’s the crank setup – note the balance-shaft mechanism that is specific to the 2.3 (due to its longer stroke) – Driven at 2 x Crank speed by a gear on the Crank (see pics) can be removed though according to the yanks. Considered but eventually not opted for.
The crank on the Duratec is carried high in the block in a cradle which incorporates all the main caps.
Crank with cradle removed.
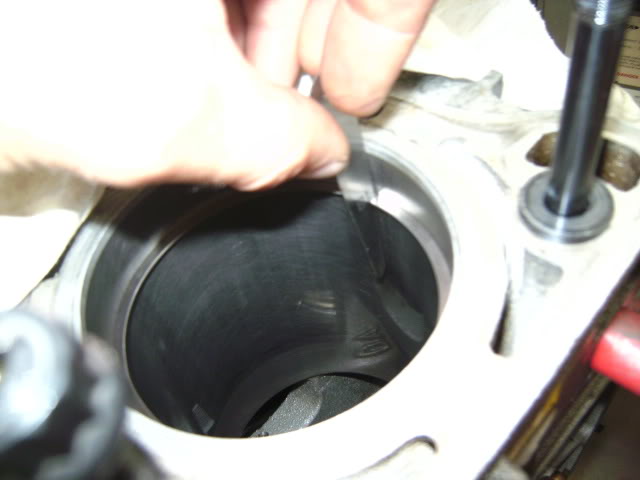
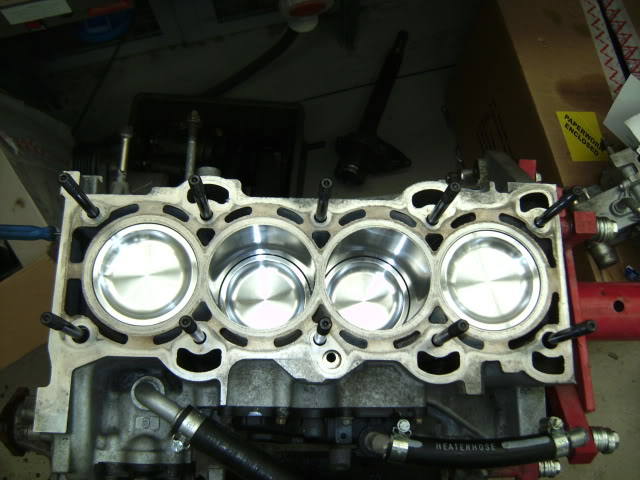
Bare Block at last!
Off to Cober Precision Engineering, collecting it middle of next week all freshly bored to 88mm for me to rebuild – bloody light too
Pro Alloy rad
Pro Alloy full-width Rad & GRS Intercooler
Bell housing talk.
Question raised from forum member about bolt pattern for the Duratec engine;
Just to get things straight in my head, is the bolt patten for the duratec (proper) different to the zetec/I4 etc as there seems to be alot of differant opinion on different websites, basically will a mtx75 gearbox (my only option due to needing 4×4) bolt on?
You can use any MTX75 ‘Box so long as you have the bellhousing from a Duratec (1.8 or 2.0) Mondeo MK3 (2001>) or one of the MK2 Focus that came with the Duratec once it replaced the Black-Top Zetec. Basically the bolt pattern on the end of this engine is a Mazda one (as this is where these engines originate) therefore it breaks the Ford tradition of using the same bolt-pattern for decades (as does the Volvo-Lumped Focus ST).
The gearbox itself will be pretty much identical right from a MK5 Escort XR3i 130 up to a late Mondeo, It’s only the bellhousing that has changed to adapt it to the Duratec and therefore you can just unbolt your Escort bellhousing and bolt up the Mondeo one
That’s also why the Duratec is so good for RWD customers as it is used in the MAZDA MX5 which has 6 speed transmission in RWD layout, might have to consider that for a project one day!
Burton / Cosworth gaskets.
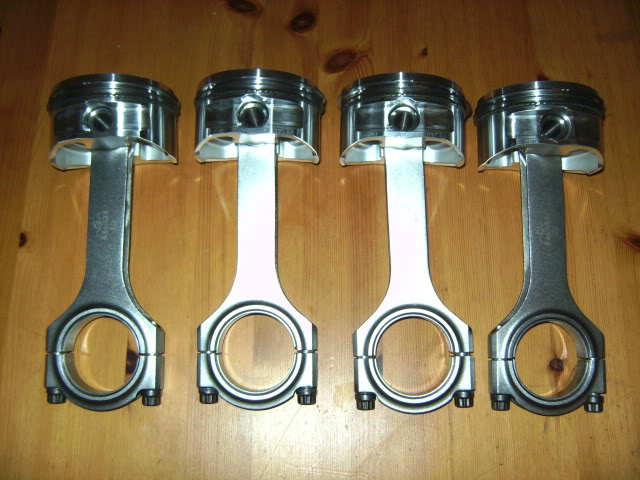
Rods new vs old
Quick pic of the standard Duratec Pistons & Rods VS new uprated lower-comp items.
Eagle rods look positively obese next to the svelte Duratec items
Although the standard Duratec items look good and almost race-like they’re well known as being rather weak, the same goes for the standard “slipper” pistons.
Talk ref Quaife diff / hunting FRS box down
I will be fitting a Quaife ATB but to be honest it’d probably pay me to be patient and hunt down a Focus RS ‘box 2nd-hand and buy that, as the Quaife ATB alone is £500 (+ Diff bearings) so it’ll make more sense to get FRS ‘box that already has it fitted then just swap the bellhousing over from my existing Mondeo Duratec MTX75 onto the FRS MTX75.
Block rebored.
I collected my block from Cober Precision Engineering in Colchester today, freshly bored & honed to 88mm and now awaiting reassembly
Note ref fuel rail
Prepared fuel rail for fuel-return operation (to make it more of a a straightforward fit into my Olde-Worlde Fiesta) and is having -6 male fittings welded onto each end to allow me to use some nice Aeroquip hoses
Duratec engine has a dead ended fuel rail, the Fiesta mk3 injection fuel pump setup in its standard form requires a fuel return to tank.
ARP Fasteners.
Mk 3.5 front hubs.
Here’s the hubs & shocks (I only bought the shocks as they’ll be useful to allow the car to be moved around during the work that’s happening and also buy me some time to save for a decent coilover kit).
Confirmation if anyone needs it – A Focus 2.0 Zetec Driveshaft & CV Joint fitted into a MK3.5 Fiesta hub, MK3 are a no-go…
Cosworth Upper Main Bearings installed (after thoroughly cleaning the surfaces with Loctite cleaning solvent). ARP Main studs fitted.
Cosworth Lower Main Bearings installed.
Crank Fitted, “Plasiguaged” then re-fitted, ARP Nuts torqued with ARP Moly Lube.
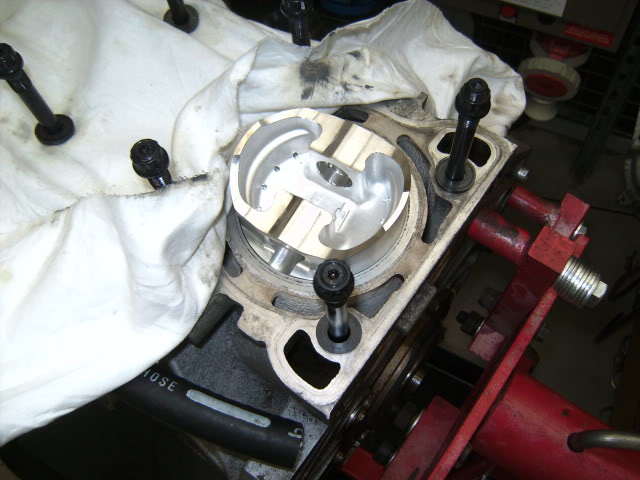
Pistons & Rods fitted using ring compressor and copious amounts of oil – Massive care had to be taken not to break any rings here!
Here’s all 4 fitted, ARP big end bolts and Cosworth bearings used throughout.
Modified fuel rail
Here’s my modified Duratec Fuel-Rail that now allows for fuel-return (compatible with the MK3 Fiesta’s fuel system) Has -6 male fittings on each end ready for Aeroquip hoses
Oil returns to sump talk
Should hopefully have the rest of the engine assembled tomorrow, aside from the sump which is having a -10 alloy male fitting welded on for an oil-return for the turbo and also a smaller -6 one for a drain line from the oil catch-tank. Also, I’m keeping the cam cover off for now as I’m painting that gloss black.
Balance shaft in the bin talk
A blanking-plate for the balance-shaft assembly oil-feed will also be manufactured as I’m not re-fitting this assembly. From what I’ve learned from people that have tuned the 2.3, the general consensus is that these engines run just fine without it – (the 2.0 doesn’t have it). Plus it’s just more rotational drag and weighs 5KG!
Gets left in!
Engine build (continued).
Right, make yourselves comfortable because there’s about 16 photos to get through here!
Worked like a bloody Trojan today, even skipped lunch and my daily trip to the gym!
First off I installed the cosworth head gasket:
Torqued the ARP head nuts to specified torque with ARP “moly lube”:
Installed Cams and torqued caps up to correct torque:
Note these Duratec Cams have a hexagonal section to hold the camshaft with a spanner whilst tightening the pulleys – useful feature, can’t remember if Zetecs have it?
Installed Oil Pump:
New Oil Pump drive-chain & tensioner fitted:
New Camchain tensioner fitted – note the grenade-style pin that you have to pull out once fitted!
New Cam Chain & Guides fitted:
Once Cam sprockets torqued to spec, a bead of gasket was applied to the front cover, this was then fitted:
Thermostat (bet you never expected it to live on this part of the engine eh? ) and water pump outlet fitted:
Block Breather & Oil filter housing fitted. Standard “save the planet” Injectors removed:
Thought I’d go mental at this point and trial-fit my Cossie inlet manifold!
Note that the power steering pump, alternator, tensioner & Idler pulley are all fitted too.
The cam-cover is waiting for me to paint it (still can’t decide on the colour – Moondust Silver, Gloss Black or Green to match the FRST Stripes and the boost/coolant hoses that I’m getting? for now it’s just resting on the head at the moment to keep s**t out of the engine. The sump is with the metalsmith at work getting the oil returns welded on. Still waiting for my exhaust manifold from Pumaspeed…
Cam cover, fuel rail and sump painted.
I fully cleaned then rubbed the manky cam cover down today and gave it a few coats of primer – Painting it Ford Modena Green tomorrow
Modified Fuel Rail was painted gloss black – In addition to having -6 male fittings on each end it’s also had the standard pressure regulator and pressure sender ports ground off and welded over as I’m using a Sytec adjustable regulator.
Sump waiting for my mate at work to weld the oil returns on – should be done by tomorrow…
Couple of pics of the actual car!
My RS2000 rims are still round a mate’s house in Kent, I’m keeping these nasty rims and chunky 195/50 tyres on it whilst it’s being worked on.
Driveshaft length talk
Today I also measured the total width from cv joint-end to cv joint-end with Focus driveshafts fitted into the mtx75 ‘box – I made it 1570mm whereas the the Fiesta measurements were 1480mm – this pretty much matches the dimensions that I used when building “The Manj”. Although the Focus driveshafts are supposed to be “equal”, one is actually about 30mm longer than the other, last time I fitted the shorter one where the longer one was originally fitted, then had the longer one shortened by around 90mm and fitted on the passenger (near side) side. I’ll be getting Cober Precision Engineering, Colchester, to sort me a shortened ‘shaft soon.
Mk 3.5 Power steering fitted.
Today I sprayed the Cam Cover Ford Modena Green – goes very well with the FRST Green trim
I removed the MK3 Hubs and replaced them with MK3.5 ones, look at the difference between them below – Mk3 are on the right, notice the smaller splined hole?
I also fitted the MK3.5 front suspension, just standard Si shocks with lowered springs to see the project through – I’ll put some decent suspension/brakes on once it’s running…
Pitiful state of an engine bay!
Don’t worry it will be immaculate before the powertrain is installed
I removed the standard manual steering rack and replaced it with the MK3.5 Si power steering rack and steering column, not as straightforward as you may think – the hole in the bulkhead where the column mates up with the rack needs enlarging slighty to allow the power steering column to exit properly.
Pics of power steering vs manual steering components below (PAS parts at the bottom of the pic):
PAS rack fitted:
Mk3 pedal assembly vs mk4/5
I also removed the MK3 pedal assembly in order that I could compare it to the MK4 item I have ready to fit with Hydraulic clutch pedal system. As you can see, the bolt patterns are a bit different!
It’s not all bad though as the part that’s protruding from the top of the new pedal box with the 2 bolt holes was only bolted to the pedal box – once removed it left two holes in exactly the same location as the MK3 one!
Just got to do some careful measuring & Mig welding on the other face to put the other 4 bolt holes in the same place as the MK3 one and also make a hole in the bulkhead for the Hydraulic clutch inlet & outlet.
Some engine pics
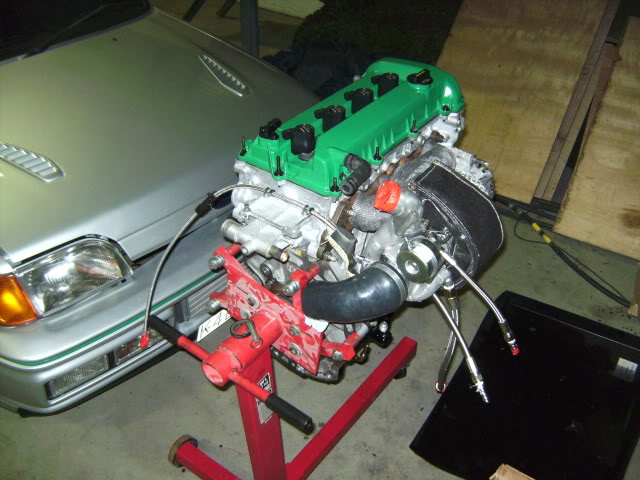
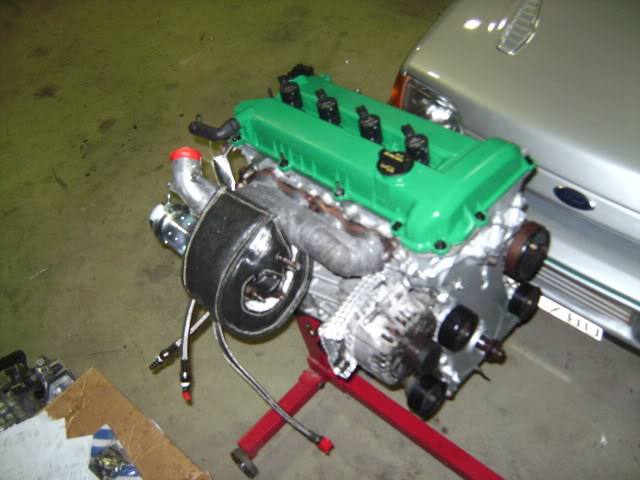
Couple more pics of my engine – cam cover re-fitted. I think it looks pretty damn nice in Ford Modena green
Fiesta MK5 hydraulic clutch pedal box modified and fitted.
Had a busy and productive day today – Did a bit of cutting, welding and drilling and now have the MK4/MK5 hydraulic clutch pedal box all fitted
Firstly I elongated the two holes on the top of the pedal box to make them the same as those on the MK3 pedals – I know it’s not mega neat but hey it’s gonna be out of sight!
As you can see from the pic, as standard the front mounting holes on the MK4/MK5 pedal box are in completely the wrong place – the mounting plate is also too wide for the MK3.
A couple of seconds with an angle grinder rectified this
Next, a 2mm thick piece of mild steel was measured and cut to size on this nice electric guillotine…
…and offered up to the pedal box.
This was then MIG welded to the pedal box ( I know, must get neater!
Using a cardboard template which I mocked up on the rear of the pedal box I then marked out the required area that needed to be removed for the hydraulic inlet/outlet connections – (Looks a bit like a kid’s drawing of a ‘conquering device’ and balls don’t you think?!
After an outline of 4mm holes was drilled around the shape it was then punched out and the edges de-burred and filed smooth.
View from inside:
Pedal box now bolted in place and everything lines up!
The edges were dressed in using a hammer and drift. They will also be rust-proofed and the whole engine bay is being re-sprayed so it should look good once done.
The MK4/MK5 fiesta pedal box hydraulic inlet/outlet area has a foam surround that seals against the bulkhead as the bolts are tightened, should anyone be wondering what the grey stuff around the black pipes is…
Just need to cut the hole for the brake linkage bar now and re-fit the steering column
Hybrid Mondeo / mk3 Fiesta PAS pipe
Hi everyone, got bored in my lunch break today so thought I’d tackle a niggly power steering issue
As you know, I have the PAS pump which is standard fitment on 1.8/2.0 Duratec Mondeos, 1.8/2.0 Duratec Focus and Fiesta ST (That’s the one I have). The problem is that the Fiesta Si high-pressure PAS pipe won’t fit the PAS pump of the Duratec and the Duratec pipe wont fit the PAS rack of the MK3.5 fiesta!
The Mondeo MK3 rack high-pressure inlet connection is just a “push-in” type that has a plate which bolts it on to the rack, the fiesta one is a more conventional swivel-ended screw type that screws into the rack.
Therefore I carefully cut the Mondeo push-fit end off that pipe, (keeping the flat “collar” that’s on the pipe to allow for a stronger base to weld to) did the same with the Fiesta screw-fit end from the Fez pipe, cleaned the faces up then carefully welded the Fiesta end to the Mondeo Pipe. A small bar was inserted into the pipe to keep alignment correct throughout.
The finished article – later on I painted any exposed metal as the pipe is steel and I want it to last at least a year! Fits a treat too
Not the most exciting update I know but it’s one of those crappy little jobs that I didn’t want to do at the end.
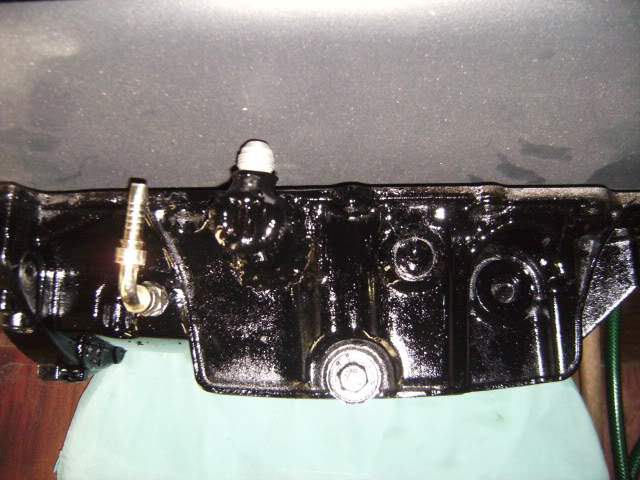
Sump oil returns.
Bit of progress today
Got my sump back from my mate, Frenchie, at work who’s kindly TIG welded my -10 turbo and -6 oil catch-tank oil returns which I bought from Earls hoses. The sump was cleaned of swarf and rubbed down, followed by a couple of coats of gloss black engine enamel. Sump and dipstic were fitted this afternoon
Intercooler mounts welded
He also fitted some new brackets that I made for the GRS intercooler (the old ones had seen better days…)
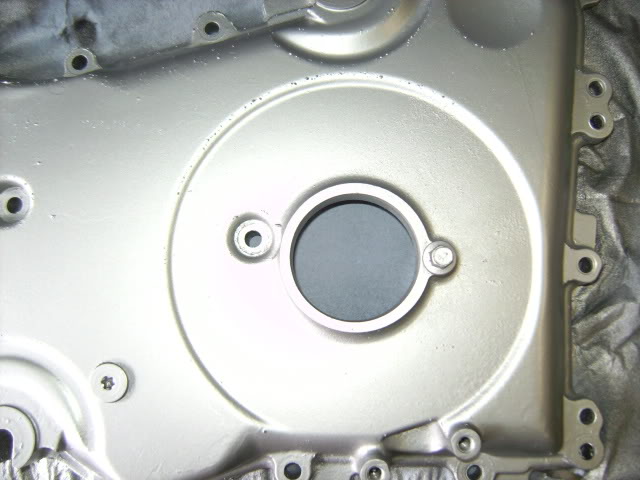
EGR blanking
Another niggly problem – The EGR valve needed removing as I’m not intending on routing exhaust gasses back into my inlet to save the planet!
(Looks awful too!) Here’s the offending item…
Using the old gasket as a template I made a blanking plate out of aluminium, here it is shown before I cleaned the mating faces and fitted a new gasket, along with some shorter bolts.
Still waiting on my turbo manifold – it’s been nearly 2 months now and I need that all fitted before I dummy-fit the engine
Pics of Mk1 Focus RS box won on ebay
Got lucky on Ebay today and bought a Focus RS Gearbox (so much for not touching the Christmas spends!
As most of you know, the Focus RS Gearbox already has a Quaife ATB Diff fitted as standard, along with shot-peened gears and stronger bearings. Seeing as the Quaife is £520 + Vat (so more like £600) new on its own I’ve basically paid half price for it and it comes with an uprated gearbox too!
I’m aiming to collect it on Friday, once in the workshop I’ll take the FRS “Zetec” MTX75 bellhousing off and swap it for my mondeo “Duratec” MTX75 bellhousing. I’ll fit the flywheel, clutch and gearbox to the engine the following week when I’m on leave again.
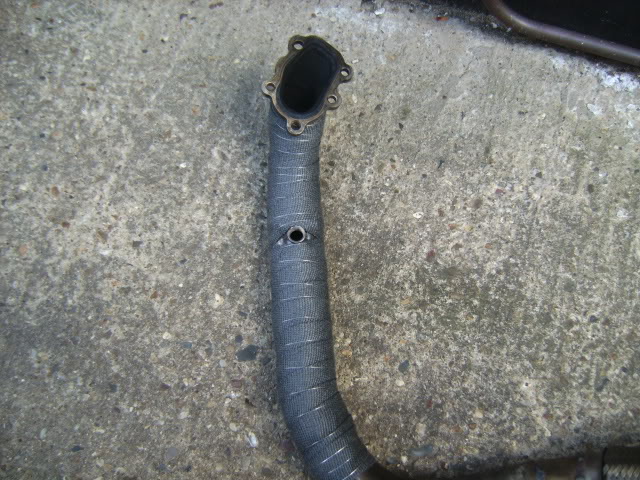
Exhaust manifold fitted
Had a bloody mind-numbing 320-mile round trip today to collect the FRS ‘box, but at least I used work transport and fuel!
Here’s my new exhaust manifold resting on the studs at the moment (will be covering in heat wrap and fitting the turbo soon). As you can see it’s not a funky “bunch-of-bananas” & equal length primaries affair, instead it’s just cast steel and compact but perfectly adequate for my power needs
Focus RS Gearbox Pics (MTX Duratec vs Zetec bell housing bolt patterns)
The couple of pics below are a useful reference if buying a 2nd-hand FRS ‘box (just in case some uscrupulous scum bag tries passing off a normal MTX as an FRS item
Here’s the standard MTX 75 Open Diff (services no longer required!)
Compare and contrast with this, the MTX 75 Quaife ATB Diff
Here’s a quick pic of the two different bellhousings, firstly the FRS Zetec/standard Ford bolt pattern:
…and here’s the Duratec (Mazda) bolt pattern, vastly different:
Just in case anyone was in any doubt, the Mondeo MK3 Duratec uses the same gearshift setup as the FRS so that can all stay put (confirmed by Ford TIS too so there! )
Tomorrow I’ll be swapping the bellhousings over and fitting the turbo if time allows
Pic of engine with turbo fitted!
Firstly I added the “Turbo” to the Duratec so I now have a “Duratec-Turbo‘
Duratec/Zetec MTX 75 bellhousing differences.
Here’s where problems arose…
I stripped the bellhousings of both the FRS ‘box and the Mondy MK3 Duratec ‘box, as you can see the bolt pattern on the “gearbox side” is slighly different even though they’re both MTX 75 ‘boxes!
It became a bit more obvious when I attempted to fit the Mondy MK3 bellhousing to the FRS ‘box – not very oil-tight!
Quiafe ATB Diff fitted to Mondeo MTX box
Resorting to plan B I removed the standard “open” diff from the Mondy ‘box…
…and replaced it with the Quaife ATB from the FRS ‘box, along with new diff bearings.
Mondy MK3 Duratec bellhousing was then re-fitted, along with the SPEC hydraulic release bearing.
Quaife ATB now resident in the Mondy ‘box.
Check out the difference in size between the FRS & standard Focus 2.0 Inner CV Joint housing!
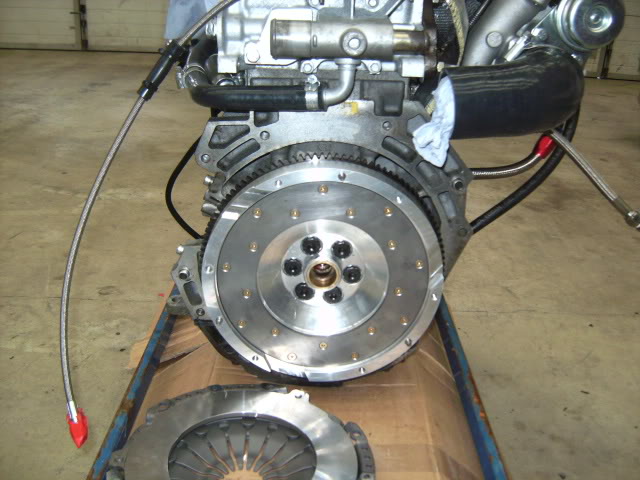
Flywheel & clutch fitted.
Flywheel & bolts ready for fitting…
…and fitted!
Spec stage3 6-paddle clutch all fitted.
Modified gearbox mounting bracket box side
Lastly, I also had a modified MTX gearbox mount made today at work – just as I did with the “Manj”. Basically the “tower” part of it (that bolts up through the mount) has been move inboard about 2″ – this gives me some much-needed room to fit the gearbox mounting point to the n/s inner wing. It’s very strong and has worked fine for me in the past, so hopefully it’ll be ok this time!
Issue with Focus RS/ATB diff in Mondeo MTX box, not turning
Things took another turn for the worse today in the transmission dept
As you know from the last update I had to fit the Quaife ATB Diff into the Mondeo MK3 ‘box due to differences in the two gearbox castings (despite them both being Ford MTX 75’s).
Before I left last night I noticed that the diff was very hard to turn with the driveshaft fitted (much more so than when it was fitted in the FRS ‘box) so this morning I stripped the box down again and started investigating…
I noticed that it was only the diff that was tight, both mainshaft and input shaft rotated fine, also the problem with the diff was only present when the bellhousing was fully tightened down, everthing was fine when it was opened by 1mm or so.
I know that the diff bearings (and mainshaft/input shaft)of these ‘boxes have to be shimmed correctly to eliminate end-float so I assumed that, as I still had the Mondy diff shim fitted then that could be the culprit? I removed the shim and re-fitted the diff bearing, the diff itself then the bellhousing – STILL too tight!
One thing I noticed about the FRS ‘box is that it has a thin metal gasket between the bellhousing and gearbox casing – no other MTX 75 has this, so perhaps they knew there was clearance issues with the Quaife?
On the other hand Quife list the same ATB diff part number for all variants of MTX75 and there’s no mention of any gasket required
I’ve emailed Quaife this evening so hopefully the can be of assistance…
My other idea was to make my own gasket at work out of 1mm thick copper and make shims up of the same thickness for the main & input shafts (thereby keeping their end-float consistent), then I can check the Diff endfloat too and hopefully it’ll be ok…
Why can’t anything ever be simple?!
Progress with diff issues
Things are looking better today after some graft at work
Recieved an email from Quaife this morning and they reckon that, as they designed their ATB Diff for the earlier “Ford bolt-pattern” MTX75, that the bellhousing casting for the Duratec MTX75 might not be as generous with regards space around the main diff body – bloody Ford!
This afternoon I fabricated a thin copper shim/gasket that would hopefully create the required clearance:
I ended up making two of the bloody things but the diff works just fine now
By the way, does anyone else here end up eating absolute crap when they’re busy grafting on motors?!
I consigned the original FRS speedo trigger wheel (mounts to the diff) to the Biffa as I originally thought it was the culprit (as late MK3 Mondys didn’t have this fitted I thought the casting may not allow for it…) so I visited the Ford parts desk earlier and paid £7.50 for another one.
Tomorrow I’m going to shim the input & main shaft bearings by the same thickness as my gasket to keep the original tolerances, then I’ll check end-float of the diff and shim that as neccessary
Once I have the speedo trigger ring I can reassemble the ‘box and get it mounted to the engine…
Diff issue resolved
Had a productive last couple of days and now (at last!) the gearbox is fitted to the engine
All required shims have been made + fitted and the diff turns exactly as it should now, as does the rest of the gearset.
This morning I fitted the new speedo sensor trigger ring, firstly the diff bearings had to be removed from the diff.
Then the ring was fitted onto the diff, followed by the bearing – this was then pressed home by the hydraulic press.
Lucky I changed diffs actually because the later MK3 Mondeos didn’t have a Vehicle Speed Sensor (VSS) in the gearbox so there was no trigger ring either – I’d have never known that, had I not stripped the ‘box down!
Here’s where we’re up to today – Engine & ‘box joined together, starter motor also fitted.
I need to visit the scrappy this week and remove the driveshaft extension from a MK3 Mondy as my 2.0 Focus Zetec one is (not surprisingly) nowhere near the correct fit on the back of the Duratec block
Replaced bonnet hinges
Took a trip to the scrappy and found a nice, straight set of bonnet hinges to replace my horrid, bent ones – they were on a Moondust Silver K-Plate MK3 of all things too
Mondeo/Focus driveshaft extension.
Removed the Duratec MTX driveshaft bearing from the block of a MK3 Mondy, unfortunately the bearing size was much smaller than that of the Focus MK1 2.0 Zetec so the MIG had to step in!
Here’s my hybrid bearing (Focus Bearing housing with Mondeo block mounting plate).
Removing battery tray – to make way for gearbox mount
Removed my grotty old battery tray (Still got black bogeys from all the grinding!)
Removing Fiesta Mk3 Engine mounting point – to make way for new
Removed the MK3 Fiesta Engine mounting point (Needed for access to Duratec Alternator) – Ditto about the bogeys!
Engine dummy-fitted.
Do you reckon it fits?! Two bloody hopes!
As above, I had to remove sh*tloads of ancilliary parts before the lump would finally get in the hole. I really want to use the inlet but it will need to be made smaller with some creativie TIG action – If it’s a crap casting and doesn’t take weld I’ll have to start from scratch with a new inlet
We’re in!
After a whole day of f*cking about, swearing, gashing my hands and getting molten steel in my hair I finally got the whole lot lined up correctly and tack-welded the transmission and engine mounting points in
Start of engine & gearbox mounting fabrication
That’s all until next week when I’ll be squaring the engine bay away – I’ll be fabricating fresh metal around the mounting points (and jumping on them to “load test” them!), I had to chop a bit of metal out fo the inner-wing to clear the chunky MTX75 so I’ll be adding some strength back in somewhere it won’t foul the gearbox.
After that I’ll be cleaning it all down, seam-sealing then priming the ‘bay then hopefully getting it all sprayed Moondust Silver.
Final fabrication of engine / gearbox mount points
Today I welded the mounting points in properly and sorted the clearance for the MTX 75/inner wing/chassis rail.
For the gearbox mounting I started by mocking the required piece in card first.
Then started making a duplicate in mild steel…
All welded in
Same detail for the engine mounting point, card first…
All done.
Here you can see the area that has been created to clear the gearbox – once the gap was opened up, I used some 4mm thick mild steel to restore the strength to the chassis rail and inner wing – should look a lot nicer once the seam sealer has been applied and it’s all painted.
Here’s the small area that had to be removed to provide a bit more clearance around the Duratec Oil Filter housing – to be honest I was a bit “previous” by hacking it out in the first place – once I had everything lined up properly there was a bit more space than I first thought, ah well better safe than sorry!
Still got to sort the top out – ran out of time today.
Next update should hopefully have the engine bay stripped, cleaned, rubbed down and primed,
Engine bay resprayed.
We’re another stage closer now – engine bay is all resprayed and looking a damn site more presentable than it was a few days ago!
I applied seam-sealer to all the exposed welds, followed by 2 coats of primer, waited 24hrs then 2 coats of Moondust Silver, another 24hrs then 2 coats of lacquer. I know it’s not exactly pro-standard but I’ve at least achieved my aim of making the engine bay look presentable!
Little comparison…
Next on the list is fitting the gear linkage and hydraulic clutch pipes, then I can dump the engine & ‘box in properly and stop them cluttering the workshop up before everyone gets back from leave!
Mondeo MK3 MTX 75 gear linkage fitted.
Another busy day, managed to fit the gearshift setup and keep it all looking factory-fit (almost! )
Firstly I gave the car a clean as, despite my best efforts to keep it covered, there was metal-dust all over the place due to my efforts with grinders/mig etc over the last few weeks, that all needed removing before it could start rusting and end up trashing my nice bodywork!
Check out the cheesy sticker on the rear ‘screen – I would keep it a proper sleeper but I need some recognition for all this graft, so there it is!
Fitted all hydraulic clutch and PAS pipes that would be a Bic™ to fit once that beast of an engine is in the hole.
There was a bit of a setback today when I tried to mount the gearlever mechanism inside the car and bolt it through the floor (as I did with my previous ST170 transmission). Unfortunately, the Mondeo MK3 gearlever mech is HUUUGEand if fitted there would mean a very tall gearlever (as found in a Bus!). Worse still, the centre console would never clear the cable shift & selector mech so a bit of creativity had to step in!
Here’s how high up everything was originally!
Basically I made a steel cradle up that allows the mechanism to bolt in from beneath the car, saving me a vital couple of inches – this was duly fitted and now everything fits and looks ok.
Trim re-fitted, full range of gearlever movement too!
Still got to do a bit of tidying underneath but the hard work’s done – not touching the car again until after some serious New Year’s drinking!
The battery is now residing in the boot – here’s a couple of pics of how I went about it…
Battery fitted into boot.
I used a Mini centre exhaust mount as a remote “live” terminal to hook up all the usual live connections to where the battery would normally live.
The wire back to the battery in the boot goes into the bulkead via this grommet, then under the interior sill trims all held in place by the plastic cable clips already put in place by Ford.
Here’s my battery box that I made yesterday – I’m a tight bugger and won’t pay £20 0r £30 for one when mine cost £0.00!
It’s bolted to the boot floor, the holes are painted and sealed.
Waiting for the big-ass ANL fuse holder that’s coming in the post (hence the + wire being left doing nothing in the pic). I have a 300A ANL fuse going in there to safeguard against potential shorts/fires
May fit a cut-off switch at some point too…
Mondeo Mk3 gearbox mount aquired
Bit of an update
I spent a couple of hours in a snow-covered scrap yard today freezing my nads off tring to remove the rear gearbox mounting bracket and mount from a MK3 Mondeo 2.0 Duratec, It was made all the more difficult with ice and muddy slush everywhere, the fact the car was ground-mounted with no wheels on and my pink, frozen mong-hands not working properly!
Here’s the rear mount and the block bracket:
SANYO DIGITAL CAMERA
Crank sensor fitted.
Also managed to acquire a crank sensor as mine was broken.
Not sure if you know or not, but that sensor gap has to be pretty exact. They cause all sorts of bloody trouble if fitted even slightly out. When new they even come with a little gap jig. A couple of minutes now can save a good old headache later!
Turbo Coolant Pipes
Finally got back into the workshop and knocked up some turbo coolant pipes using some spare power steering pipe and some M14/1.5 Banjos, taking care not to get them in the way of where the oil lines will go (still waiting for them to arrive) and also the actuator.
Rear view
RS2000 rear brakes arrive.
Here’s my new back brakes – RS2000 270mm rear discs
Got the whole lot for £55 inc. Delivery
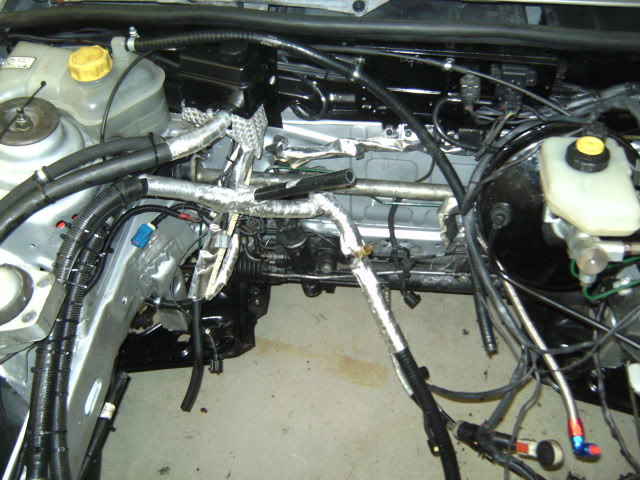
Engine & Gearbox fitted.
No you’re not seeing things – that’s a 2.3 Duratec-HE Turbo in a 1992 MK3 Fiesta
Had a mad moment last night and after my wife & daughter went to bed, I cracked on through the night to get this lot done
Doesn’t even sit any lower than when the CVH was in there!
Bonnet still shuts (was having horrible thoughts that it wouldnt! ) need to still adjust it to sit straight yet…
Rear gearbox mount fitted.
Lined up on the lower crossmember.
A jiffy with the MIG later…
You can see more clearly here why I needed to modify the front panel to clear the oil filter housing!
There’s no chance of it touching – the photos don’t quite illustrate how much room there actually is, plus the way these engines mount, they can’t lunge fore/aft like the CVH’s used to – knocking chunks out of the rad/bonnet!
Starter motor fitted.
As you can see, the actuator bracket needs some trimming!
There’s plenty of room to “contour” its shape around the brake linkage bar so that the two never meet.
Fiesta ST150 PAS Reservoir Needs A Rethink.
When the power steering pump was re-fitted, it became apparent that I need to use a remote reservoir though as the pump-mounted Fiesa ST item is just too tall for my diminutive MK3!
Obviously it’s fingers-crossed time for the inlet plenum – I’ll see whether it takes weld next week if I can when my mate who’s good a TIG is back.
Oil pipes arrive
Notes ref Caterham inlet not suitable & new manifold fabrication
As I showed a few weeks ago, the Caterham Cosworth inlet plenum was just WAAAY too big to have even the smallest hope of fitting in what’s left of my engine bay . As a result I sold it on ebay for near enough what I paid then set about designing and fabricating a custom compact aluminum plenum that’s more suitable for my needs.
There’s only about 7.5″ room between the face of the head and the rad/slam panel, so I’m aiming to keep the depth of the plenum to 6.5″ to allow room for movement etc, also as it’s located right at the front of the ‘bay it can’t protrude too high as the bonnet won’t shut!
I’m using 4″ X 4″ section 400mm long aluminium extruded tube for the main plenum body (I cut this to size today) and have already made a throttle body mounting plate for the end, complete with time-sert steel m6 threads. This is housing the standard 2.3 Duratec 65mm throttle body. I’ve also ordered a twin DCOE/Throttle bodies Duratec inlet manifold from ebay which is going to be TIG welded to my plenum as soon as it arrives!
Still got mock-up where the throttle cable bracket will be welded on and where I’m putting the vacuum take-offs etc but hopefully it’ll come together.
Also have some front brakes now in the form of Esc Cos calipers & discs which should work well behind my 15’s
Bye for now, next time I’ll have pics – I promise!
Manifold and brakes arrived
Plenum / Inlet coming Fabrication coming along
Some Aluminium bits from those nice chaps at Earls Performance Hoses arrived today – the weld-on fitting for the A.C.T Sensor, along with the -4 & -6 fittings that my vacuum/boost fittings are connecting to Also, the FRST ISCV turned up too
I cut the plenum along its length yesterday so that it tapers in from the throttle end, just waiting on the Ally velocity stacks + throttle cable so Mick and I can get this thing put together.
Here’s how the inlet plenum is taking shape – in the pic the inlet is upside-down as all the vacuum/boost take-offs, ACT sensor and ISCV will be mounted on the underside for a clean, un-cluttered look. The main reason though is clearance for closing the bonnet!
As you can see the velocity stacks arrived but as the first pic shows, they were a bit too tall for my compact plenum
A bit of a tickle in the metalsmith’s workshop later and they’re now a decent size.
On Monday, Mick the TIG welding guru is back so he’s going to crack on with finishing the plenum
I fitted a Focus 1.6 throttle cable too which is just perfect – it goes through the original fiesta bulkhead grommet and has a ring-fitting on the end which is the exact size of the Duratec throttle mechanism arm fitting. Once the plenum’s done I’ll sort a cable bracket.
Cosworth front discs / RS2000 rear discs fitted.
Escort Cosworth front brakes now installed, a nice well-proven budget brake upgrade and perfect for my car as it’s staying on 15’s (NOT the hideous TSW Stealths that it’s wearing now!
Also removed these shabby bits of scrap metal from the back end…
…and replaced them with these
For now I’ve reverted back to a conventional single coil ignition setup as I just want to get this thing up and running for the least outlay and hassle for now – I’m keeping the individual coils stored in case I get adventurous at a later date
Pro Alloy rad fitted.
Also fitted the Pro-Alloy rad, firstly so I could check that the plenum will fit, but also so I could gauge the route my coolant hoses will take.
Here’s a view of the turbo oil return to the sump and also the one from the oil catch tank.
As is normally the case with project cars, I rushed something when I was tired on a previous spannering session (that night when I fitted the engine) and as usual, it all needed ripping out and doing properly with a fresh mind and body!
I’m referring to the rear “torque-link” mount that stops the whole powertrain from swinging fore and aft as you take up drive – I got both the main top-mounts spot on but when I fitted the torque link it wasn’t 100% straight and also the engine was “canted” slighly (swung on its axis so that the front was higher than it should be and the rear was lower), meaning that driveshaft alignment wouldn’t be acceptable. As the torqe link just bolts through welded on mounts on the lower cross member, I ground off my original ones and started again with the engine held in the position for perfect driveshaft alignment.
It’s better just to crack on now and rectify any problems than just bodge it and suffer massive failures once it runs!
Here’s the pics of how it sits now
Engine totally straight (not swung on its axis). The best bit is that now the actuator and turbo are totally clear of the brake linkage bar. Also it means that I have slightly more room height-wise for the plenum at the front
Those that have followed this thread will have seen how close the oil filter housing was to the front panel originally
As you can see, with the revised rear mount there’s plenty more room
O/S driveshaft fitted.
After all that messing around I managed to get the O/S driveshaft fitted, looks straight to me
Oil returns fitted.
One last pic of the car before I collapsed in the bath at home
Finished Custom Inlet plenum built and fitted.
At long last – the inlet plenum is finished!
Here’s a pic of how the underside looks, (busy!!)
As you can see, all the unsightly stuff is tucked out the way so that it’s all clean and simple from the top.
Bonnet still closes, even with the throttle body and cable fitted (thank fcuk!
RS 2000 servo & master cylinder fitted.
The eagle-eyed amongst you will have seen that the Escort MK5 servo & master cylinder are now fitted too
Originally, the RS2000 MK5 servo came with this 2-outlet master cylinder, useable but a pain in the arse due to the fact T-pieces would need making…
On Ebay I managed to win a MK5 “4-outlet” master cylinder for £5.00!
Here it is fitted to the RS2000 Servo (the rear part of the cylinders are identical).
Here it is fitted to the car.
Some of you will have noticed that I’ve started to fit the intercooler, it’s a Radtec S2 Escort item that a friend in the Army gave to me in return for a couple of beers!
Focus 1.6 throttle cable fitted.
In my lunch hour today I sorted the throttle cable bracket, with a friend pressing the loud pedal I checked it moves through its full range and shuts fully, as you can see it’s now fitted
Exhaust fabricated and fitted.
Started fitting some of the Mongoose FRST system too, the pic shows the rear part and centre section are dangling down pathetically at the moment!
I dummy-fitted it all with the front section as well just to gauge how much i need to remove from the front section (the Duratec exhaust is on the back of the engine unlike CVH/Zetec lumps where it is at the front). It’s looking like around 400mm needs removing but I’ll do a lot more measuring/fitting just to get it perfect, then it’s going to be assembled by my mate Mick
I’ve ordered a Garrett GT28 5-Bolt stainless exhaust flange plate, a lamda boss and some 2.5″ stainless pipe bends etc so we will be making up a new downpipe in-house before making it fit the Mongoose system as soon as it all arrives…
Here’s the pics that I should have taken on Friday!
I know it’s not the prettiest pipe ever but I had to do it all myself as my skilled welder friend was away
I know I could have just towed it somewhere and given someone a fat wedge of cash for the priveledge but that’s not what this car is about
Focus RS Clocks fitted.
Notes ref focus RS Clocks in Mk3
As for the FRS clocks I paid about £100 for them about a year ago. Although they look good, they are by no means straightforward to get functioning in a Fiesta MK3!
You need a VSS (Vehicle speed sensor) in the gearbox, reading the ring mounted to the crownwheel (where your speedo drive pinion normally goes). Both later MTX75 and IB5 ‘boxes came with these in Focus/Mondeo derivatives.
You also need some kind of frequency modifier as the standard setup is calibrated for 18″ rims on the Focus RS – Most people only use 15 or 16 inch rims on Fiestas with smaller tyres too so this requires the speedo to be re-calibrated by use of a “Speedo-Healer” (used commonly for motorbikes – cost about £50ish).
Lastly you need a Focus partial loom and ECU for the clocks to be driven correctly – there are CAN bus signals that cannot be replicated without great effort so it makes sense to use the Focus bits.
A few more essential parts have arrived this week , namely a nice 2m length of Goodridge 200-series -6 AN fuel hose (£25 a metre!), the Sytec fuel pressure regualtor and the Siemens 630cc injectors (from America).
Goodridge 200-series fuel connectors arrive.
Some more goodies arrived this week (over £100 worth) -6 AN/Jic Goodridge connectors for the Goodridge 200-series hose that I’m using for my fuel system.
This stuff ends up costing a lot more than you think, I must admit that I never really thought about the cost of these items when I first started this build!
Fuel pump next on the shopping list…
Couldn’t resist fitting a couple of them, hopefully I’ll get some time to work on the car this week as I have 10 days off work as of Wednesday
Those nice-looking fuel system components that I had laying on my passenger seat for months are now fitted!
Siemens 630cc injectors now fitted with the fuel rail:
Goodridge 200-series -6 hose and connectors are all connected up to the fuel filter, Sytec FPR and return line:
Not 100% happy with the filter being where it is but it had to be relocated due to the Focus Transmission mount stealing its original home.
There’s also some mundane (but essential) tasks that need completing, one of which was to fit two of the bottom bolts on the inlet to the head and torque them all up (I’d just dummy-fitted it and left it before) – this ended up taking more time than planned as I had to remove the PAS pump to get to one of them!
I’m ordering the Gotech Pro-X engine management next week, along with fuel pump, some coilovers, boost pipes, new tyres, and a host of other bits and pieces so things are looking up!
Sytec “bullet” fuel filter ordered.
Just bought a Sytec “F1” (their name for it not mine) Hi-flow billet fuel filter – mine has -6 AN/Jic fittings not the push-fit ones shown, should improve the aesthetics of my engine bay slightly!
… a nice M14 X 1.5 female to -6AN Male anodised adaptor from Earls:
…and a female -6 to female -6 to join that adaptor to the fuel filter (there was no female M14 x 1.5 to female -6 available on Earls or anywhere else I looked which was a bummer as it would have made things more simple! )
Can’t wait to fit this little lot in – cost a few quid but will be in-keeping with the rest of the build
Note on things left to do
Buy Gotech Pro X ECU with base map from Jamsport + Fit it to the car, wire everything up etc.
Buy and fit partial Focus loom and ecu to drive the FRS dash instruments.Buy and fit all boost hoses / hard pipes and air filter
Buy / fit 255 LPH Walbro fuel pump
Get driveshafts sent off to Recoprop (or Cober engineering in Colchester if they quote me happy!) then fit them.
Buy / fit some new front lower arms
Buy & fit coilover suspension
Buy some nice new tyres (I sold my original RS2K rims and bought the polished ones that are now on the car – unfortunately they have “ditchfinder” tyres on! )
Finish some miscellaneous bits & pieces off (i.e get a drive belt that actually fits, adjust the gear linkeage, fit a Focus clutch pipe, bleed hydraulics, finish off heater coolant pipes….)
Need to buy/fit an oil catch tank
Fit revised turbo oil return connector (to clear exhaust) alread in hand…
Fit new fuel filter
Sort out a remote reservoir for the PAS system as the bonnet won’t close over the MK6 Fez ST item!
Bumper modified for FMIC and fitted.
Tailgate dented by an unknown and complete c*nt!
Boost pipes.
Bit of an update – I managed to find some hard boost pipes in the scrappy today and bought them on the off chance they may be of some use to me. Much to my surprise they fit amazingly well, almost as if they were designed for my very own car!
Just need to run a bead of weld around (the open join you can see in the pic) so that I have a continual “hard pipe” from the compressor all the way to the intercooler
I managed to get a Focus clutch pipe from the same scrappy too as the Fiesta MK5 one I have in the car already does not fit the Focus MTX 75 hydraulic clutch cylinder (see pic below). The MK5 Fez one is at the top:
The problem is that I need half the MK5 Fez pipe from the clutch pedal and half the Focus pipe from the clutch cylinder! Luckily there’s a place in Colchester that makes up custom hoses pretty cheaply so I’ll be paying them a visit soon…
Aux drive belt.
Been having ongoing issues trying to get a suitable aux drive belt and have now got one that fits – a 6pk 2175 (for anyone else that fancies doing the same conversion! )
As I previously mentioned, the Fiesta MK6 PAS reservoir that normally mounts directly on top of the PAS pump can’t be fitted in my car due to it stopping the bonnet from closing
I bought a Focus MK1 PAS reservoir (yes, from the scrappy! ) today and this is going to be mounted where I’m holding it in the pic below:
Injector plugs.
Lastly I bought some “EV1” standard injector connectors for my Siemens injectors (same as normal Bosch type injectors) as the Yank duratec injectors have these weird connectors that don’t fit the Siemens/Bosch injectors.
The best bit is that all this (except the drive belt, that was also £15 from Partco) only cost £15!
As you can see I’m still waiting for the Sytec Fuel filter – hopefully it’ll be here tomorrow…
For just £7.00, Hosequip in Colchester chopped the two hoses and then joined the MK5 Fiesta master cylinder end to the Focus MK1 slave cylinder end.
Had a wobble and nearly sold the car.
Decided to keep it and gave myself a good talking-to!
Hard boost pipes fabricated, painted & fitted.
From my previous updates you’ll remember my stroke of luck with the “scrapyard special” Focus TDDi hard boost pipes
Basically they fitted my setup almost perfectly and I was happy with that. I did try joining them together with coupling hose and jubilee clips but it made things look too cluttered and unprofessional for my liking
I decided to weld them together instead and here’s the results;
Boost/induction pipes welded together and dummy-fitted;
Removed and sprayed with black lacquer;
Re-fitted once paint dry;
Sytec “bullet” fuel filter fitted.
Finally got around to removing the old standard (HUGE!) fuel filter and fitting my nice little Sytec “bullet” anodised filter;
As I just want to get the car running and on the road ASAP I renewed my knackered MK3 lower arms with some new MK 3.5 items – (I will buy some fany adjustable rose-jointed items but I just can’t justify shelling out £2-300 right now). I needed MK3.5 ones as I’m using hubs from a 1995 Fiesta Si and I had filed down the original MK3 ball-ends to fit the later hubs when I dummy-fitted the driveshafts etc and didn’t want to run the risk of forgetting I’d done it and venturing out on the road!
Bumper splitter & small numberplate fitted.
After what seemed like an age, I managed to find an original rubber bumper splitter on ebay for a couple of quid (mine was wrecked). This was fitted and my smaller number plate is now below the FMIC. ( I will be getting a different FMIC or re-manufacturing that one to make it more central once I’ve got the car running).
This last job was one of those boring, tedious affairs that you never really feel any reward for doing
Gearbox cradle modified and re-fitted to clear Mondeo MK3 Gearbox mount.
The original cradle that goes under the gearbox was useless with the MK3 Mondeo rear gearbox mount in place and although I no longer required the cradle for gearbox mounting purposes I still need it for the front towing-eye and to keep much-needed strength/rigidity in the car. I chopped the original cradle and modified it to clear the gearbox mount, whilst still retaining ample strengh/rigidity.
Apologies if anyone has tried to read through this topic and noticed that all the old pics have gone! Basically I made separate photobucket albums for each car I’ve had to avoid confusion/clutter. When/if I’m ever bored enough I’ll go back thorough and re-post all the pic links
Mondeo Gearshift Mech heatshield fitted.
Firstly, I sorted the gearshift issues by moving the whole assembly back about 10mm which now allows gearchanges without the lever mech hitting the trim!
After that I made a heatshield/cover for the exposed mechanism. (Was all sealed around the edges later on).
The MK5 Fez PAS cooler was mounted somewhere where there’s still actually some space!
Fiesta MK5 ZS PAS cooler fitted.
It’s all plumbed in now and all pipes suitably P-Clipped out of harm’s way.
Both driveshafts were sent off to Recoprop to be shortened today – they should be back with me within a couple of weeks and fitted
I also took delivery of a Focus RS MAP sensor today but still sren’t sure what boost-control solenoid to use
I collect the ECU from my mate, Si in Kent this weekend and have already begun sorting connectors etc for all the sensors etc to be connected and for the loom to be made.
I still need to work out where to site the PAS reservoir and fab a take-off plate for the feed to the pump (using Fiesta ST MK6 Pump which uses a reservoir that bolts on top of the pump but my bonnet won’t clear it that way! )
Also need to get hold of a Focus MK1 2.0 loom/Ecu to drive my Dash (fun, fun, fun! )
Still need to buy an uprated 255lph fuel pump (save that till next payday now…)
Megasquirt V3 ECU arrives.
Another step towards completion – I now have the ECU!
Megasquirt V3
dangerousdave – yep you were right about the on-board 21 psi MAP sensor!
No bother though, I’ll still use the FRS one that I bought for the signal to run the boost gauge on the FRS dials…
It was originally bought by a good friend who was going to put a Golf 1.8 20v Turbo lump into his MK1 but has since sold the engine and consequently didn’t need this anymore. He sold it to me for £100 which was a Godsend just after the Christmas blowout!
Luckily the Golf also uses C.O.P ignition and this is already mapped for that so hopefully it shouldn’t be too much hassle setting this up to run my Ford C.O.P setup.
Luckily there’s a big Megasquirt site with lots of helpful forums and as I’m an Electronics Technician by trade, this hopefully won’t prove too difficult!
Apparently I need to change a transistor for a more powerful one to drive the Ford ISCV that I’m using as the Megasquirt is normally used for stepper-motor type idle valves
Also, I was hoping to fit a boost control solenoid and I’m sure I have to add another driver for that too:-?
Focus RS Loom arrives
Thanks to “cowie20” on these forums I now have a full FOCUS RS wiring loom which he sold to me for a very reasonable sum, thanks again mate
Seeing this box of wires took me back to when I built the MANJ and had to decipher a whole ST170 loom!
I went through it this evening with the Ford TIS CD and have identified the parts I require. As you have seen in earlier posts, I’m using the Focus RS Clocks and consequently need to use inputs from the engine and Vehicle speed sensor to supply the ECU with the info that it needs to drive the clocks. I have pinouts for the FRS 104-Pin ECU and should have this little lot sorted soon enough…
Also, as the FRS dials incorporate a boost gauge, I have a FRS MAP sensor which will provide the signal for the ECU to drive that gauge.
I am using other features of the Focus loom too, such as the twin cooling-fan drivers (using cyl-head temp sensor & ECU), the outside temp/ice warning sensors, the Ford Passive Anti-Theft (PATS) system and keeping the alternator wiring to the ECU.
I’m going to pare this lot down to the bare essentials to save weight/clutter and generally to only keep what’s absolutely necessary for it all to work.
I should have the driveshafts back from recoprop this week and have started making up the engine loom for the Megasquirt, the coil packs and injector loom is all sorted and looking rather neat even if I do say so myself!
(will take pics next time I’m in work).
Right everyone, couple of new developments
Decided against the Megasquirt.
Firstly, I returned the Megasquirt V3 to my friend and am not using it any more – I’ve been chatting to some well-known ECU-tuners who can remap (hack into!) Ford EECV ECU’s and am going to run the engine on the Focus RS ECU as well as the clocks! It means ditching the C.O.P setup but in many other ways the 104-pin EECV is more sophisticated than the V3. It seemed stupid having a powerful ECU that’s already designed for an inline-4 turbocharged Ford just sitting there driving the clocks!
Focus RS ECU/KEY arrive.
Here’s the ECU…
I’m still working up North in Catterick for another couple of weeks so took my box of Focus RS wiring up, and also my TIS CD and full pinouts for the Focus RS 104-PIN EECV – my mates think I’m both mad and sad at the moment!
Focus RS wiring loom modified & rebuilt to suit my car.
Here’s what a few boring evenings have produced – I have completely stripped the engine loom back to the ECU connector and re-made the loom to suit the layout of my Fiesta MK3 Engine bay + back-to-front Duratec HE engine. I’ve left most of the sensor connectors off for now though so that they can all be added once I have it all in-car once I’m back down south – it will all be tidy and use the normal Fiesta MK3 rubber boot that covers the ECU. The ECU will also be mounted where the MK3 Fez item normally lives.
The driveshafts have arrived from Recoprop and as you can see, they are almost equal-length. O/S one is 380mm, N/S one is 355mm so hopefully torque-steer shouldn’t be as prevalent as it is with the normal Fiesta transmission
Dash removed and all wiring spliced to the Focus RS loom.
Had a full day working on the car yesterday and finally started to get my modified Focus RS wiring loom fitted…
Firstly the dash was removed to make things neater/easier towards the end when I’m hooking up the wiring to the Inst cluster/OBD Port/PATS/Fiesta fuse box;
OBD II connector & Focus PATS wired in.
As I’m using the Focus RS ECU and loom, I also needed to fit a Focus PATS tranceiver so here it is;
Engine – bay wiring with Focus RS loom completed.
As per my previous updates, I pared the original Focus RS loom right back to the ECU connector and started from scratch, reconstructing it to suit the layout of my Fiesta’s Duratec engine bay. I’m using the standard MK3 Fiesta ECU mounting location so here is the bare loom emerging from the passenger footwell!
This job is extremely time-consuming!
Basically I left all the connectors off the loom so that I could tailor it exactly to my engine bay, and heat-shrink each individual “branch” that goes off to a different part of the bay then soldier the relevant connectors in place (been triple-checking the wiring diagrams and ECU pinouts at every stage! ) – we’re partially there in this pic…
Here is is as I left it last night – most of the engine bay components are all connected now, including earth leads etc. As I’ve needed to revert back to conventional HT-Lead ignition due to using the FRS ECU, I’ve had to re-route my hard boost pipe slightly (see pic) – no hardship, I’ll get that sorted soon. As you can see, I’m also using the original MK3 Fiesta ECU wiring rubber “boot” for neatness and also, The Focus battery junction box – this allows me to run all the ECU, PATS, sensors, dash, fans, fuel pump etc with the correct fuses/relays already in place. I’m also using the Focus relays in this box too such as, Starter relay, Engine run relay, Fan relays, Ignition relay, fuel pump relay. As a result, I’m only keeping the fiesta fuse box for the lighting, heated screens, central locking etc.
Here’s the wiring that needs hooking up to the dash,OBD port,PATS,Starter button,fuel pump and the fez fuse box. Not too much really as the ecu and engine bay wiring that uses the battery junction box all gets taken care of under the bonnet. (sorry for the grainy pic – crap mobile phone! )
Got a bit more to do and I have an extra week’s leave after my wife goes back to work in a week’s time so going to beast it then!
Basically all the wiring is done!
Notes ref C.O.P with DIS or EDIS wasted spark setup
As you can see from the first pic, all the engine-bay loom is done and I’ve gone full-circle back to Coil-On-Plug (C.O.P)ignition
This might be of interest to some of you – I did some research and some testing of my own (using a signal generator, test-jig and oscilloscope) and found the the C.O.P coils can be ignited from the standard Ford DIS or EDIS wasted-spark setup
Each individual coil had a dwell-time of just over 2ms, whereas the standard Ford coilpack has a dwell-time of 4.2ms. When wired in series, in pairs (1&4 , 2&3), the C.O.P coils had a dwell-time of just over 4ms! Others have successfully used this setup on various cars using EDIS and ECU-driven wasted-spark ignition. More importantly, I have freed upsome valuable space in my ‘bay once again (chopped my hard-pipe for nothing though as I won’t be using the standard coil-pack now )
Focus RS clocks wired up and all working.
The interior wiring is all done, the dash is all re-fitted and the instruments work!
Almost looks like it was made to fit in an early ’90’s Fez
Can’t wait to get those other 3 needles moving though
Also fitted a FRS-Style “Engine Start” switch. As I’m using the FRS Relay-box and complete starting system, I thought it made sense.
New issue with PATS
A new problem has been the Ford PATS system
As you know from my previous updates, I’m using the FRS EEC-5 104-Pin ECU which obviously uses that PATS system – I purchased the ECU & supposedly “matching” key from someone on Passionford – After some headscratching (and swearing!) today, I narrowed the problem down the the ECU & Key not matching. I’m getting 12v & Earth to the PATS, plus the two PATS signal wires have continuity to their corresponding pins on the ECU. With the ignition on, I’ve bypassed the two wires on the ECU that ground the “Engine Run” relay and starter relay, connecting them manually to earth – had the engine turning over on the starter motor that way (kept the coil leads off for now
List of things still to do
1. Both driveshafts are still sat in the boot, waiting for me to get it upon the ramps and fit them.
2. My PAS reservoir (nice little black item from a VOLVO of all things!) needs fitting and plumbing in.
3. One coolant pipe (to the top heater-matrix pipe – fiddly as fook to reach now! ) needs fitting.
4. Brakes/Clutch need bleeding & clevis pin fitting to the master cylinder.
5. Engine oil, Trans Oil & Cooling system need filling.
6. Focus RS Post-Cat Lambda sensor needs boss welding further down the exhaust (just for ECU purposes – not planning on using a CAT).
7. Cooling fan wires still need connecting (will be using twin fans once it’s running – think this lump may generate some heat!
8. Oh yeah the horn’s knackered too (people should hear this motor coming though to be fa
New Cosworth uprated Walbro fuel pump fitted.
A Walbro ITP 048 Uprated Escort Cosworth fuel pump from Motorsport Developments.
A sytec fuel pressure gauge with a -6 AN T-Piece fitting.
Some reflective heat-proof tape and G2 Heat barrier material for the vulnerable pipes/wires in the bulkhead area.
2 x blank Focus “blue chip” keys (will be programmed to match my ECU by a Allinking when he and his brother are available)
Here’s the new pump;
Fitted;
I also had to modify the fuel sender by swapping one wire from one end of the resistor-track to the other – doing this makes the fuel gauge on the Focus RS Clocks read correctly and not back-to-front – On my previous project “the Manj”, I didn’t bother doing this and just got used to “full” really meaning “empty”!
Apparently you can also just swap to a MK5 Fiesta sender as Allinking did with his to run his Mondeo mk3 clocks.
Thought I’d add this pic -you don’t often see the fuel-filler panel on a MK3 Fez looking this good!
Here’s the Sytec fuel pressure guage, it’s only fitted for when I get the car running and set-up – I have a 1/8 NPT blanking plug to take its place once all the tuning is complete.
THE ENGINE RUNS!
After the progress made at the weekend, I thought it would be a crying shame not to chuck some oil in it and just see if it starts…
I must admit my heart was beating faster than normal when the ignition was turned on and my finger pressed the “engine start” switch, especially as the guys from work were all watching, no pressure then
It started up as if it had just been parked up for 5 minutes, literally one tiny push on the button and it was burning & turning. Doesn’t sound like anything earth-shattering until you take a step back and consider the following;
1. The Engine is a Ford/Mazda Duratec. 2. The ECU is a Ford Focus RS (basically ZETEC 2.0 Turbo). 3. The Coil-on-plug idea was just a “hit and hope” but works amazingly well driven from the Ford ECU. 4. I haven’t even set the fuel pressure yet. 5. It uses a Fiesta RS Turbo ISCV and still idles like a new car on this ECU. 6. It has Siemens “Deka” 630CC injectors. 7. This is the first engine I’ve ever built from scratch.
I still have to fill the coolant up and tighten the turbo exhaust-flange up properly, and it’s smoking a bit when the throttle is blipped (I’m hoping that this is due to all the oil that I poured into the cylinders to keep it lubed while it’s been sat ). I’ve only started it up twice today and only ran it for about 20-30 seconds each time, so it will probably burn cleaner once it’s settled in…
The Focus RS Clocks look to be doing their stuff too – the rev-counter is working fine as are the battery, oil pressure lamps etc. Just the speedo and boost gauge left to check once it’s mobile!
Happy days, I will video it tomorrow and post the vid in the evening about 6-ish…
Smoking issues
More to come
New custom driveshafts fitted.
Firstly I connected the VSS (vehicle speed sensor) plug to the gearbox, then I lowered the ramps, started her up in 3rd gear (remember – driveshafts still not fitted at this stage ) and looked at the dash. Lo and behold the speedo works perfectly too!
A couple of brews later I had both the new, shortened driveshafts fitted
Nearside;
Offside;
Volvo PAS tank
Here is my neat little Volvo PAS tank that I sourced from the scrappy;
Custom fitting for PAS pump inlet
Here’s the fitting I made for it to connect to the inlet of the PAS pump (remember the pump-mounted Fez MK6 ST reservoir was too big for my bonnet to shut!
One last pic of my silver rocket before I put it under the covers for a week or two… Looks as if you could just get in and drive her away!
Possible smoking issues
I’m still tring to work out whether the burning oil is due to the turbo or engine
I’ve got the following symptoms;
1. Engine starts from cold and runs with no smoke whatsoever for about 30 secs to 1 minute, then blue/grey smoke is emitted constantly and is more pronounced if you rev the engine.
2. I have considered the possibility that I may have broken a piston ring during my engine-build (unlikely but it could have happened ) but the likelyhood of all four pistons having damaged rings is pretty unlikely. Today I removed one spark-coil connector at a time to try to eliminate any suspect cylinders but the smoke remained…
Garrett oil restrictor purchased (in a vain effort to stop my engine smoking!)
3. Due to my engine having a Garrett GT28 Ball-Bearing turbo, I’ve found some info that states that GT-Series ball-bearing turbos need oil-restrictors (just the banjo-bolt part) fitting to limit the amount of oil that gets into the turbo otherwise they can pass oil into the exhaust… Here’s the restricted banjo-bolt compared to the original..
4. The next stage for me is to do a compression-test.
5. I know it’s a bad idea in a lot of ways but the thought of blanking the turbo oil-supply just for a couple of minutes whilst running the engine at low speed/idle (just to see if the smoke stops) and having the wastegate stuck open in order that the turbo doesn’t have to be under any load. This would be a definite way of showing whether it’s the turbo or engine
Speedo correcting device
I just fitted this to the back of the removable panel that drops down from the top inside the glovebox. It is a Dakota SGi-5 Digital signal interface. As the Focus RS uses 18″ rims and my car uses 15″ rims, (taking the tyres sizes into account as well) the FRS does 804 wheel revs/mile and my car does 920 revs/mile. This means that my speedo will be reading 114 MPH when I’m really doing 100 MPH. This little black box lets you punch in a calibration factor (0.871 in my case) and just interrupts the signal from the gearbox to the ECU. Hopefully I’ll be verifying this with GPS in the not-too distant future!
The good thing is that it’s always accessible but is not taking up any space in the glovebox. It’s all wired up now too and works fine.
Nomad twin A-pillar gauge pod purchased.
Stack coolant temp gauge purchased.
Koni rear + Spax adjustable front shocks fitted, along with Spax -35 springs.
Turbo in-line oil filter purchased.
New pistons
Just ordered some new forged CP Pistons in 88mm bore size and 8.5:1 compression for the little Fez
Make compression ratio same as focus RS
Various issues and smoking, engine taken out
As promised, today I removed the engine & gearbox (space is so tight in there that it’s easier just to lower everything out rather than try to lift the engine out on its own).
Spent this morning removing some more ancills and transmission from the engine and mounting it onto its stand, then I move the whole lot back to my own little part of the workshop ready for it to be stripped down.
The pistons won’t be here until about Sept 10th so I’ll just concentrate on getting everything stripped, cleaned to within an inch of its life ready for the rebuild.
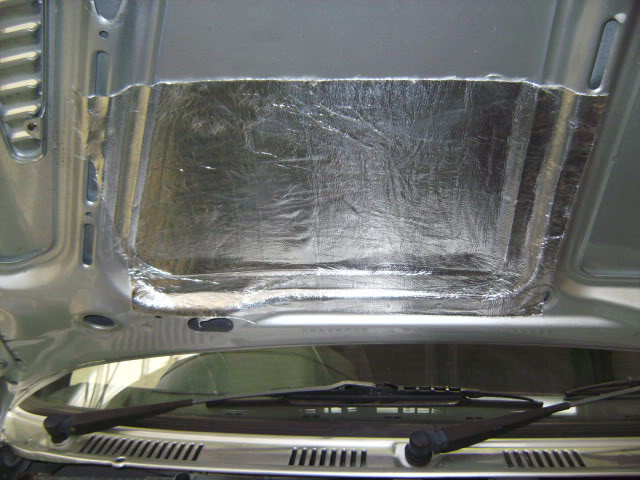
Also will be concentrating on sorting the heatproofing in the bulkhead area – new reflective silver hose covers will be ordered and the new turbo blanket is in the post. I’ll also be sticking some aluminised heat reflective material on the underside of the bonnet just above the turbo/exhaust.
When removing the engine, I found out why it stuttered so much when trying to start it – I’d left the nut off the starter solenoid terminal!
Engine stripped
Spent today stripping the engine;
Bores still immaculate.
How I left things today;
The pistons and rings are immaculate and undamaged – selling them on now though as I’ve already ordered the 8.5:1 CP Pistons
General thoughts of engine itself not an issue
Still at a loss to find the culprit of the oil-burning – the bores/pistons/rings are all in perfect condition. I didn’t find any sinister particles in the bottom of the sump or in the engine.
Two things have got me thinking though… The Moly lube for the ARP studs had all congealed in the bottom of the sump -could this have continually mixed with the oil to cause a smokey engine? (I’d have thought that as long as the oil was properly controlled that it wouldn’t matter if there was some moly-lube in there?).
The second problem is that my turbo oil-drain is below the max oil level of the sump I can’t really position it much higher either as the Duratec has such a shallow sump (the crank is mounted higher in the engine in a girdle). Looks like I might have to get creative with some aluminium to make a kind of “extension” to the rear of the sump that my return can go to or try and find a suitable place on the rear of the block (without getting in the way of the driveshaft extension).
I ordered it today so should have it early next week.
New 8.5:1 CP forged pistons.
Plus my shiny new CP Pistons of 88mm / 8.5:1 comp arrived today
I’ve also splashed out on a rather nice turbo blanket, some new steel Garrett water lines (to replace my shonky home-made efforts!), some more heat matting (for underside of bonnet).
The original oil return into the sump is blocked off and some nifty mods are taking place – basically a piece of aluminium 35mm tube is to be welded into the back of the sump at the highest possible point (the duratec sump is very shallow as the crank sits higher than on say, a Zetec – up in a girdle in the block). This alloy tube has a -8 AN fitting mounted on top so that the oil drain can go directly down to it.
My mate, Zig is doing that for me this week.
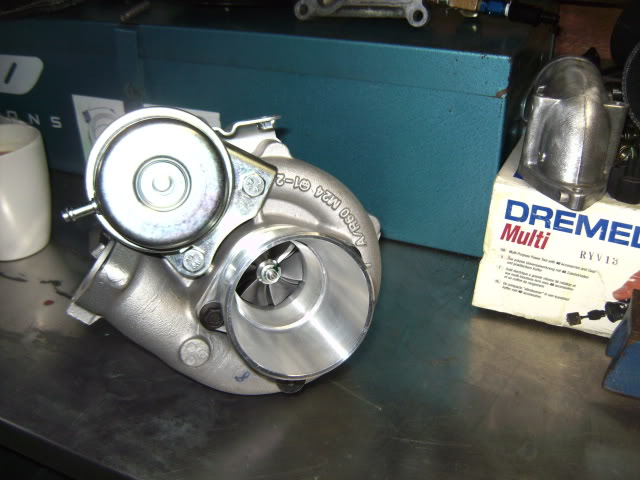
Turbo Arrives
Always nice to find this box waiting for you when you get home…
…especially when you open it and there’s a brand-spanking new Garrett GT28R ball-bearing turbo inside
With new billet alloy compressor inlet fitted.
I’ve also ordered a Stack wideband Lambda kit and a couple of Spal pull-fans to replace my single, weedy push fan of unknown origin. I’m using “pull” as opposed to “push” fans as, unlike a normal FRST, I have plenty of room behind the rad due to only having my inlet manifold at the front.
Inlet manifold leak
Talking of inlet manifolds, I’ve decided to test my homemade effort for boost leaks by fitting a bicycle inner-tube over the throttle-body and sealing all vacuum take-offs off, then sealing it to my stainless work bench!
Lo and behold, I got it to 20 PSI and found a small leak in one of the welds on the O/S edge – I’ll be handing it to Ziggy the welder tomorrow for some remedial attention
I’d rather find things like this out now than wait until the car’s on the road and losing boost/power and having to rip things back out!
Tomorrow, I’m getting busy gapping the CP piston ring end gaps to the correct specification and seeing how my sump is coming along with Zig.
Turbo oil return revised and sump modified.
irstly the redesigned turbo oil drain mod on the sump is done (small brass-coloured connector is the drain for the oil breather tank);
Stack wideband lambda gauge ordered and boss welded into downpipe.
I welded a new lambda boss into the downpipe for the wideband UEGO sensor for the Stack wideband gauge/kit (that should hit my door-mat tomorrow)The boost leak in the inlet manifold weld has been rectified by Ziggy and his Tig skills.
I’ve drilled & tapped one of the inlet manifold mounting holes in the head and fitted an M8 Time-Sert for my peace of mind as the Duratec has one very short hole due to the head design. The Time-Sert allows me to stop worrying about stripping the threads out of it!
The twin Spal cooling fans are now fitted to the rad.
Oil leak cause found – timing cover repaired.
So glad I took this apart now!
– When I examined the timing-chain cover I found that I’d fitted a bolt that was slightly too long when locking the crank-pulley at TDC during the previous build
Basically it had punched a hole right through into the timing-chain area, that’ll explain my mystery oil leak then!
Luckily this has now been rectified by my mate, Ziggy and his Tig welding skills
(It’s the small bolt right next to the crank-hole)
Turbo Blanket Fitted
The turbo now has all its new water & oil lines connected, is fitted to the exhaust manifold and is wearing its new turbo blanket as-per my endless mission to control radiant heat in the bulkhead area.
I spent a while today setting the gaps on the rings to CP’s specifications – those nitrided top-rings are a real Bic™ to file!
Even worse when you go straight to filing the second rings which are cast iron, therefore easy to work with so you run the risk of taking too much off – I took my time and got them all bang-on.
Finally, tonight I fitted the rings to the pistons than fitted the pistons to my Eagle rods.
Plenty of heat-proofing near the exhaust.
Engine rebuilding
Stack gauges fitted
Stack wideband lambda gauge & water temp gauges fitted into A-Pillar mount and all wired up. (They’re on a funny angle as they are big, chunky gauges that are rather deep when compared with the Revotec or Ford Racing type gauges – consequently, this is the best fit I could get in my A-pillar pod without bodging my nice new gauges!
Little jobs done
1. Removed the steering column and fitted an adaptor plate with the correct MK 3.5 PAS rubber grommet for my PAS conversion, then refitted everything.
2. Connected the brake linkage up to the master cylinder.
3. Fitted my new wideband lambda sensor into the exhaust downpipe.
4. Made up a new improved turbo oil drain with some -8AN Goodridge 200-series hose & connectors.
5. Removed the engine from its stand and placed it on the trolley ready for craning back into the car.
Vaguely driven!
I can’t believe I’ve finally driven this beastie! (made a nice change not to have to push it back to the lockup )
The first vid is only short and is just of when I fist started it up…
The second vid is a quick minute of it being driven around the workshop – I have no brakes yet (I need to get them bled and investigate a problem with the linkage) so that, combined with the fact that it’s got new pistons/rings/turbo is why I’m going quite gently
Apologies too for the shakey camera work but I had to keep grabbing the handbrake, as well as steering and videoing!
As well as this I was completely knackered from all the graft, my hands are cut to ribbons!
Got a tiny oil leak from the T-Piece where the oil-feed to the turbo comes from which I’ll sort next week. Also got a PAS fluid leak from where the pipe joins the rack – probably due to it being a home-made effort
I’ll get a proper one made up by a hose specialist.
For some reason, the Focus RS cooling fan relay isn’t being energised so I need to investigate that, also the Focus RS boost gauge is not working either
It’s not an easy car to work on due to space being so tight, I’ve learned that however long you expect a job to take – multiply it by about four and that’ll be about right!
To be fair, all the problems are just niggles and to be expected – I’m just over the moon that I’ve finally reached this stage – the car is an absolute weapon!
My cheap, old Sanyo camera does not do it justice – it sounds absolutely amazing – the turbo chatter is addictive as hell. it’s massively responsive and I can tell it’s a seriously fast car
At least now I can go on tour happy in the knowledge that it’s pretty much all done and is waiting for me when I get home
Car given a clean up after little jobs
I spent a few hours today giving it a good wash and polish, hoovered the interior out then took it for a 5 mile drive around the camp (camp’s massive )
Let it run for a fair while to totally cure the stinky thermotec graphite exhaust wrap.
Brakes all work brilliantly.
The Focus RS Boost Guage is working correctly.
I have now fitted a Sierra Cosworth fan switch into my top-hose which energises the fan relay in my Focus fusebox – brings my fans on a bit earlier than the 112-114 degrees that Focus RS ECU switches the fans on at!
Really is a joy to drive – If it had tax/MOT/Insurance, I’d have spent all day out in it on public roads
I’ve left full instructions with the car and the keys with trustworthy people, so if it needs moving again it hopefully won’t get damaged (like it did last year )
I will drive it again when home on R & R. Got a few bits and pieces to do when I get home properly then I’ll hopefully be driving it to FITP 2011
Note ref balance shaft still in
In the end I decided to keep the crankshaft balance system in place, my reasoning was that my Fidanza flywheel is really light already and the long-stroke 2.3 has the balance assembly for good reason. I wanted this engine to remain as smooth and civilised as possible and now I’ve driven it I can say that I reckon I made the right choice in keeping the balance assembly
Driven on site for running in
Since then I’ve been driving it a hell of a lot inside the camp where I’m based (the place is huge so I can put some running-in miles on without even venturing onto a public road). Although it’s got an MOT, I’ve still been testing it exhaustively just to ensure reliability once I actually drive it on real roads with modern stop/start traffic etc
. All is ok except it’s developed a power steering fluid leak from my home-made high pressure PAS pipe (consisting of a Mondeo MK3 PAS pipe with a fiesta MK3.5 PAS rack fitting welded on the end! )
To that end I’m buying another pair of Mondy and Fez PAS pipes, then taking them to that hydraulic hose specialist that joined my Focus and Fiesta MK5 clutch hoses together (for £5! ) – might as well get it done properly.
I also took the time to “clock” my Garrett GT28R Turbo so that the oil drain points directly downward and adjusted the length of my oil-drain hose accordingly.
The Alpine ICE and the Clifford Concept 650 is all wired in and all working perfectly. I took a couple of days with the dash out to ensure all the wiring is immaculate and neat.
I insured the car tonight with H.I.C too with a very sensible agreed value and declared EVERY modification (took bloody hours! ). Only costing me £400 per year fully comp (I am 33 with a few year’s NCD and no points/claims etc).
Lastly, the “DURATEC INSIDE” sticker has been removed from the rear windscreen – I like the car to be as subtle as possible on the outside.
Driven on public roads
Here’s some pics I took on the weekend after I’d driven it from my home in Colchester to my folks house in Kent (85 miles). The sponges you can see through the windows are taped to my mountain bike to stop it smashing them when I drive over bumps!
I originally intended on just doing a few local journeys to test it but I’ve been sent on a course near Reading for 3 months so it made sense to commute in this!
It is absolutely FANTASTIC on the motorway – somehow I randomly made a proper laid-back mile-muncher when that was never really my goal!
It has such a tall 5th gear but also so much readily-available and wide-ranging torque that it is almost like driving a powerful diesel at sensible motorway speeds. Staying in 5th, you only need to dab the throttle at 70 and you just get an instantaneous whoosh from the GT28 and obviously a big shove in the back and three figures come round almost instantly!:D The STACK capillary temp gauge rarely even gets up to 85 degrees on a run, and in traffic it’s behaved ok so far – I do wish I had a milder clutch though (one with central damper springs!) as mine’s a bit “on-off”.
Also, another pleasant surprise is the fuel consumption – obviously I am taking things gently at the moment as I’m still running it in etc but even so, it doesn’t seem to sup as much as some of my previous fiestas!
The Lambda Gauge shows everything’s good in the fuelling department though.
I did have some late nights last week sorting some power steering issues which were seriously annoying me!
Firstly, I got Hosequip in Colchester to make me this pipe out of a Mondeo MK3 & Fiesta MK3.5 hose – cost me £30 and doesn’t leak!
The fluid leak carried on elswhere though
The PAS rack that I originally bought from the scrappy had a nasty pinion-seal leak (serves me right for being tight). I fitted another one on Saturday morning and now all is well with no leaks
My brass oil sender T-Piece had a crack in it which was kindly dumping Castrol’s finest all over the deck
The blue alloy one from SpeedFlow has now been fitted and again, no more leaks
Speedo Over-read
As predicted, the speedo does over-read massively (reads 12.7% over) so 30 MPH is shown as 34, 70 is shown as 79 and 100 is obviously just shy of 113!
I tried to use the little speedo healer unit I bought but it made my dials do all manner of mad things – Instead it can be adjusted through the OBD II port using a Ford dealer service tool to change the axle ratio for the speedo cal. Allinking said he’d do that for me one weekend soon
I did have a bit of an issue with the idle “hanging” when you press the clutch down or stop the car. It was also idling a bit fast at 1100 RPM. Allinking said he might be able to help change the map for the idle solenoid. To see me through until then though, I’ve made a solid 13mm hose joiner with a 5mm hole through the middle and it’s in my idle bypass hose. It does the job well and keeps the idle at about 900 RPM.
All in all, things are good – just want to get a few miles under its belt, then when I have the time & money, it’ll be getting properly mapped & set up for a reliable 300BHP
It’s been getting quite a few glances on the roads – you just don’t see many around any more.
Completes over 300 miles of normal road-driving, 35 MPG, happy times!
Sold 26.06.2011 – not to me, but turns up to me eventually.
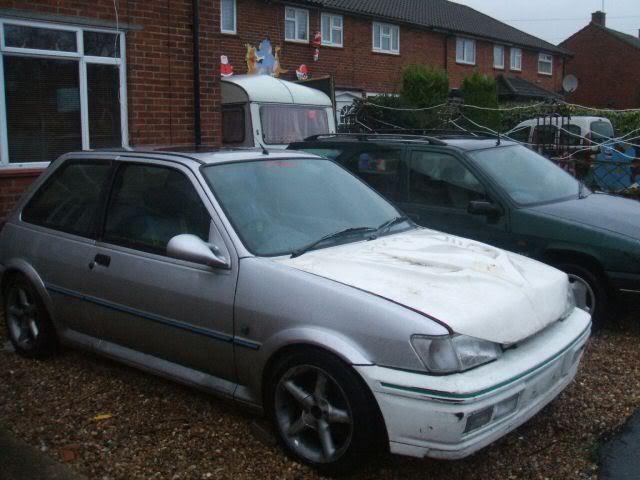

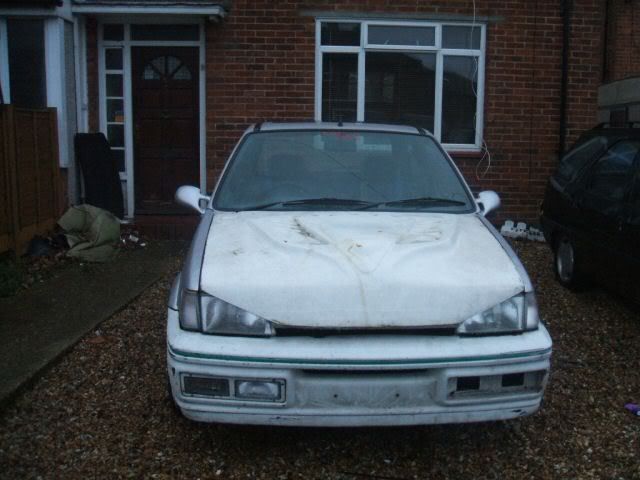
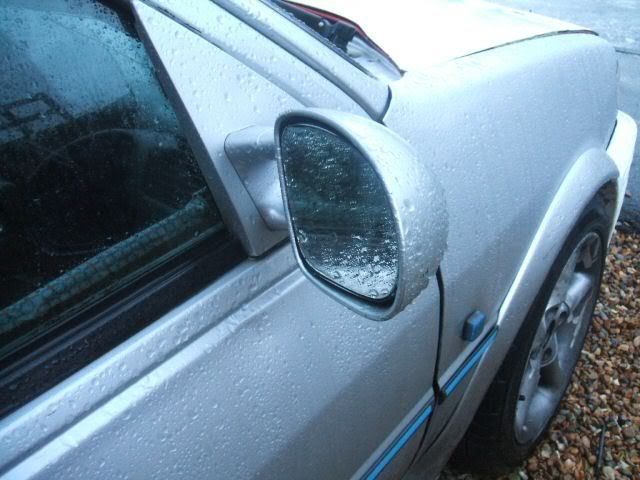
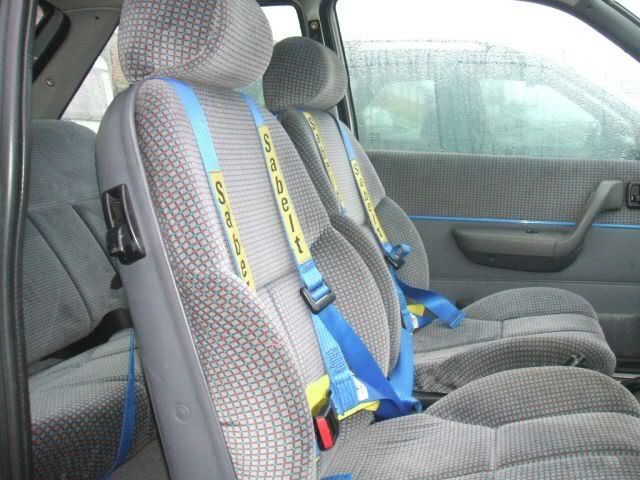
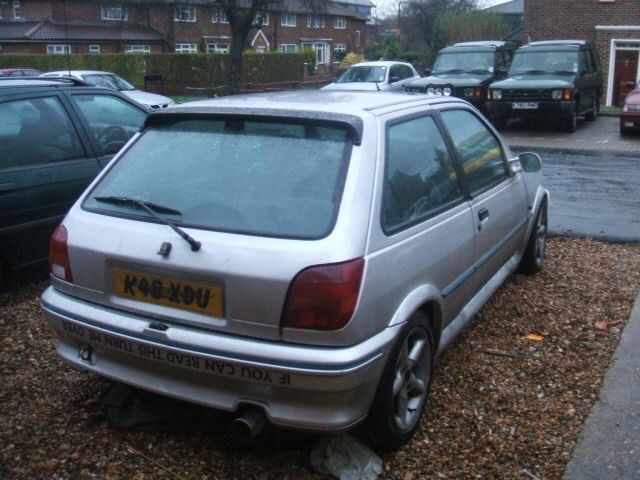
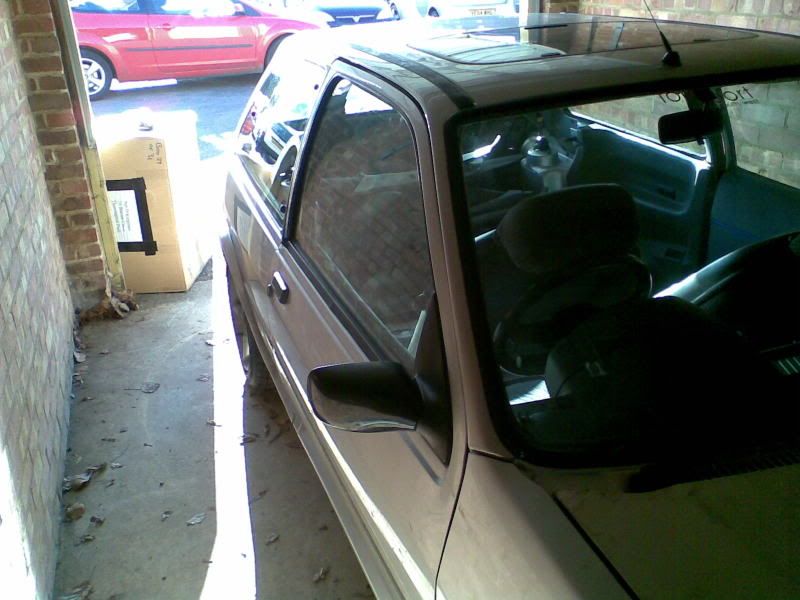
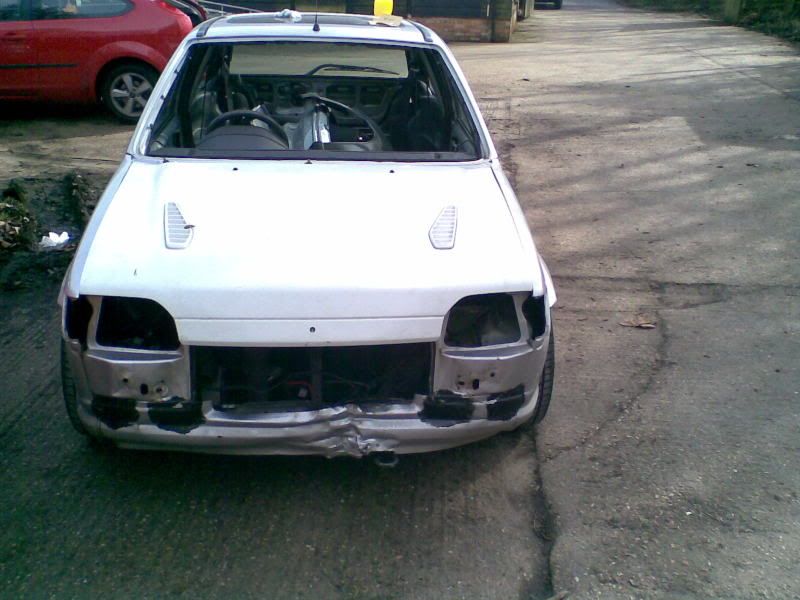
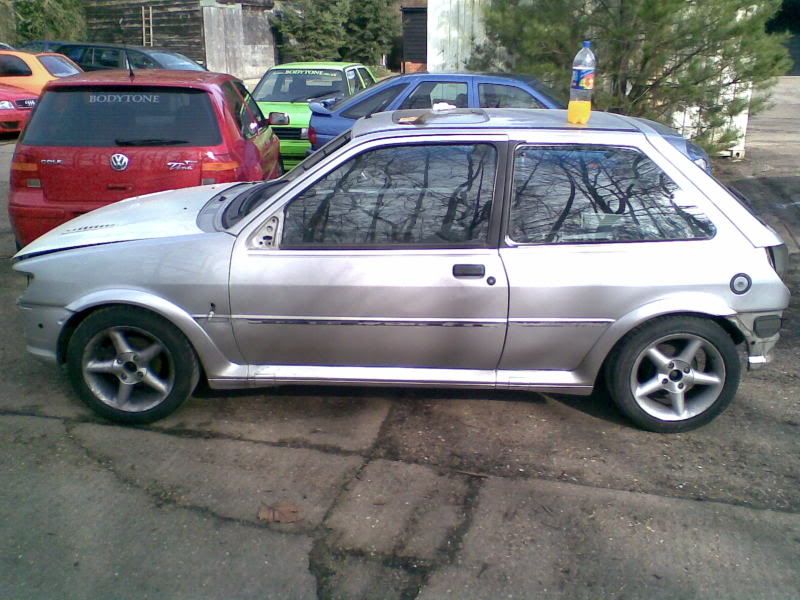
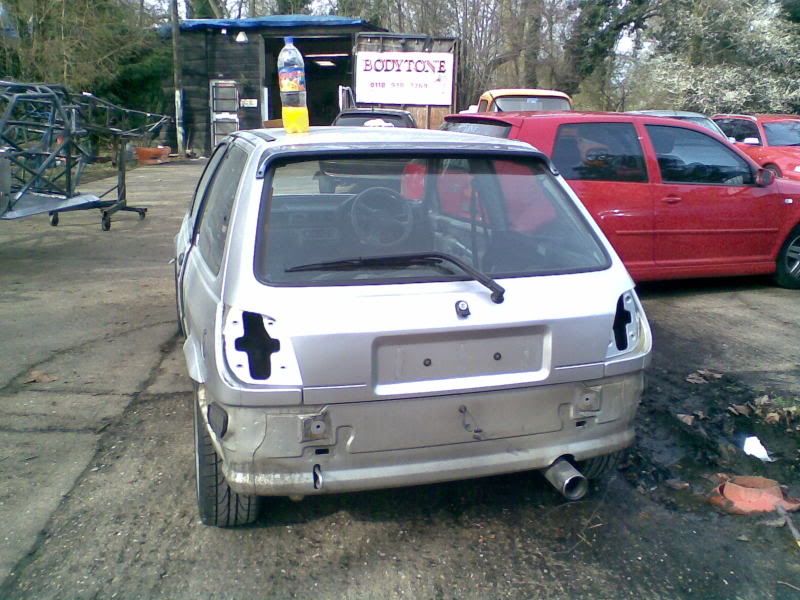
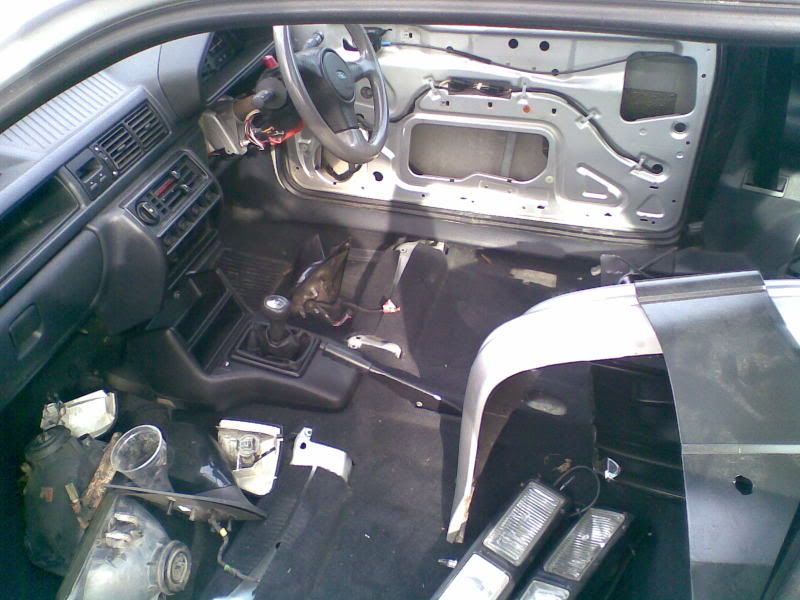
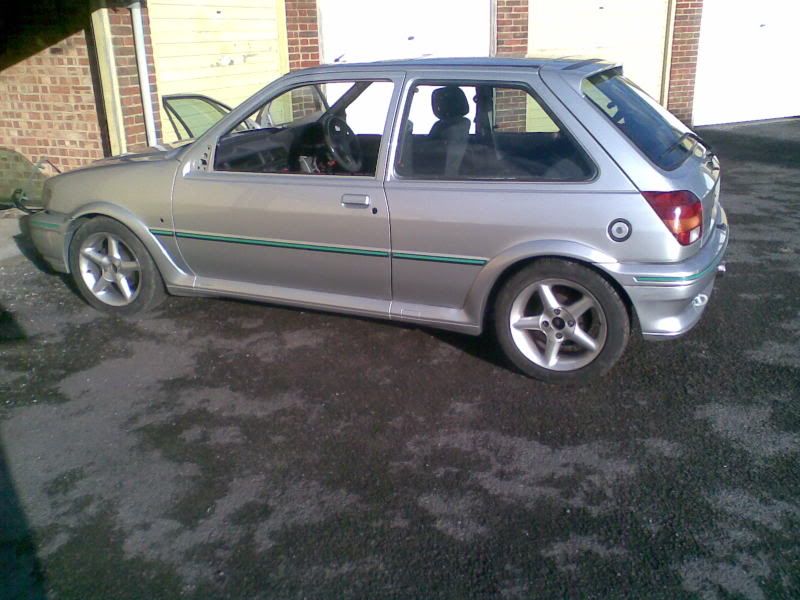
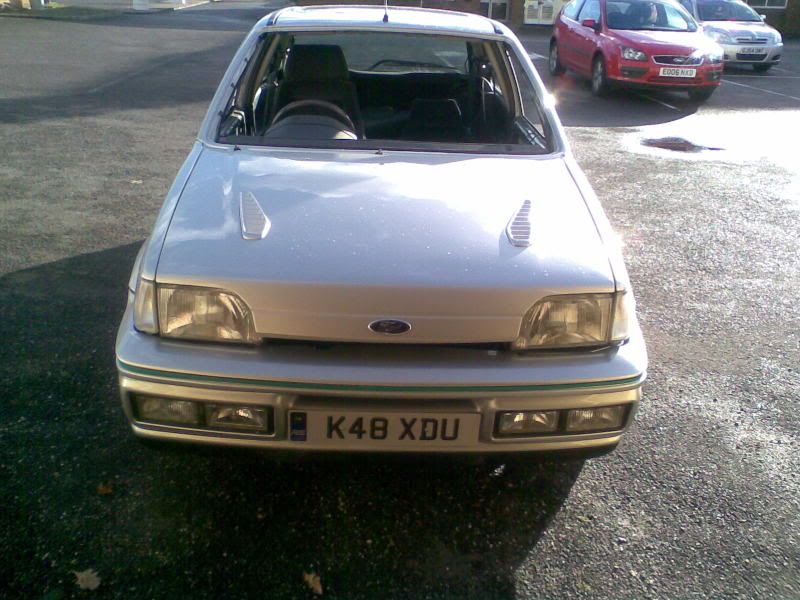
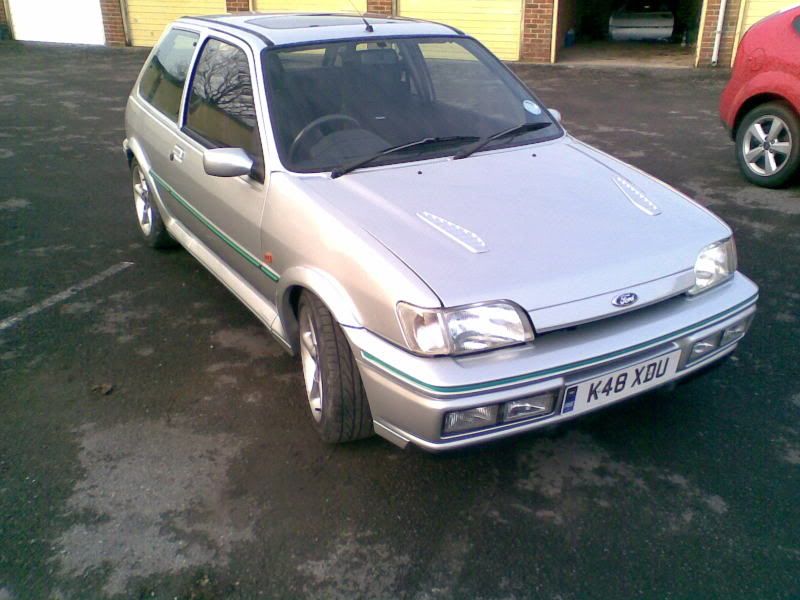
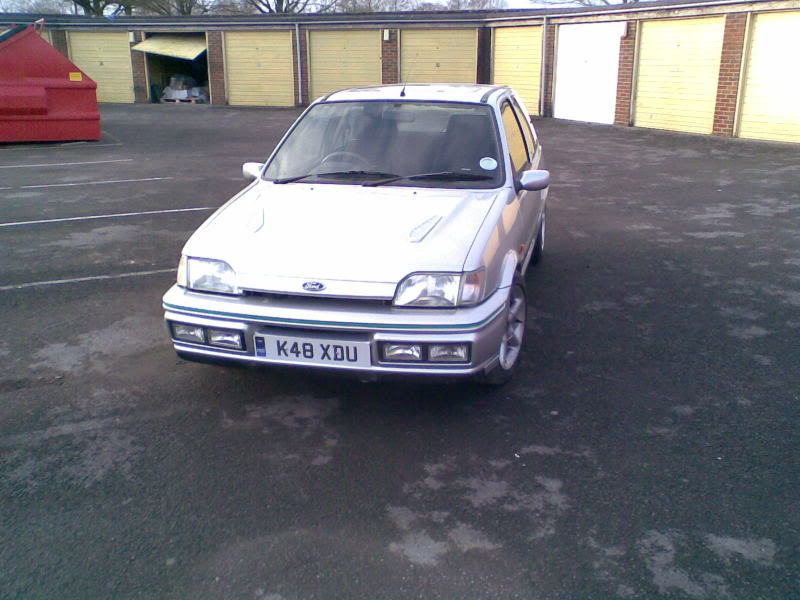
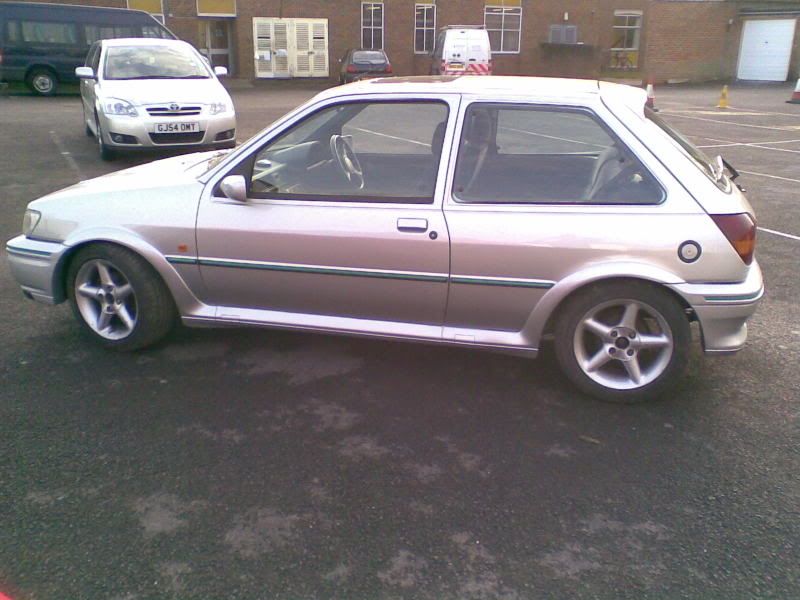
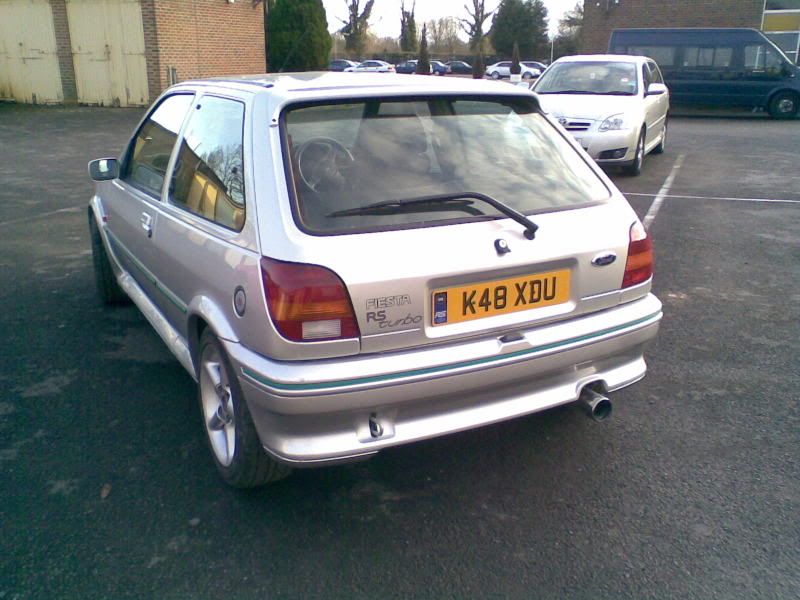
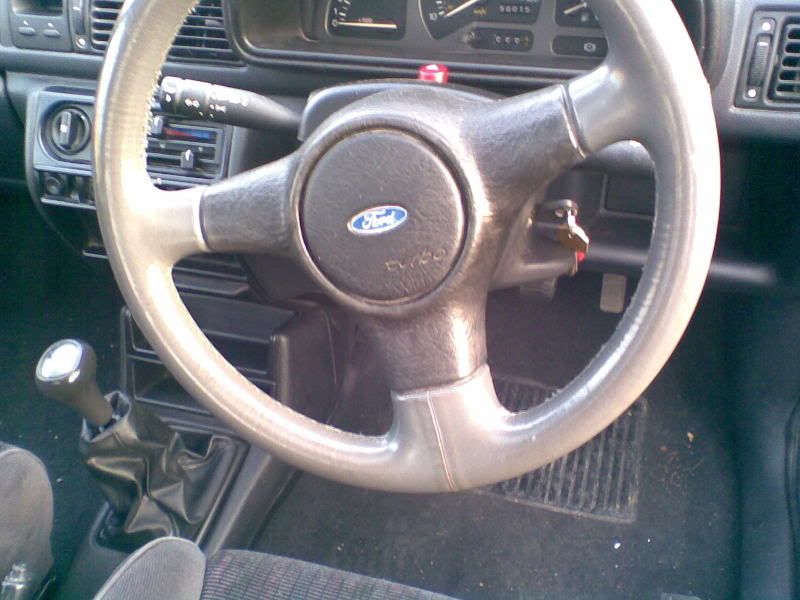
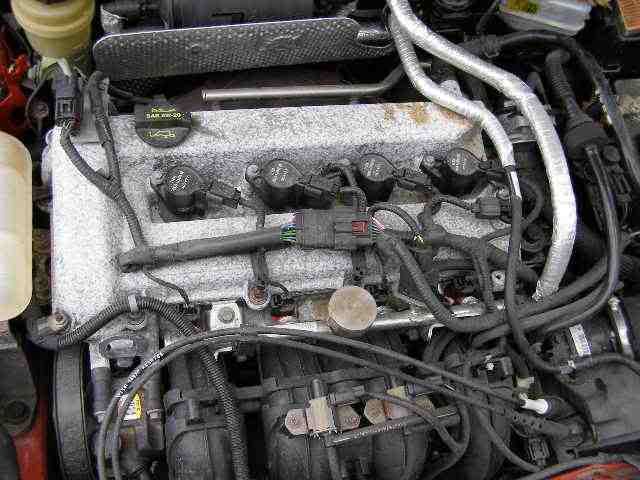
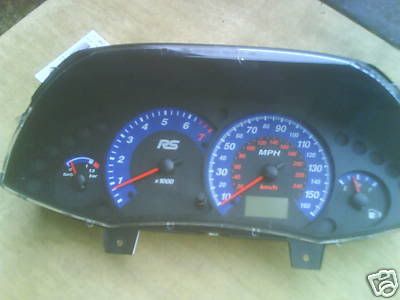
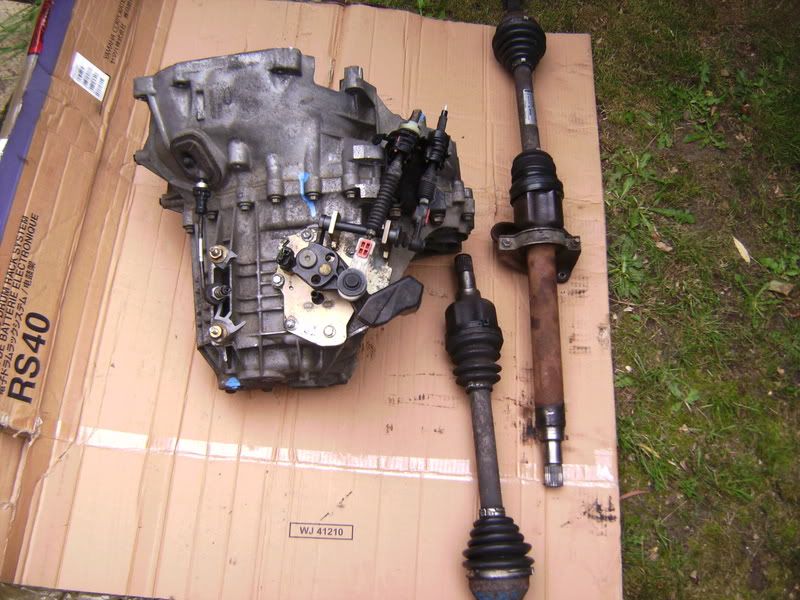
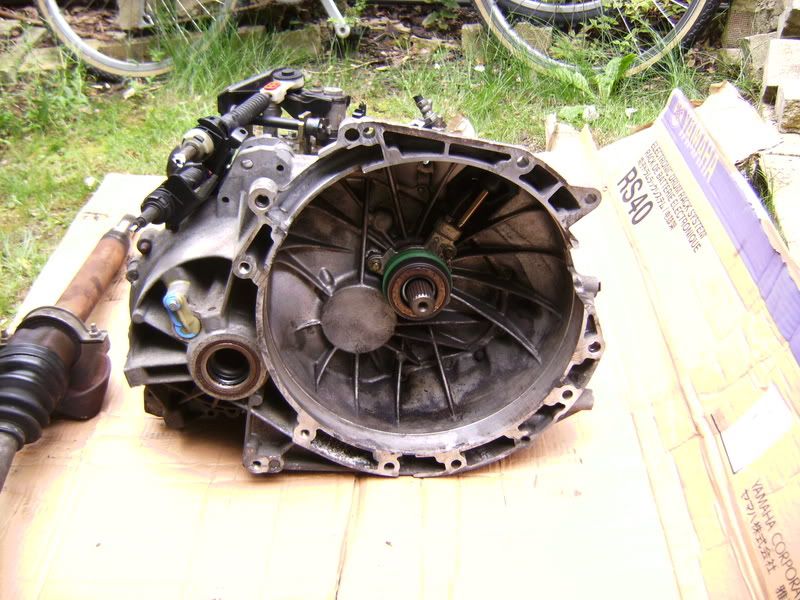
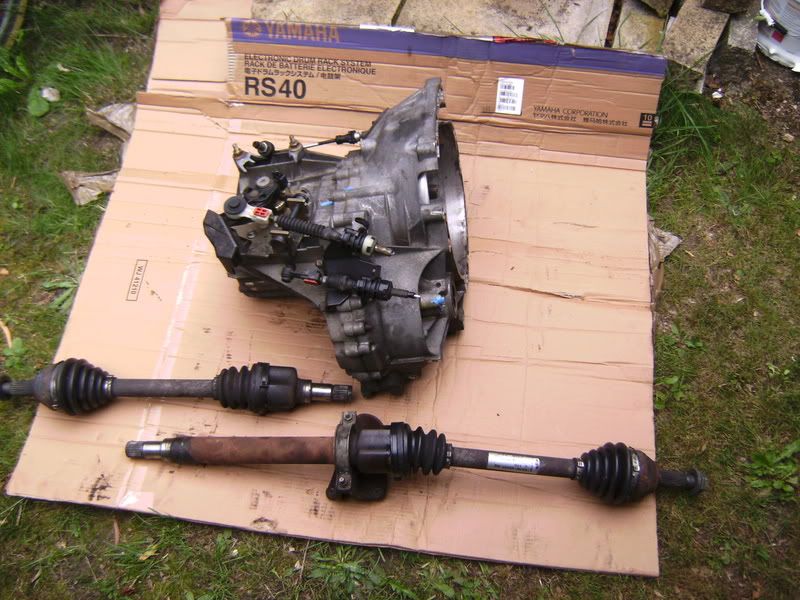

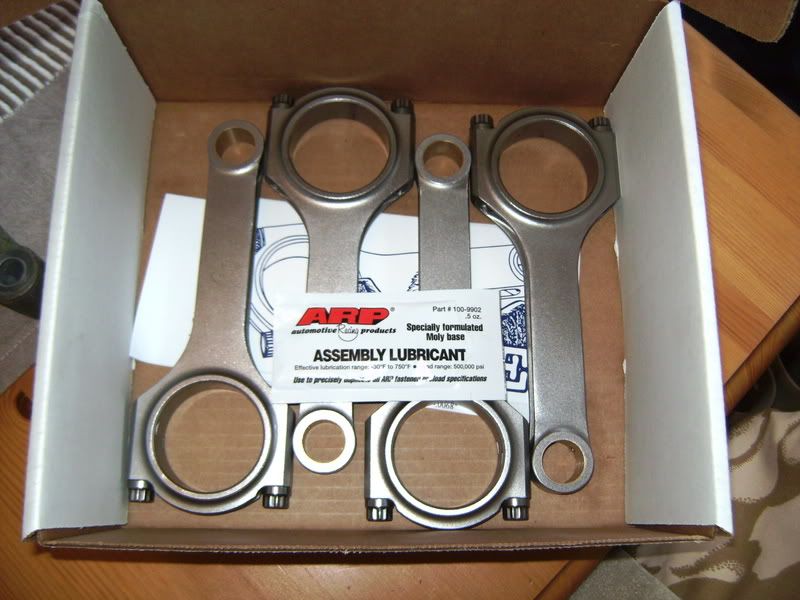
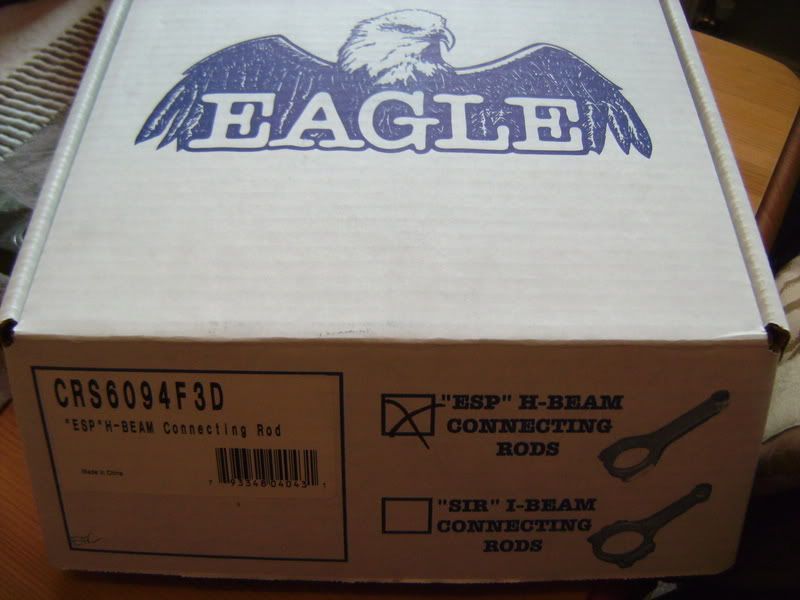
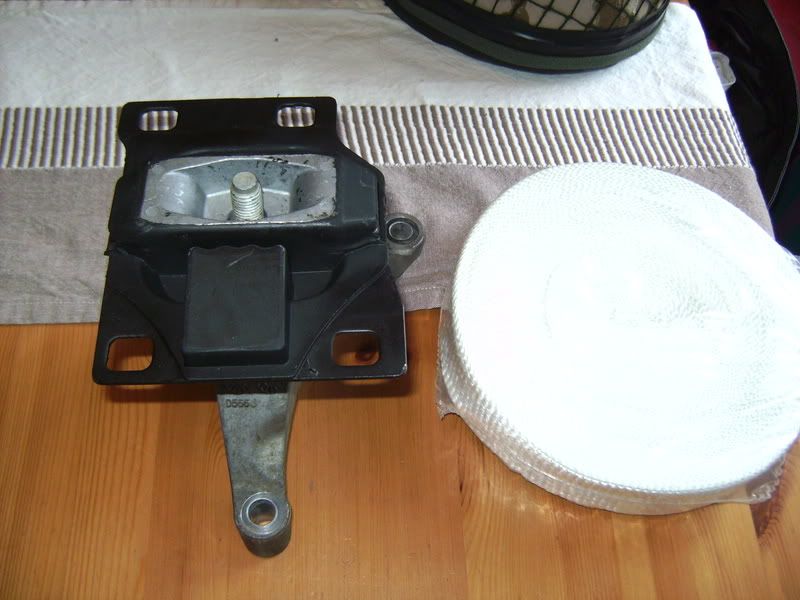
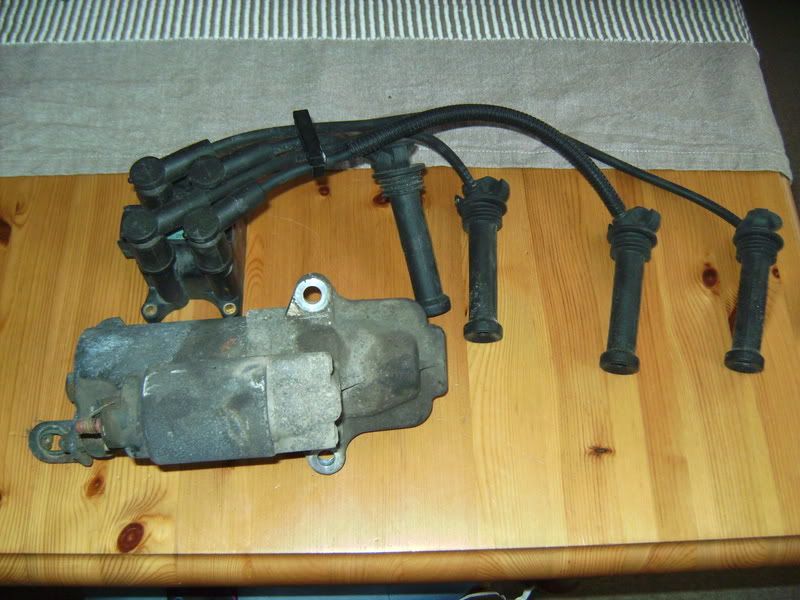
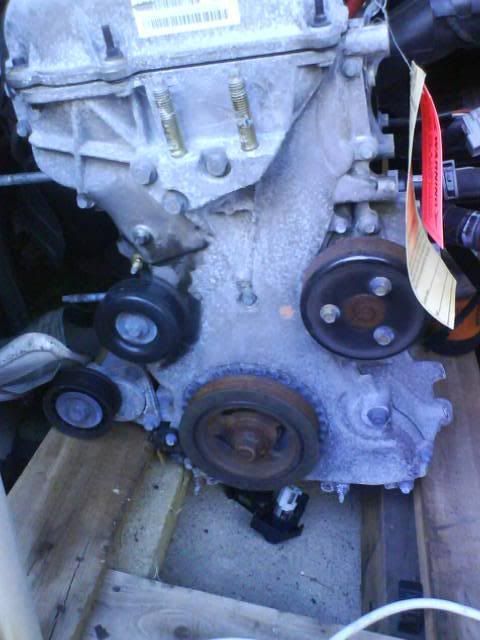
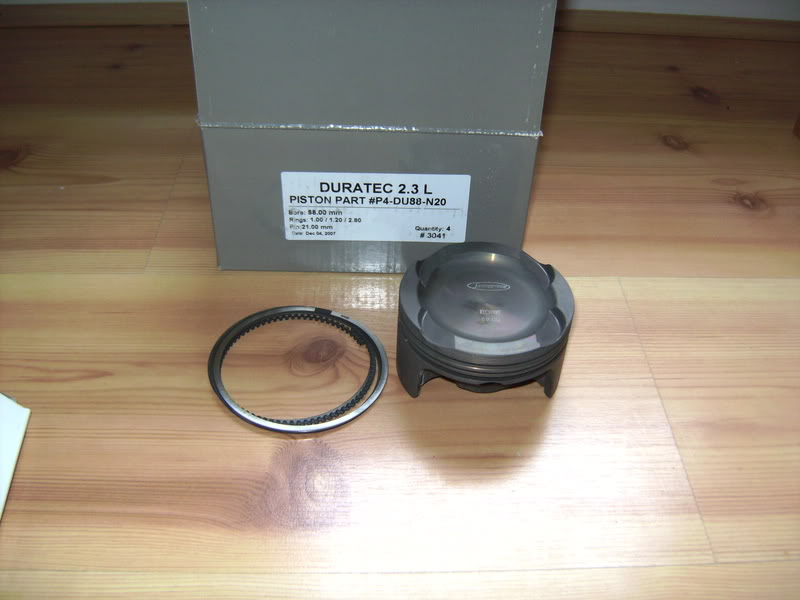
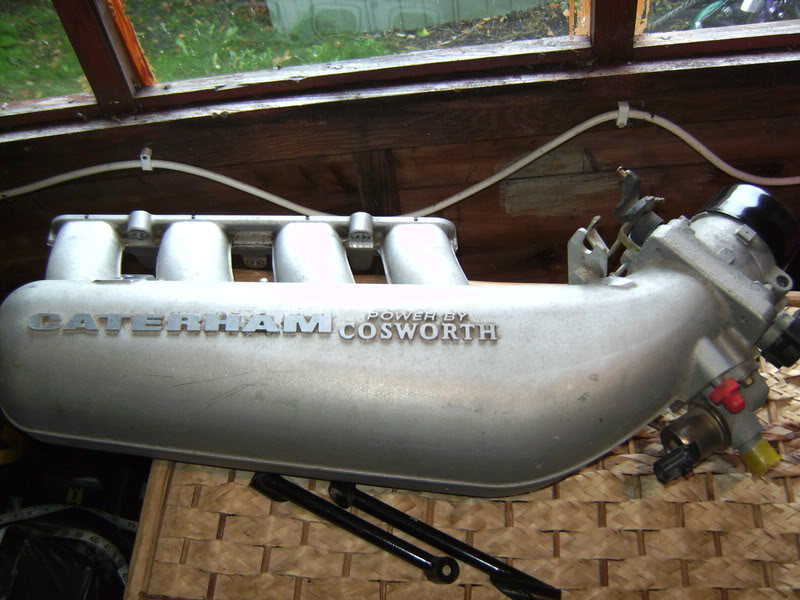
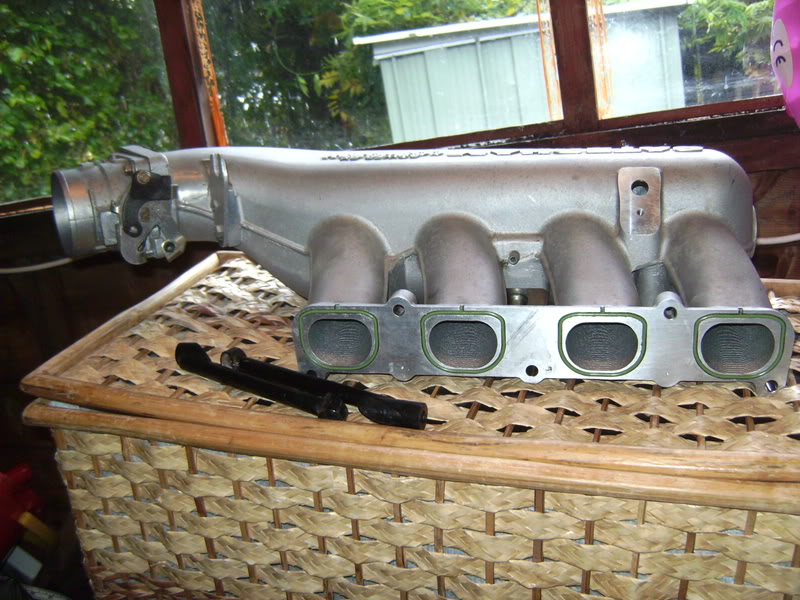
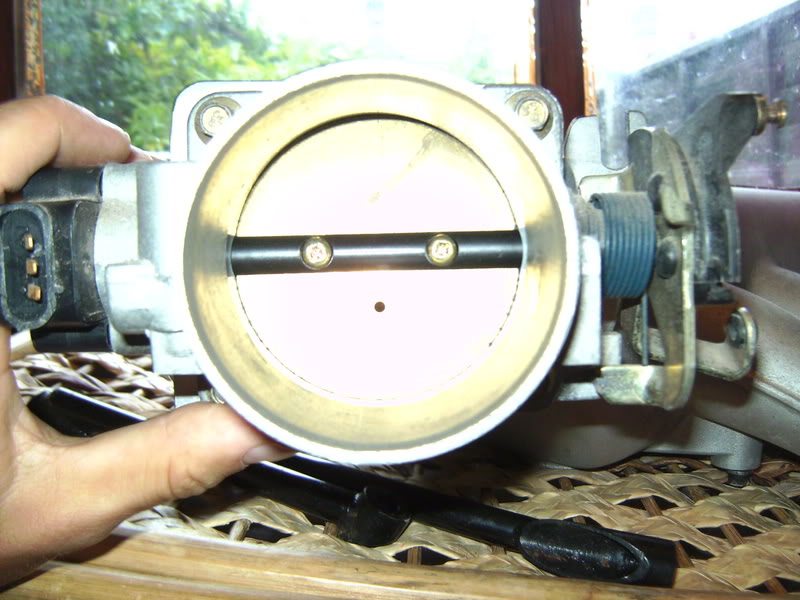
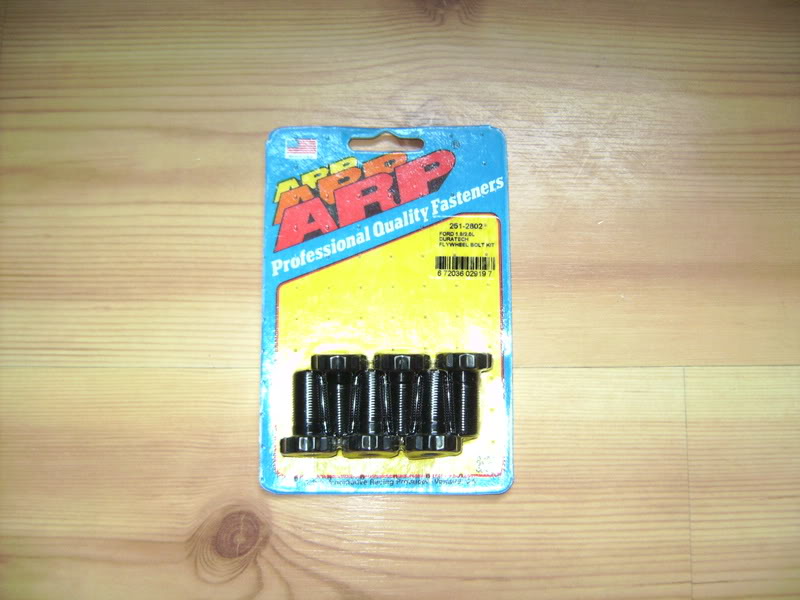
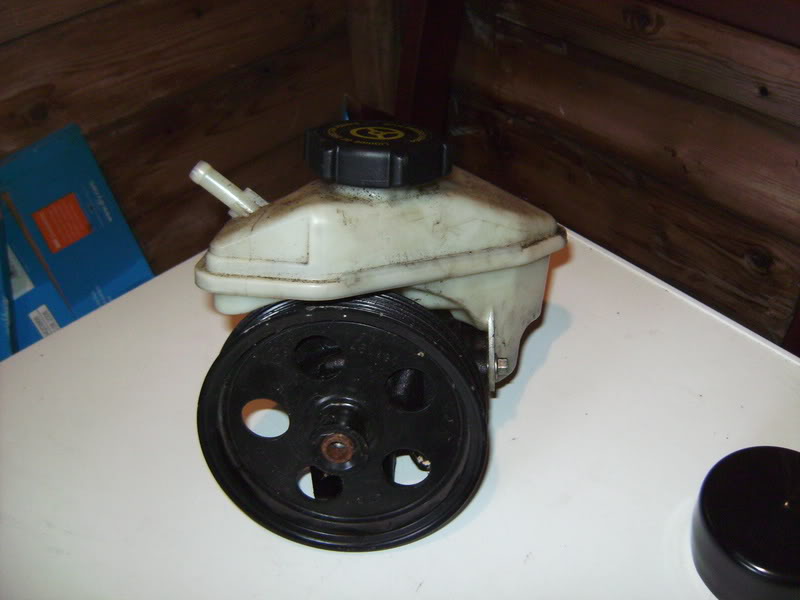

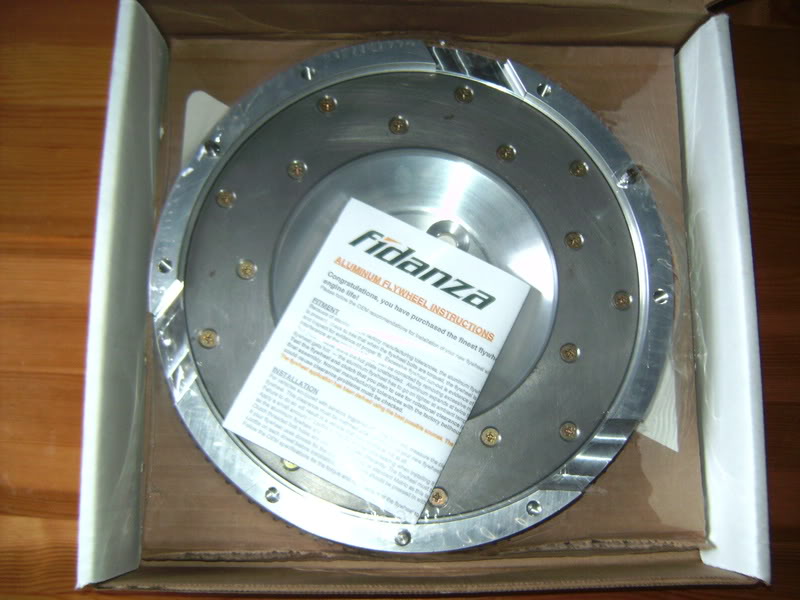
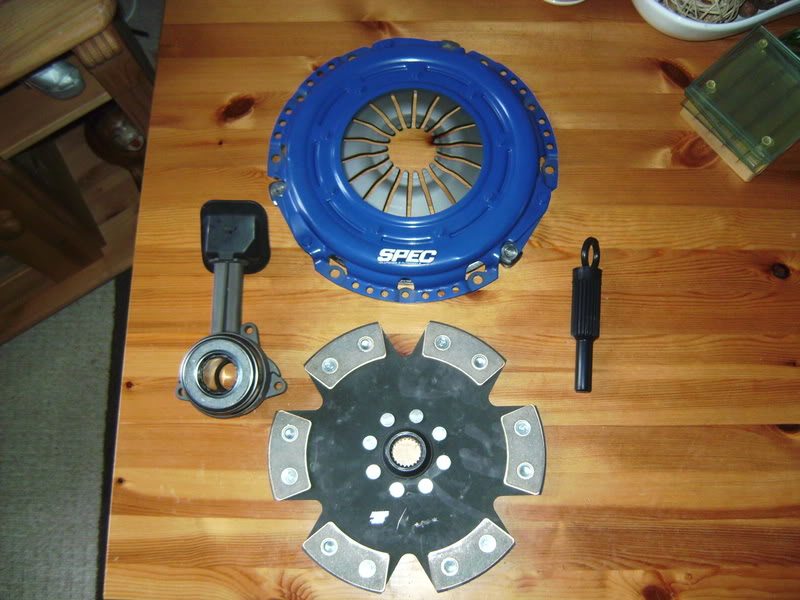
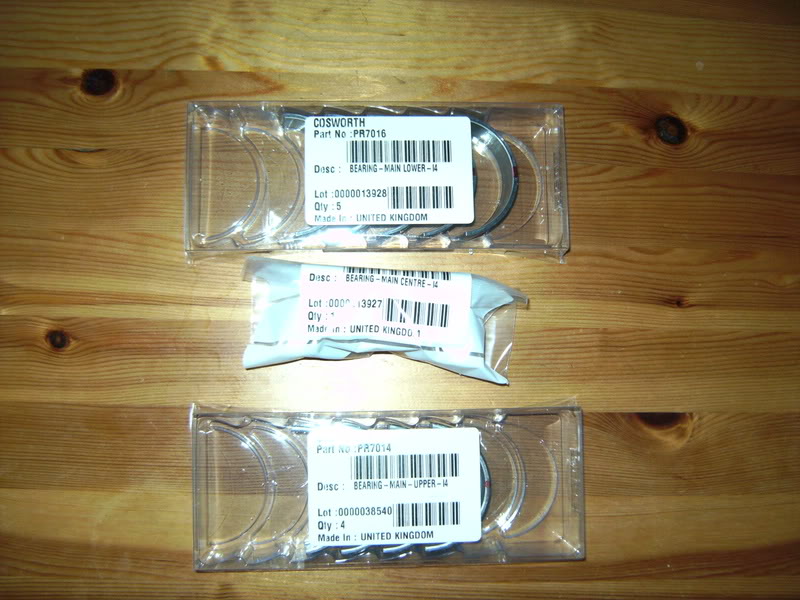
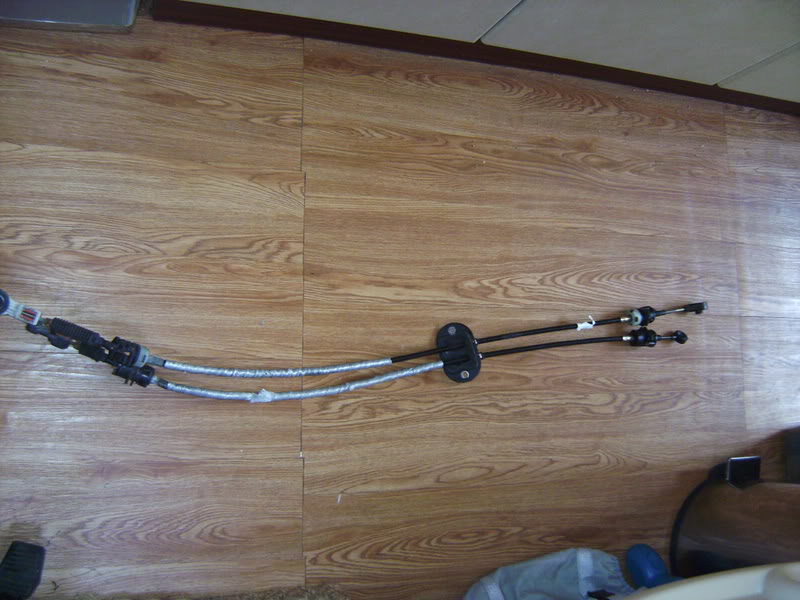

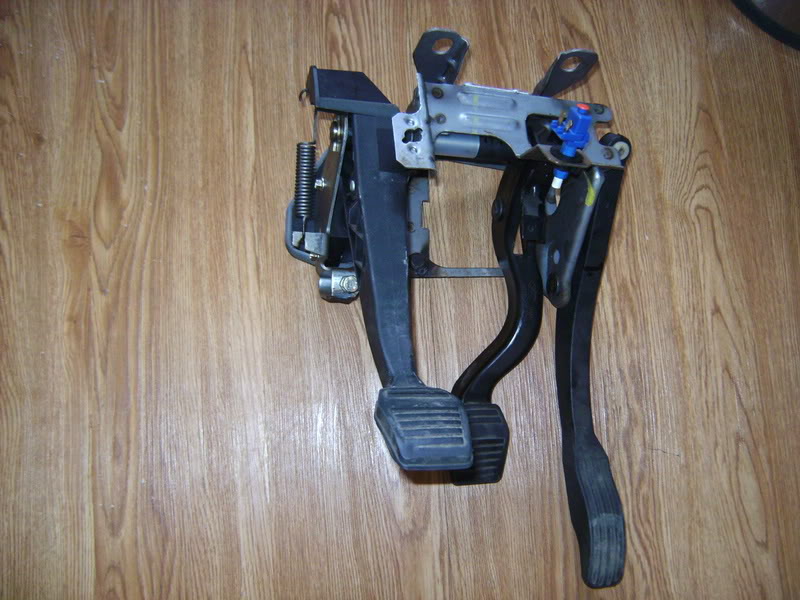
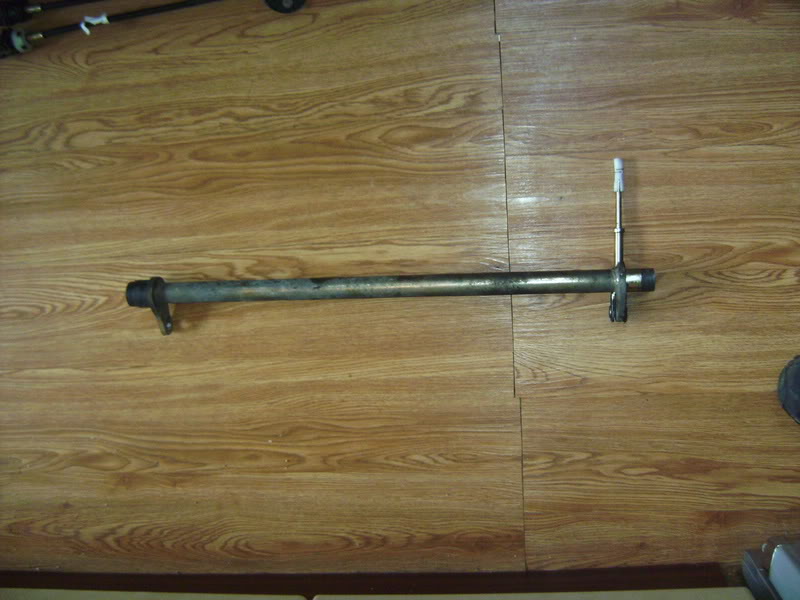
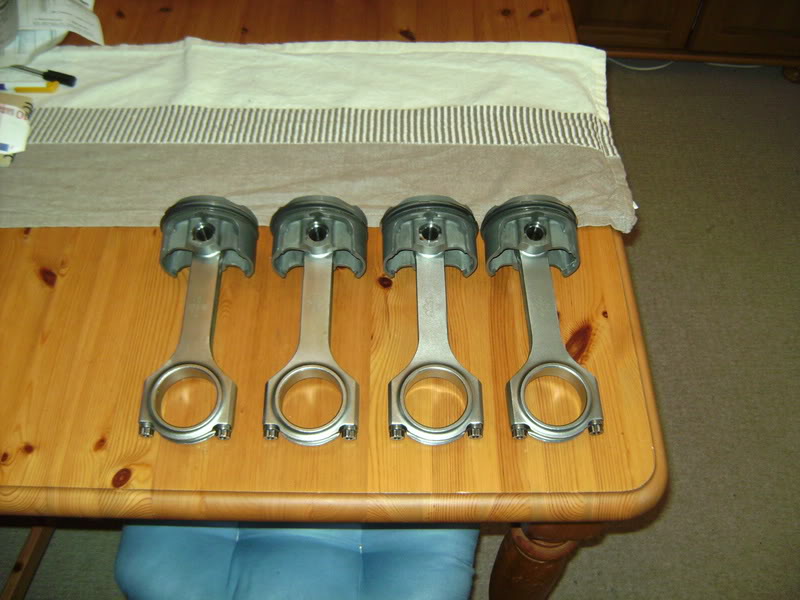
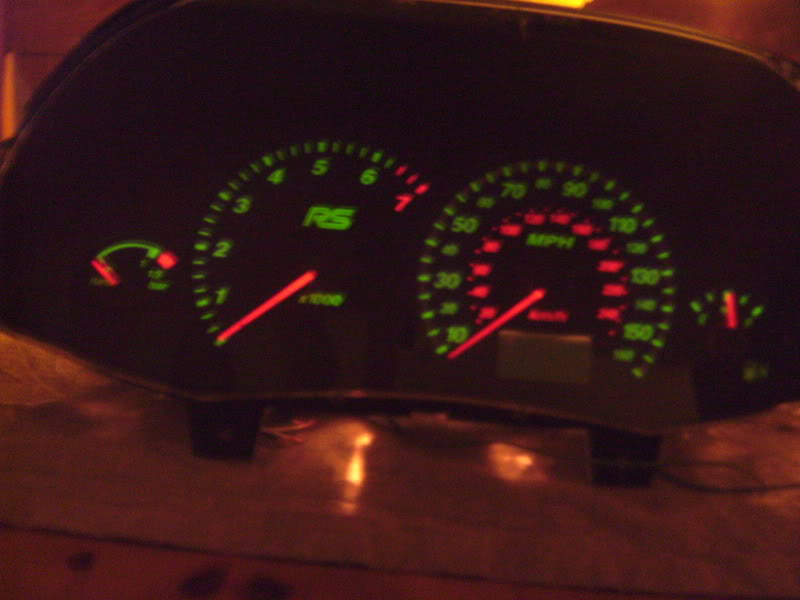
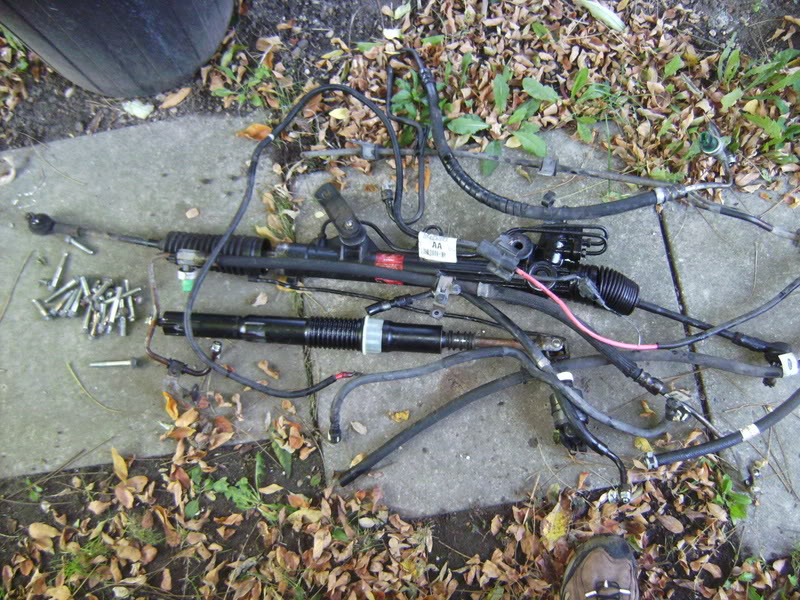
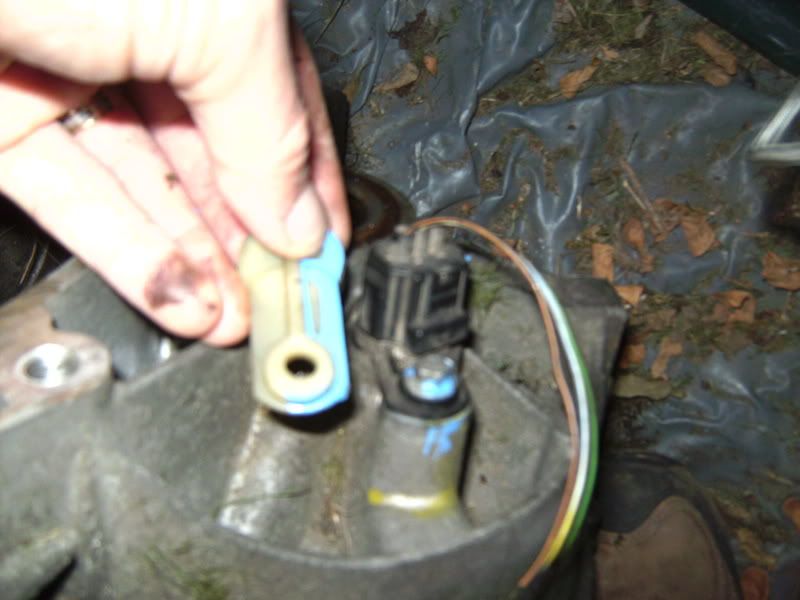
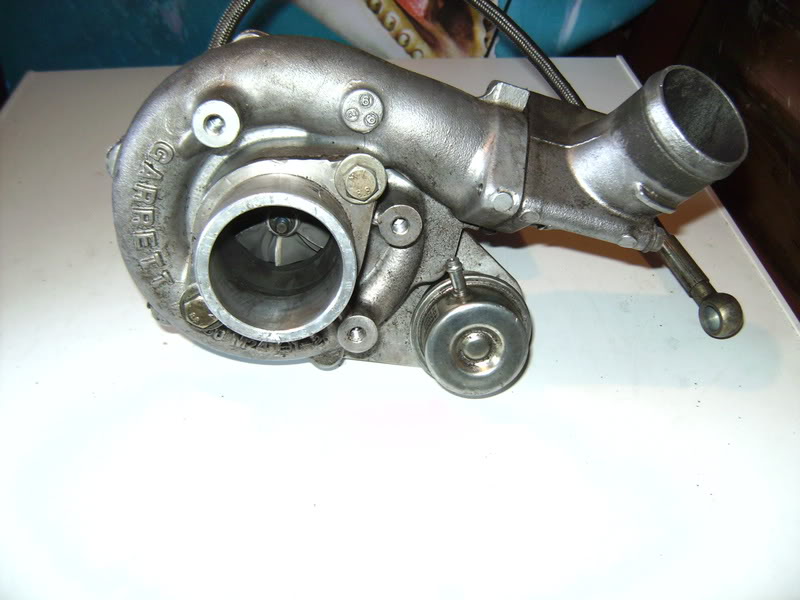
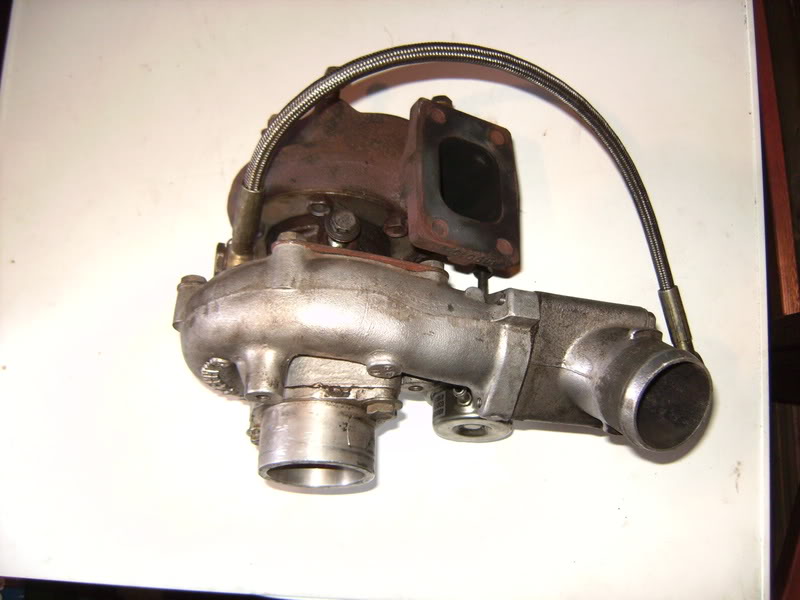
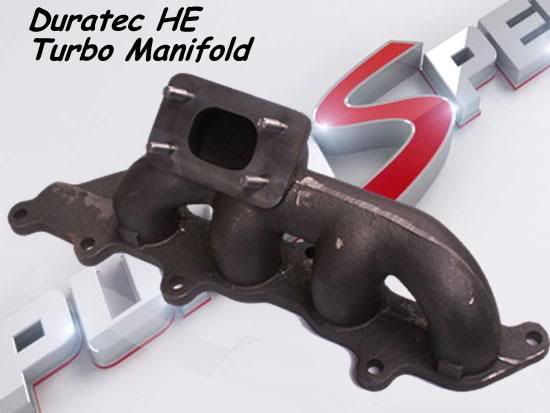
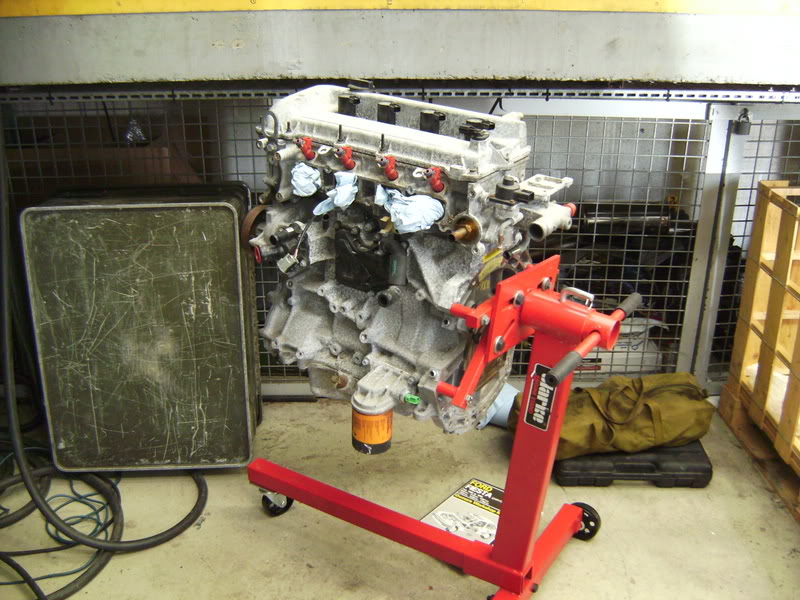
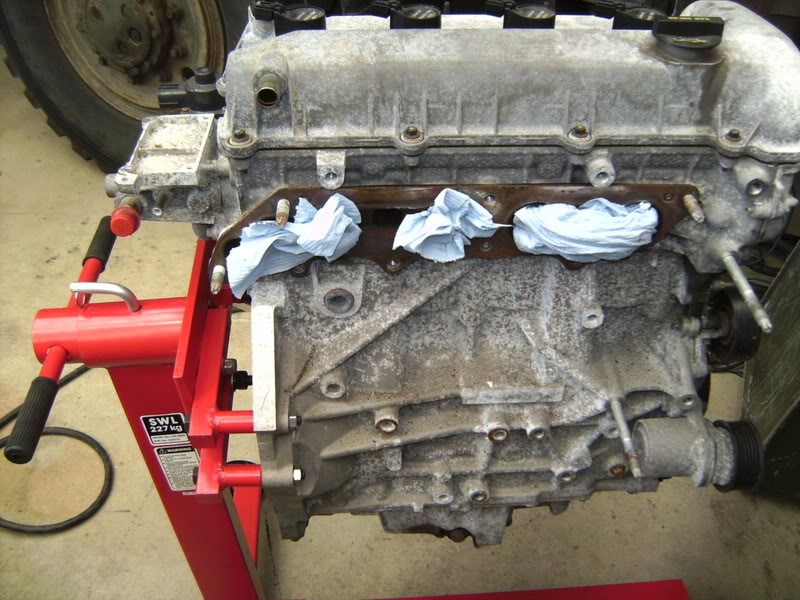
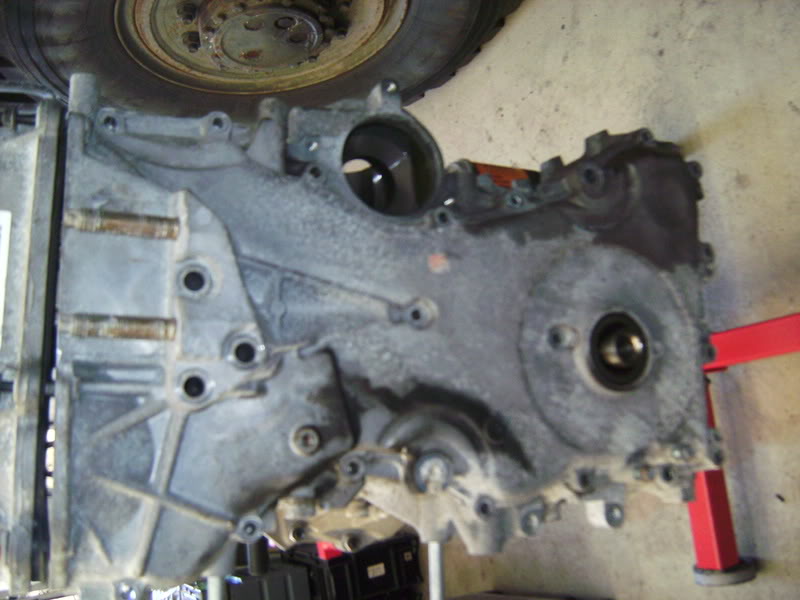

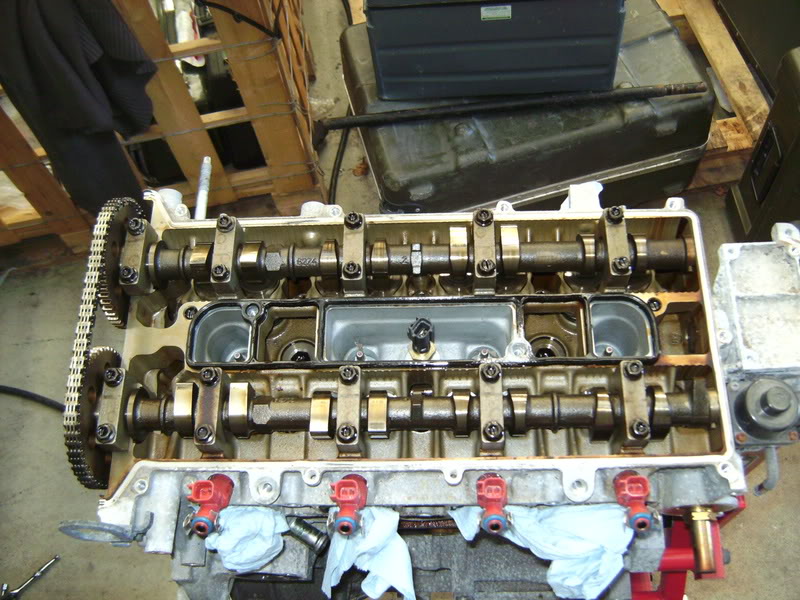
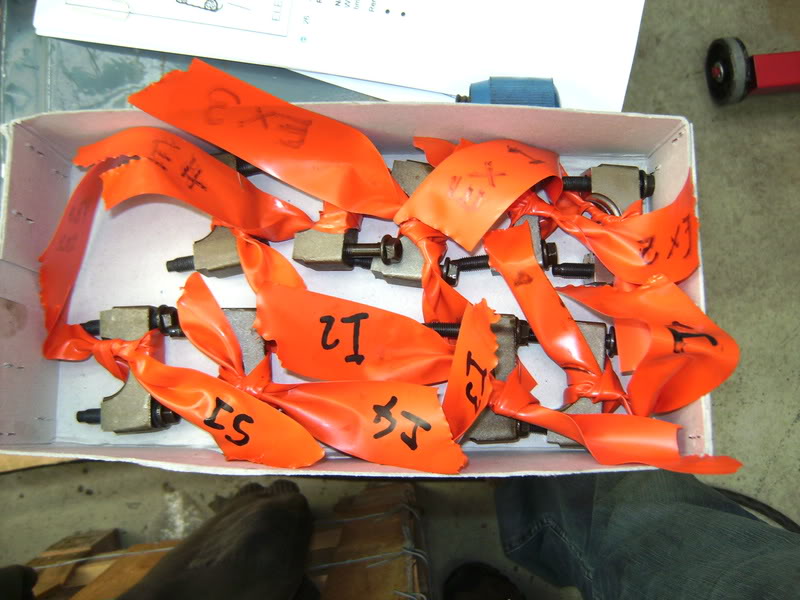
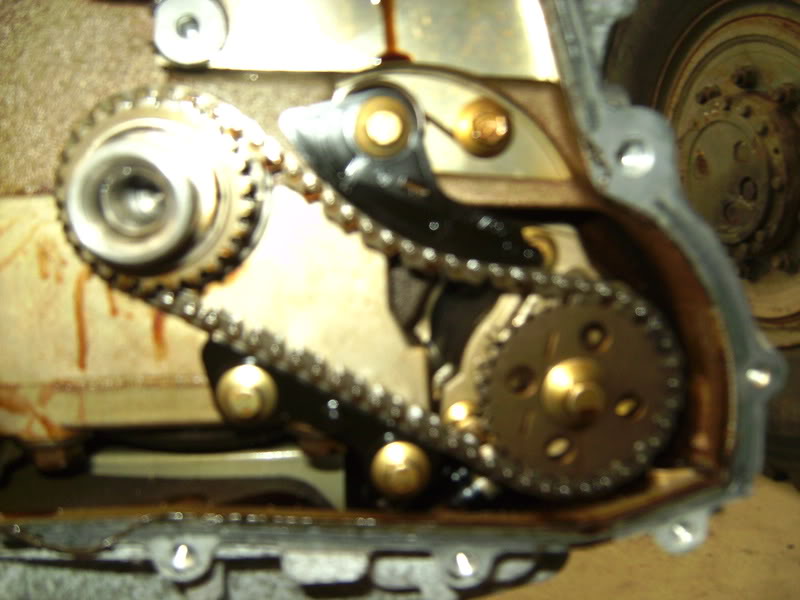
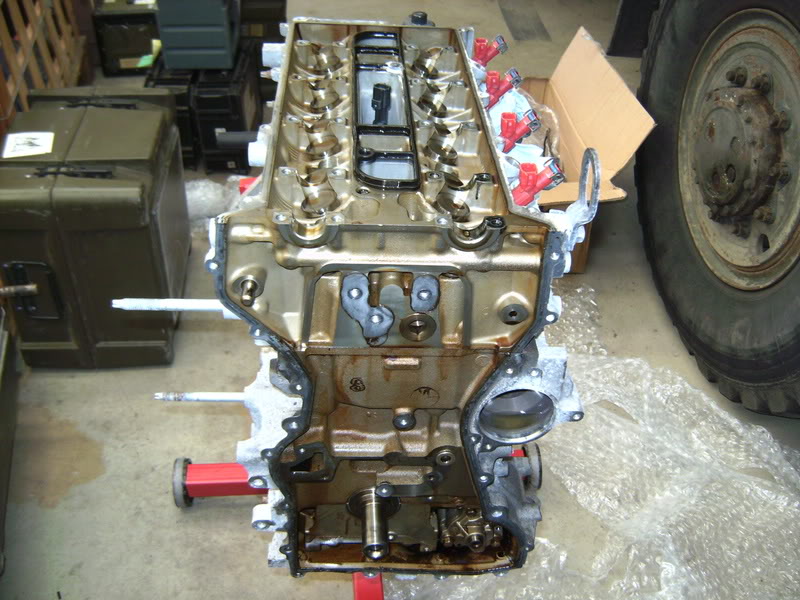
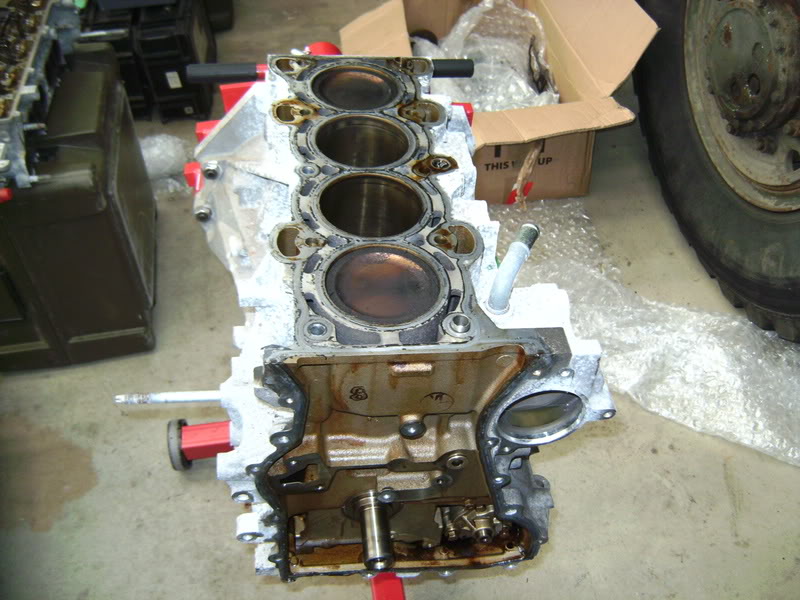
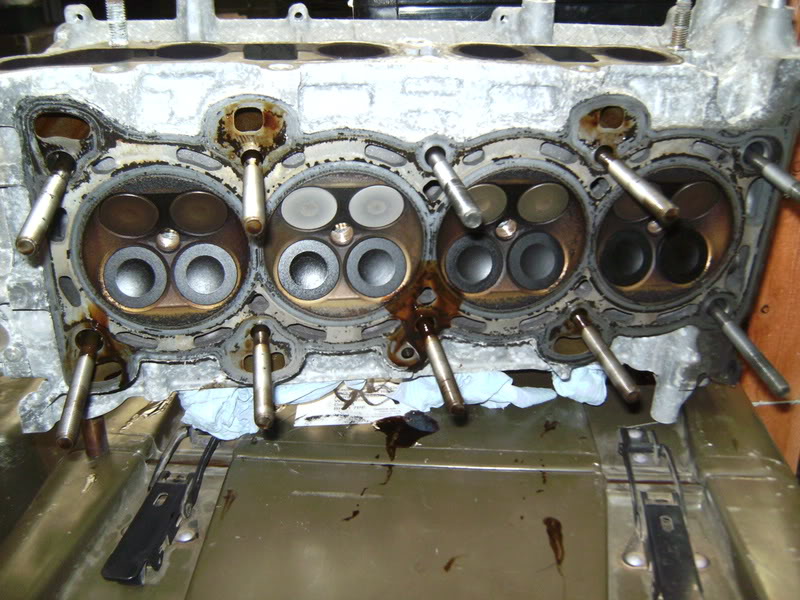
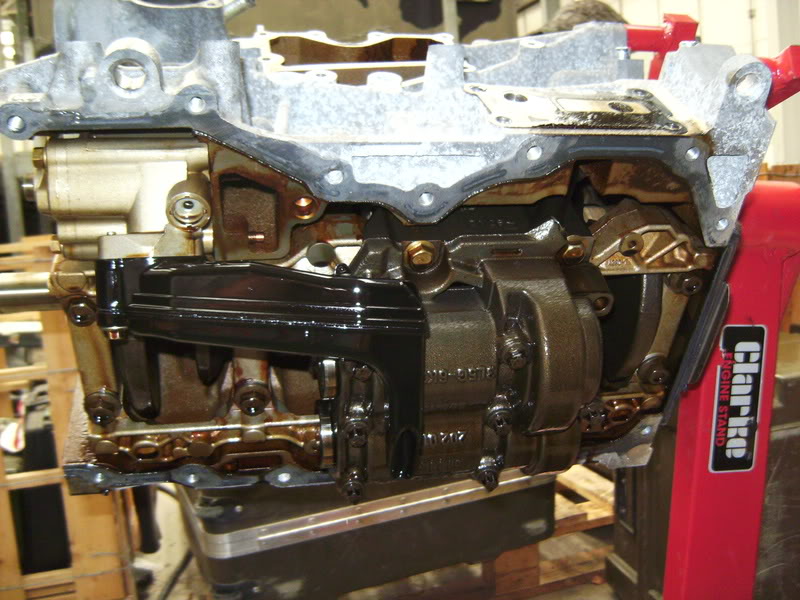
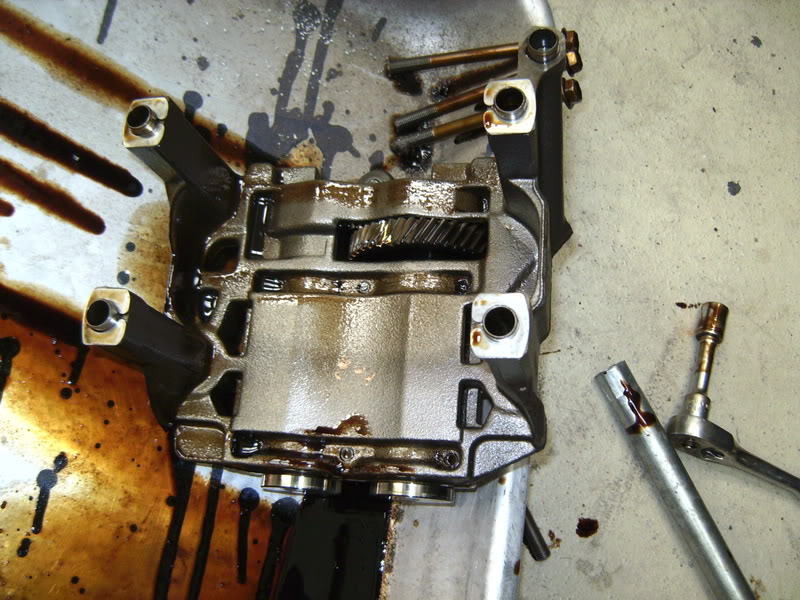
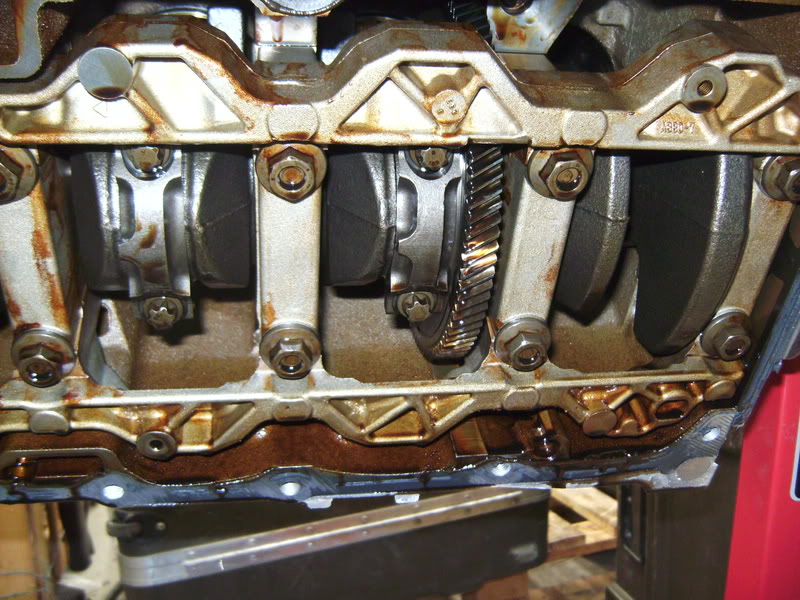

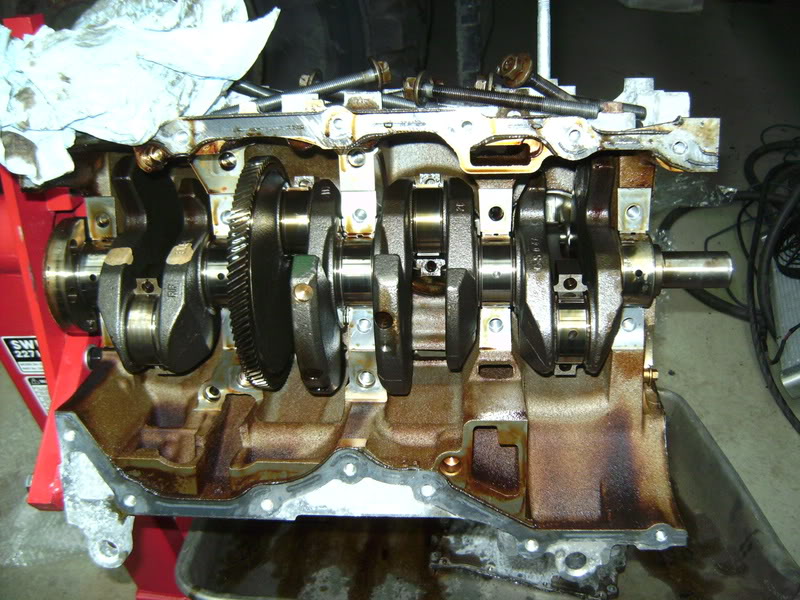
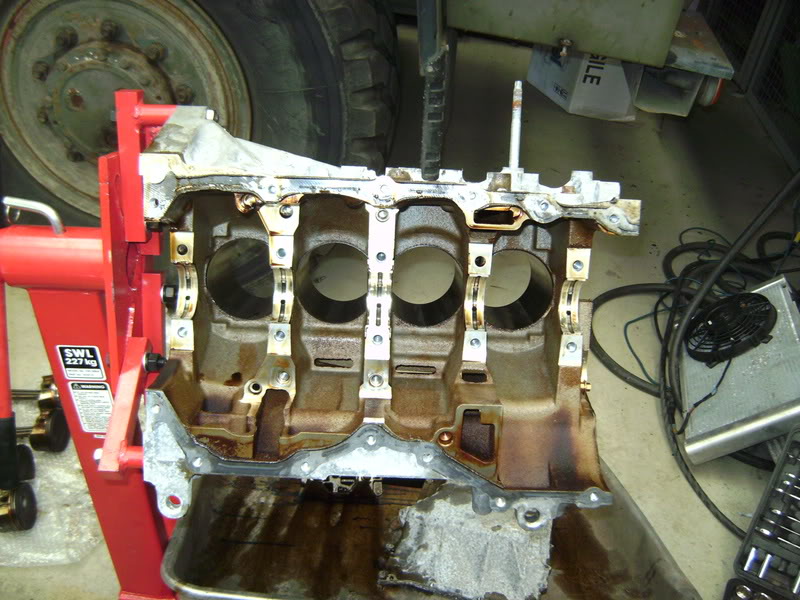
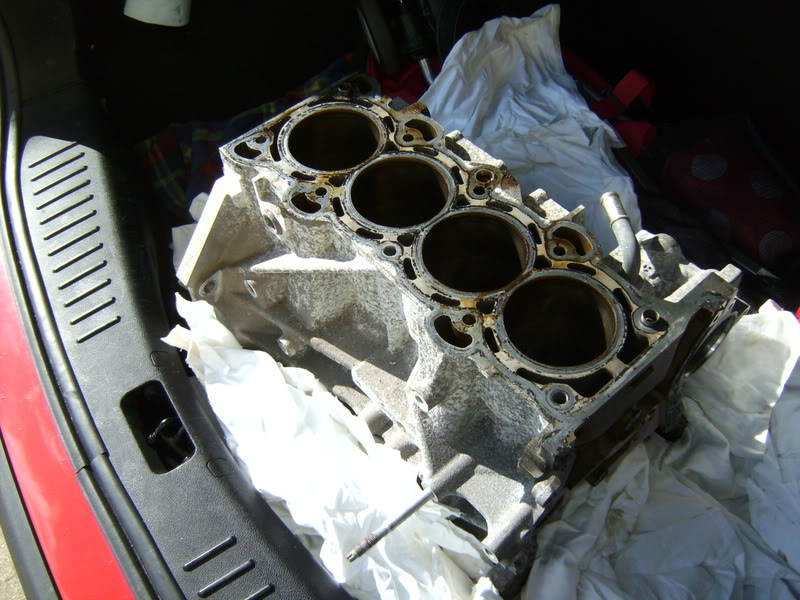
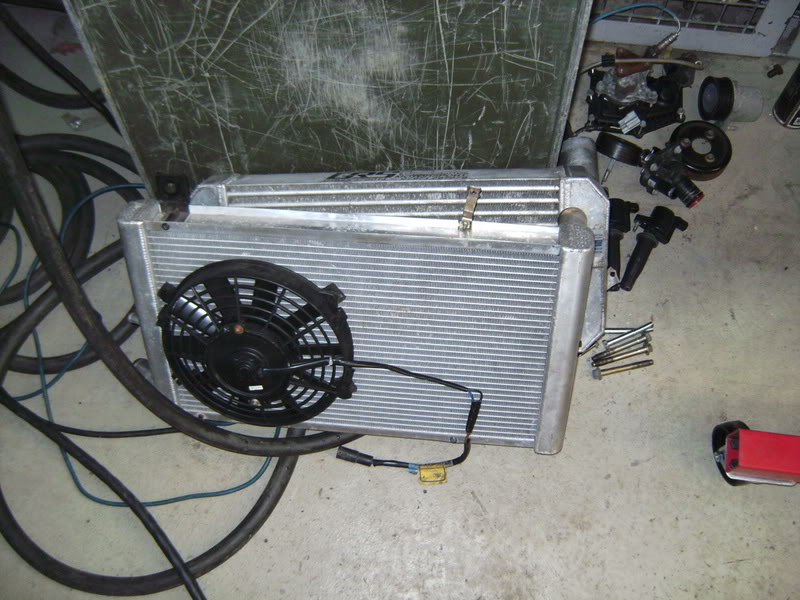
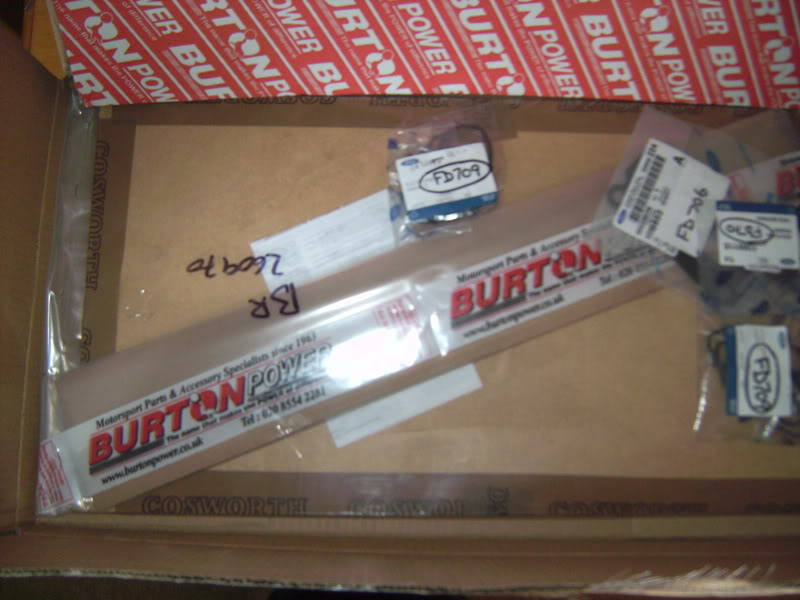
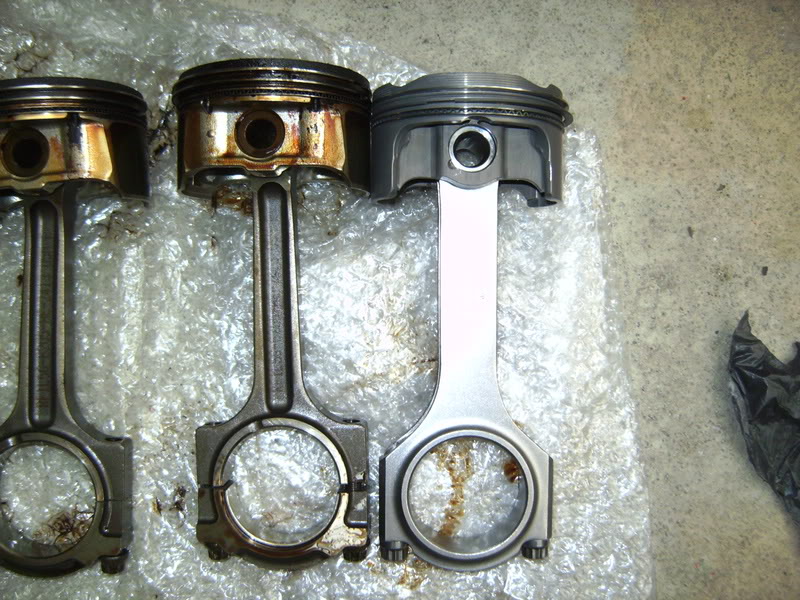
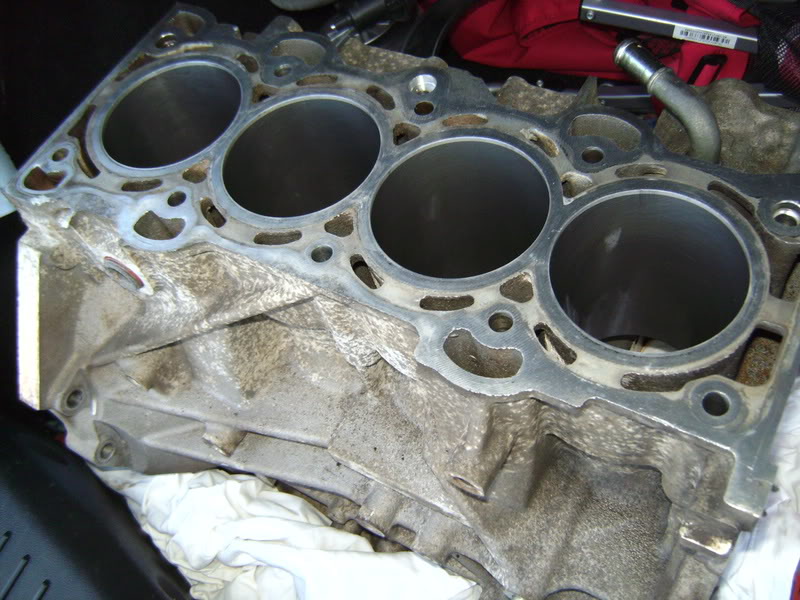
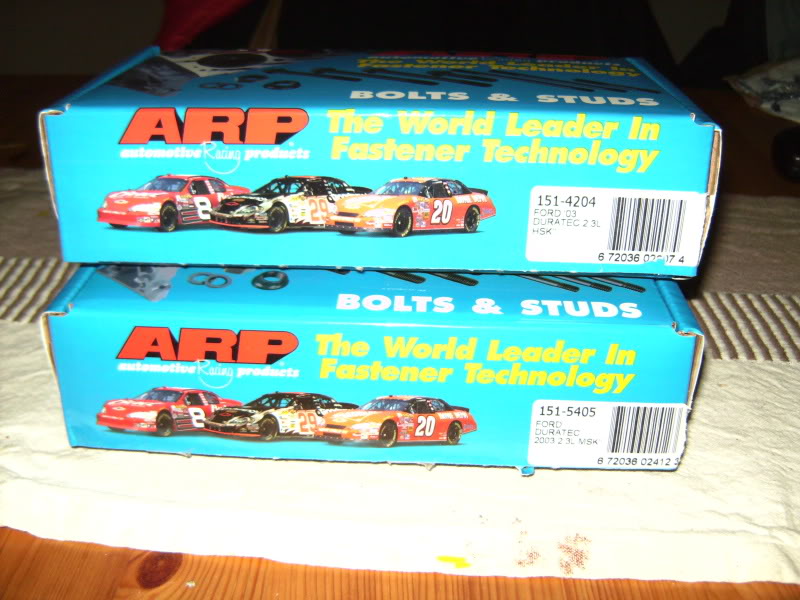
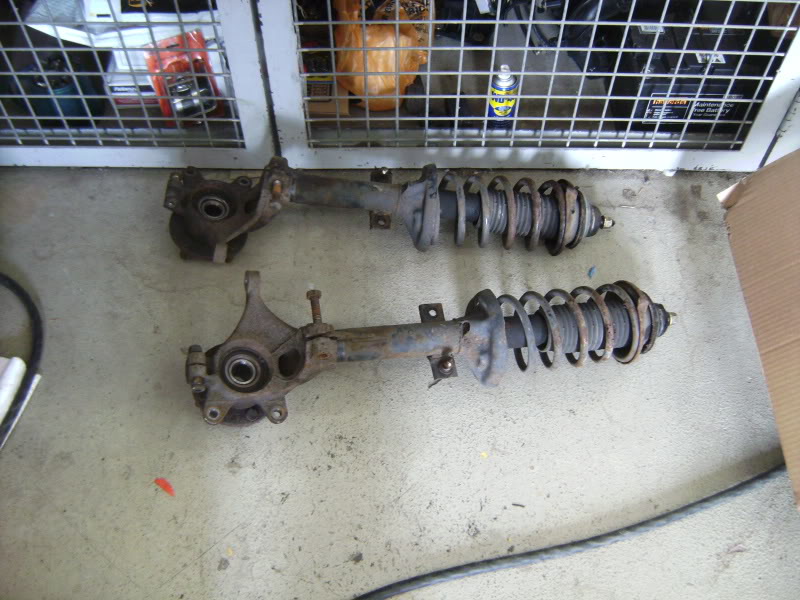
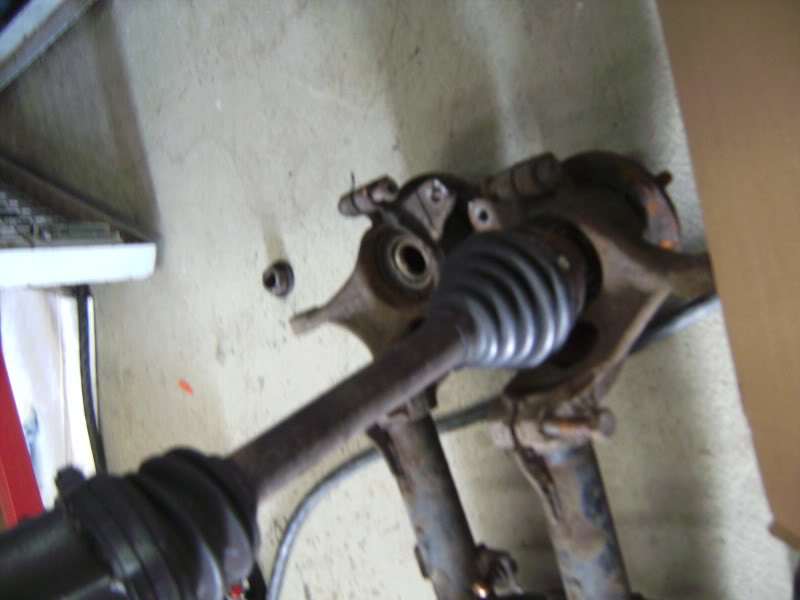
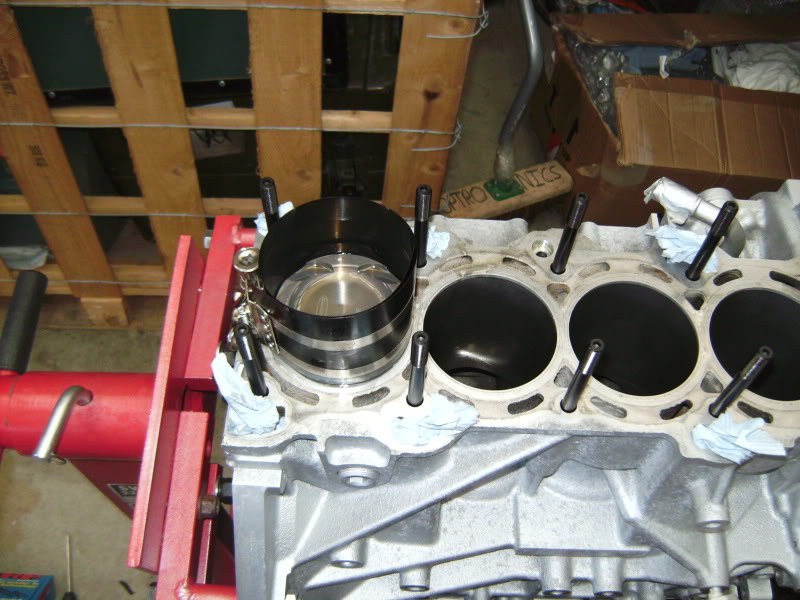
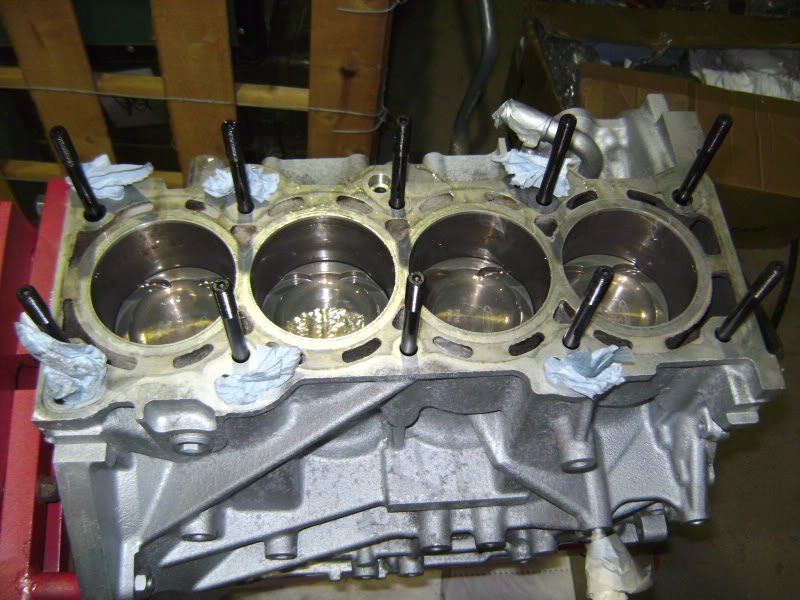

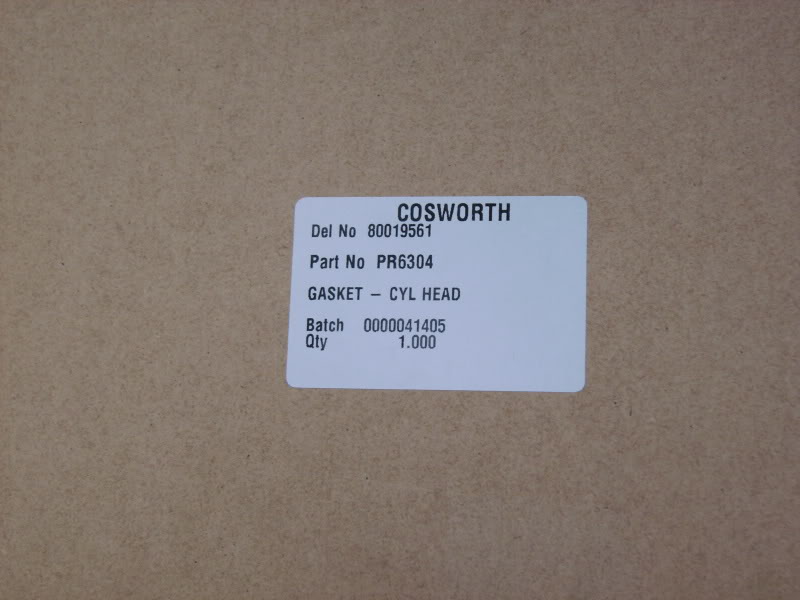
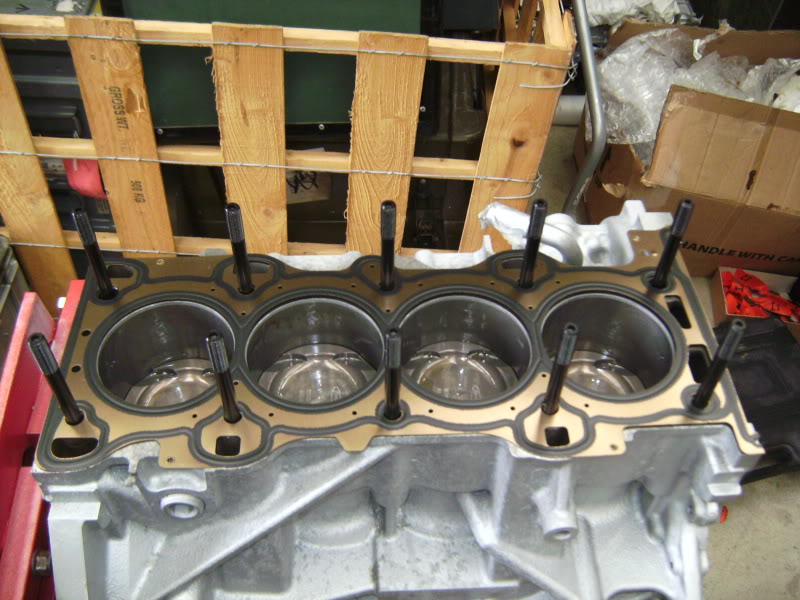
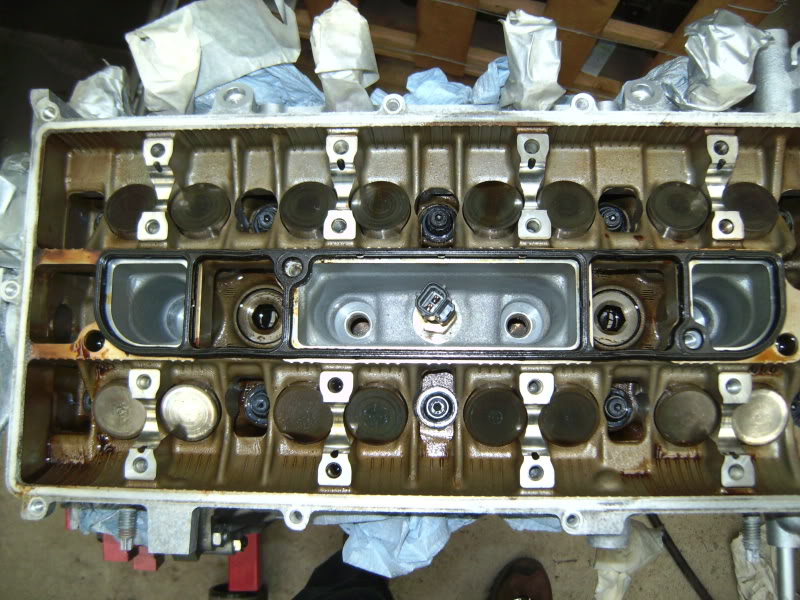

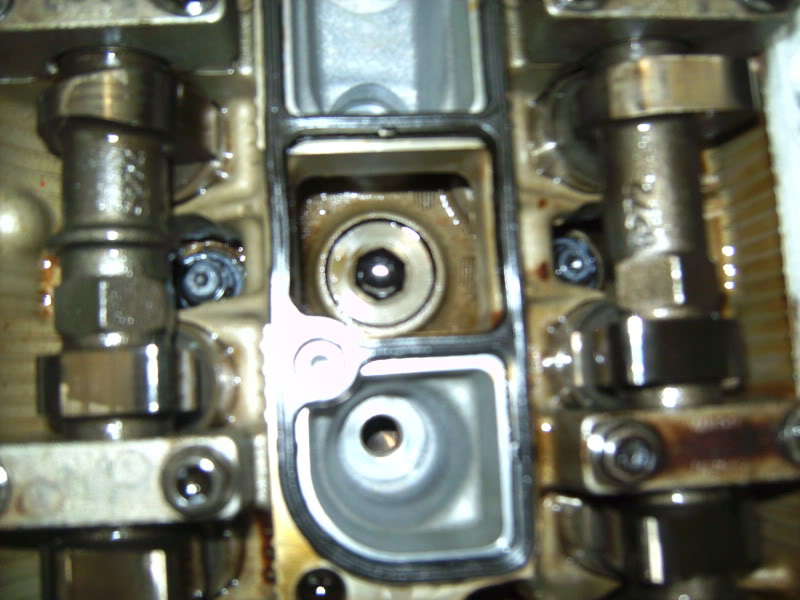
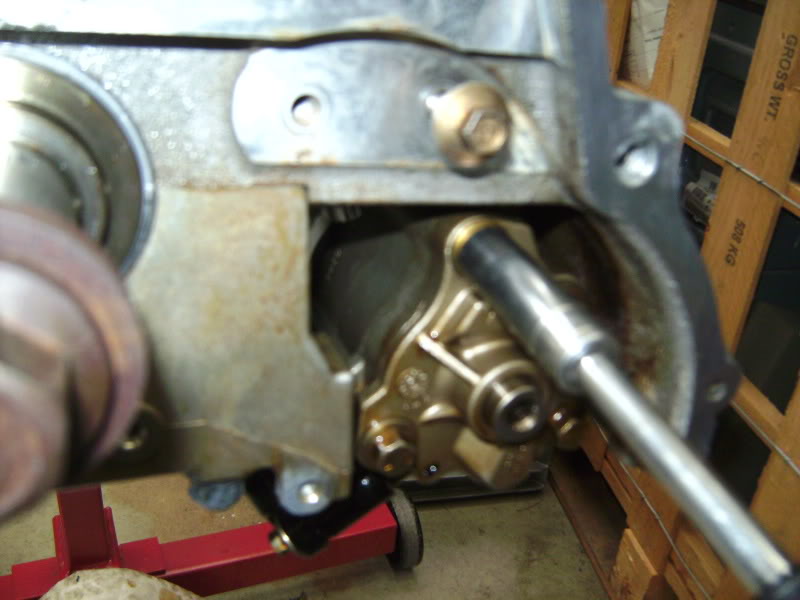
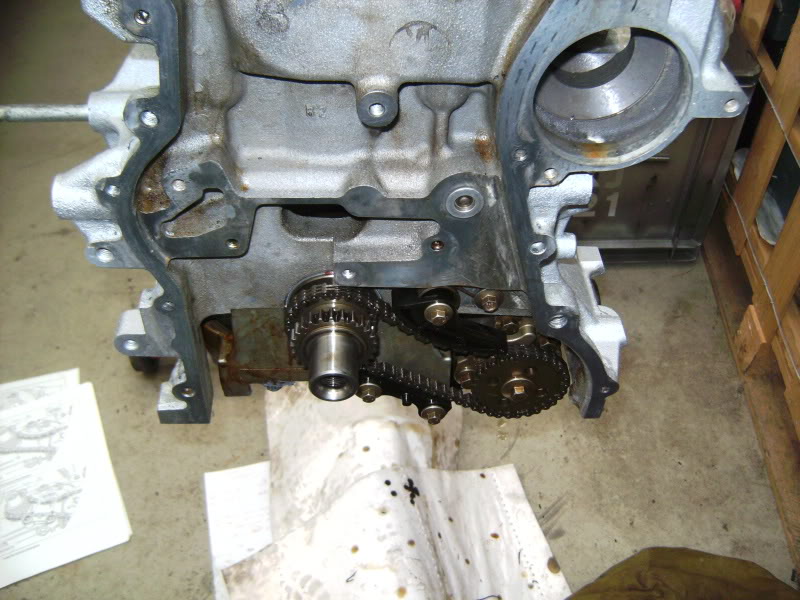
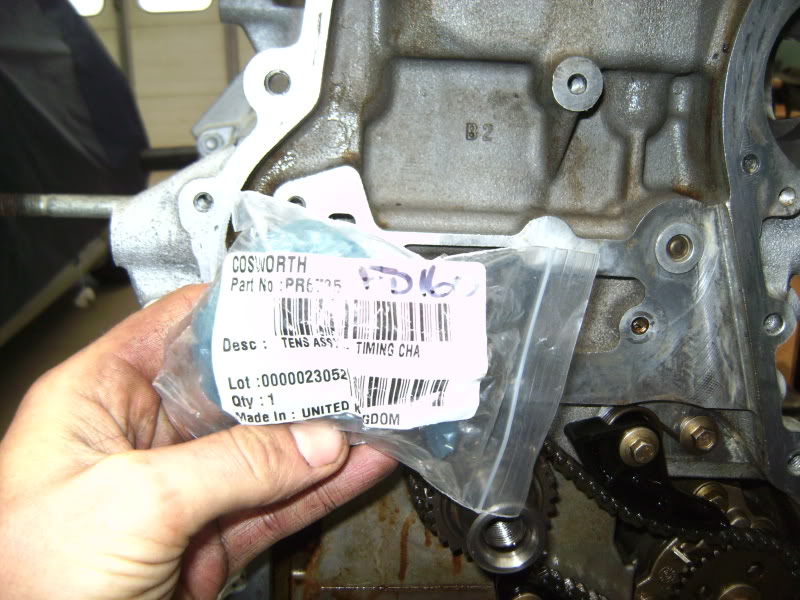
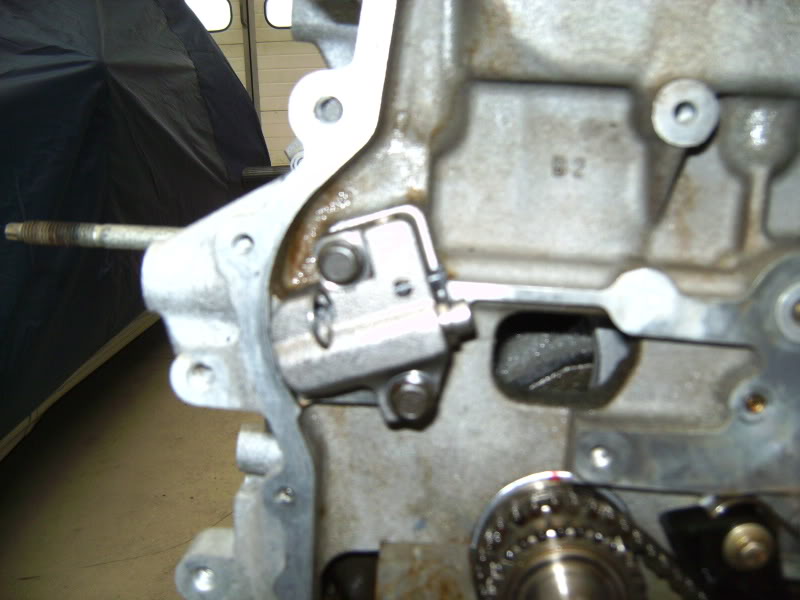
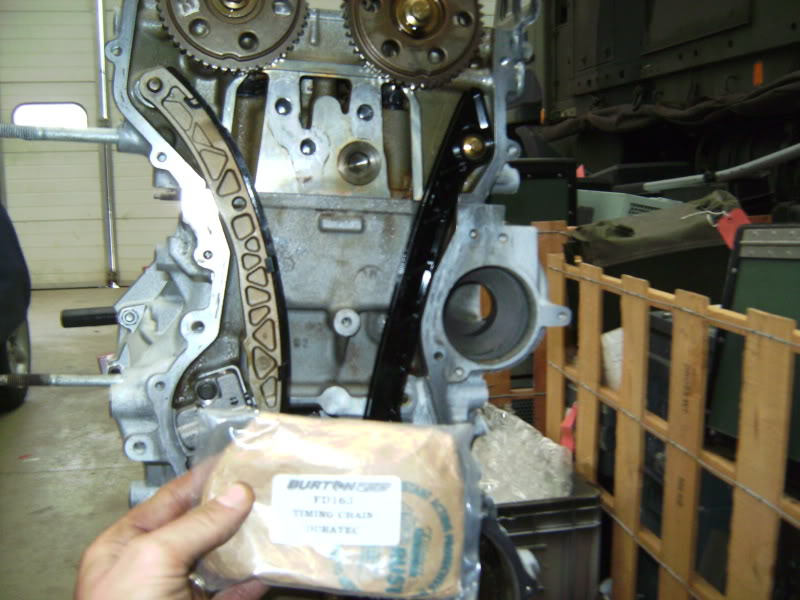
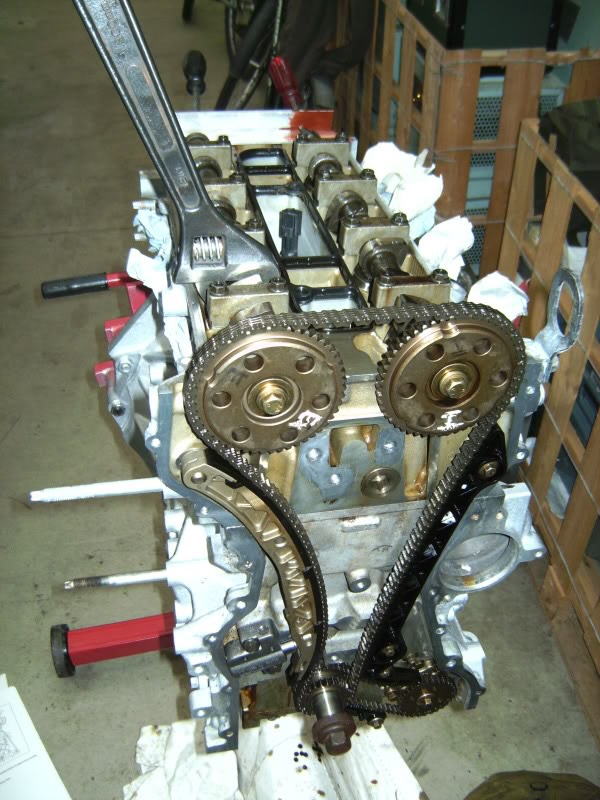
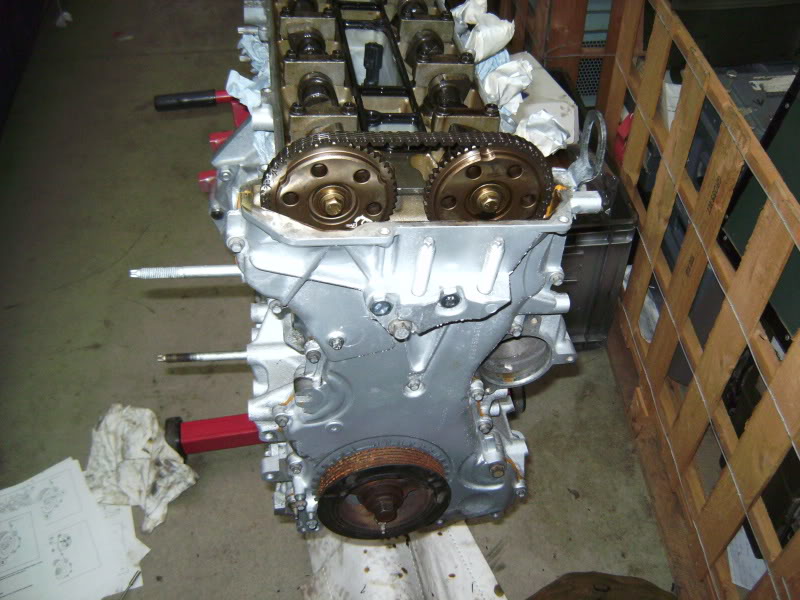
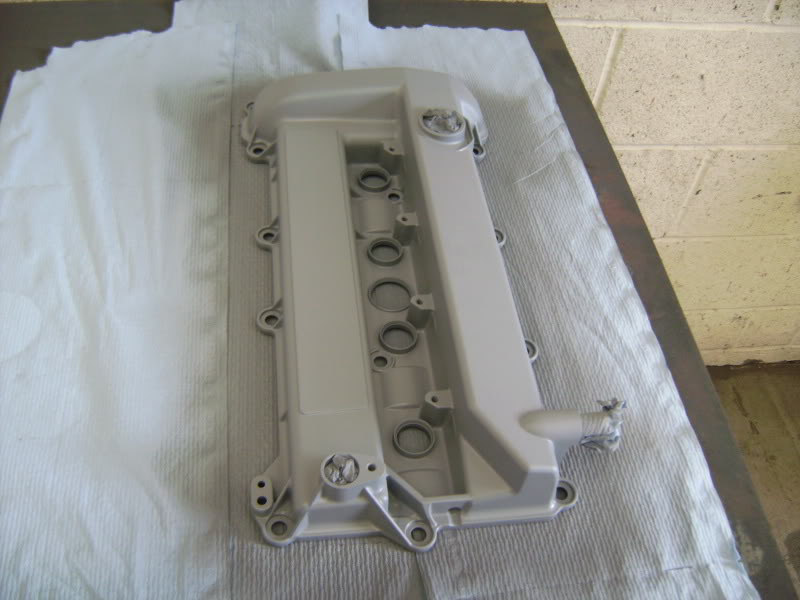
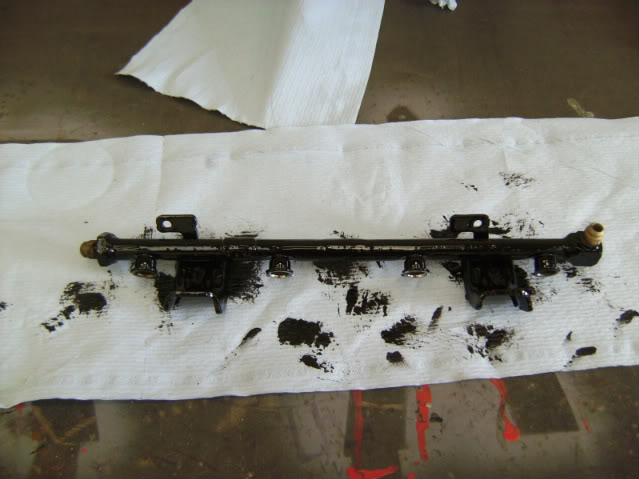
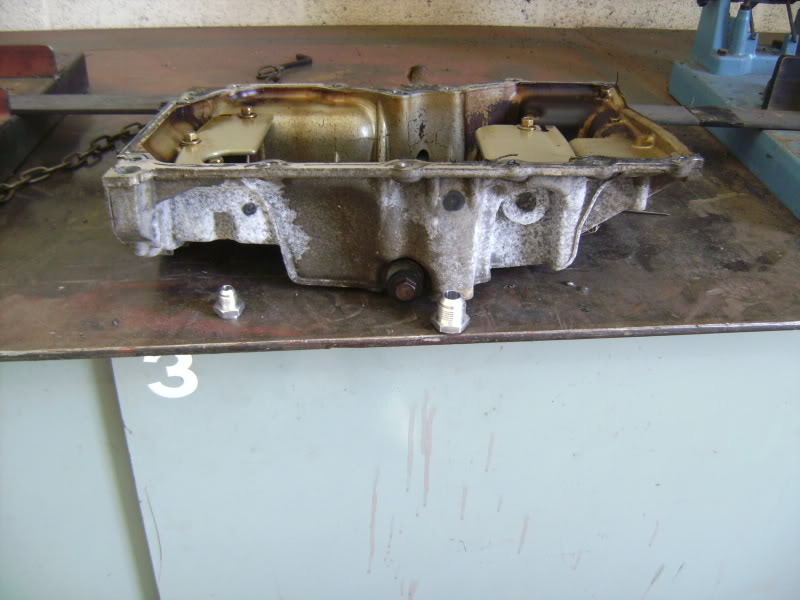
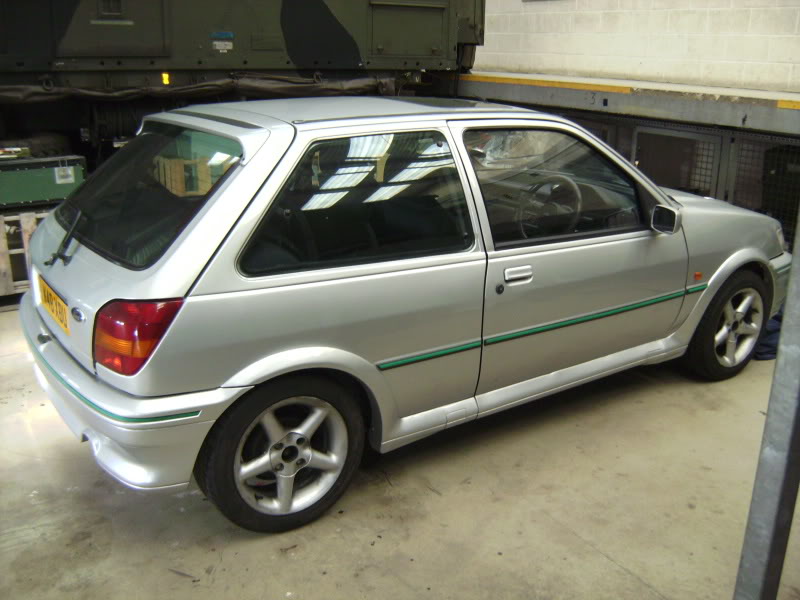
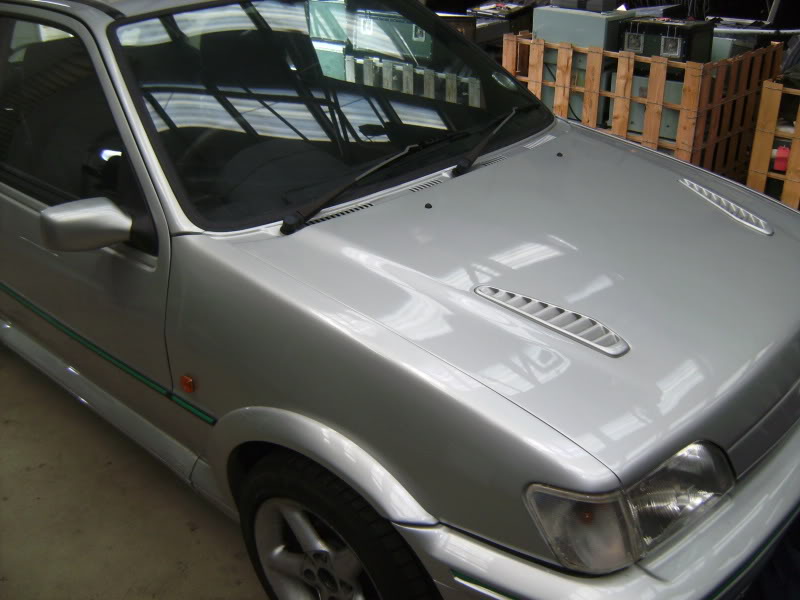
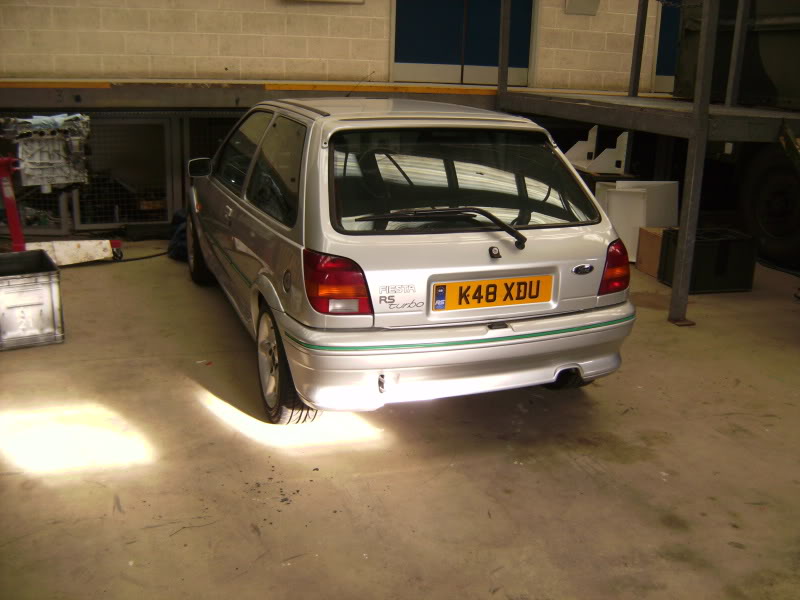
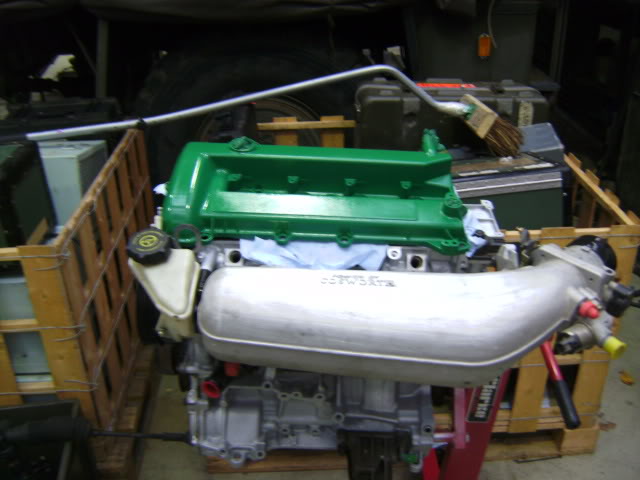
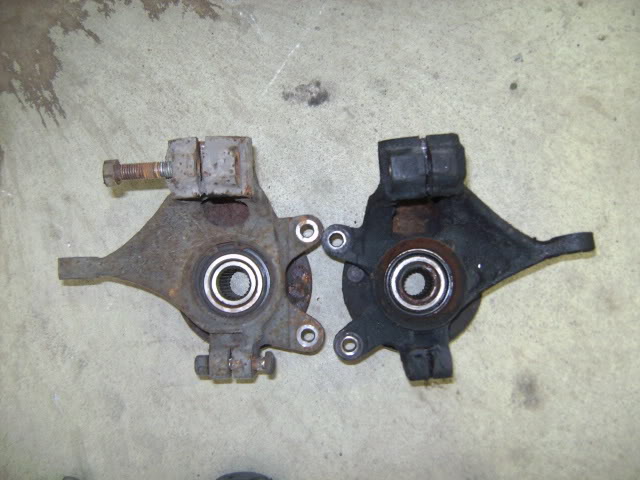
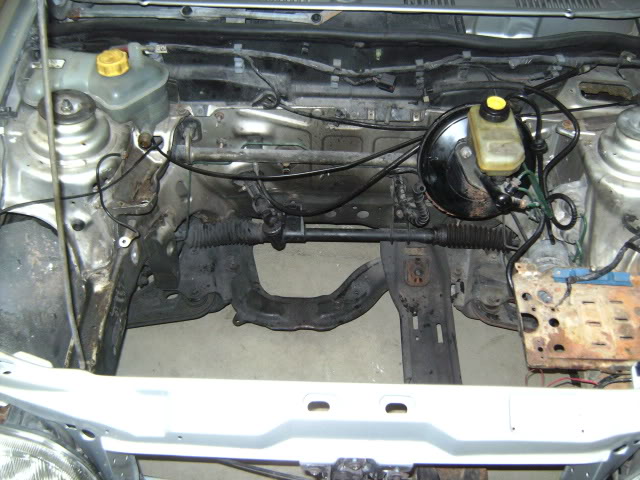

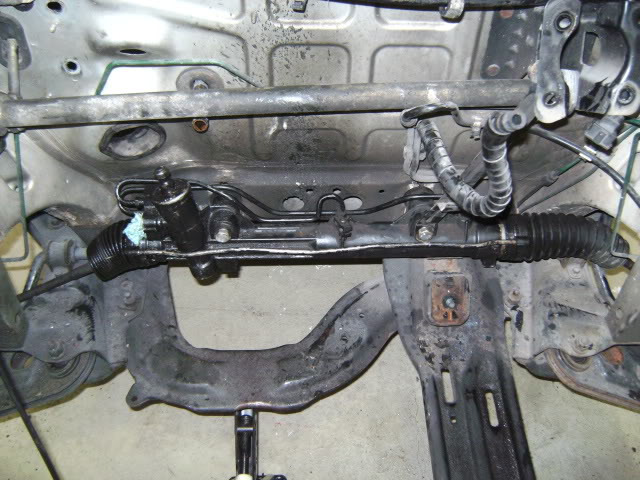
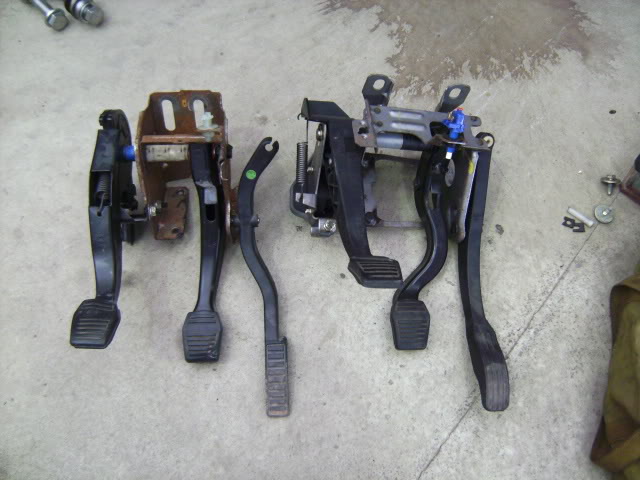
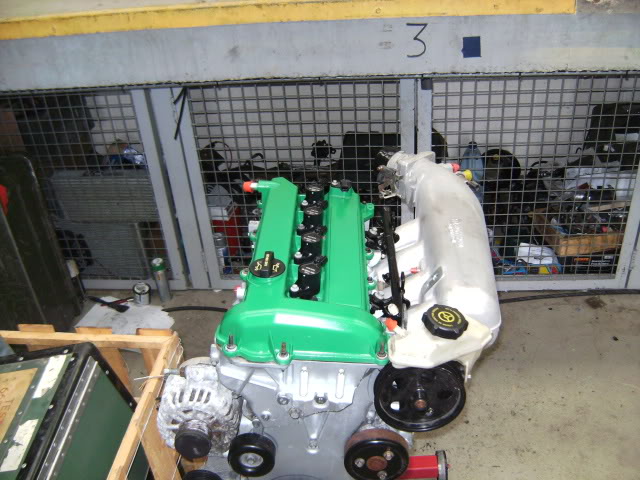

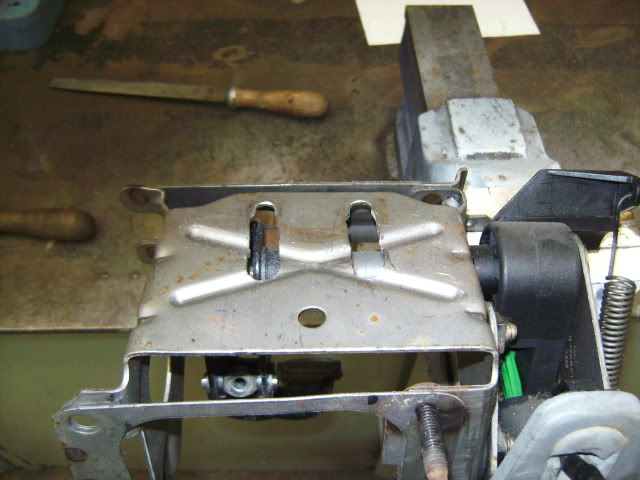
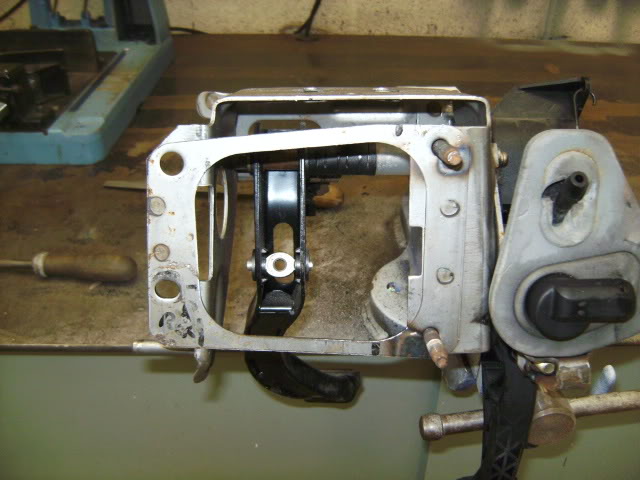
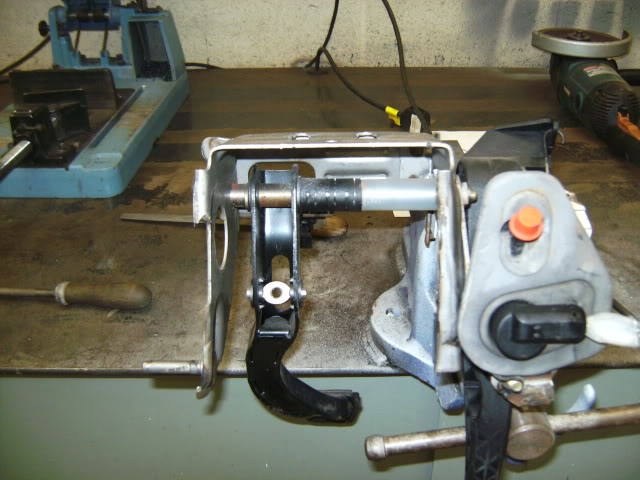
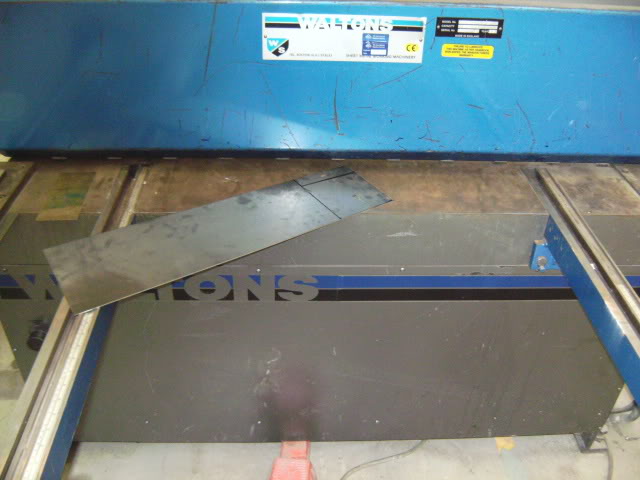
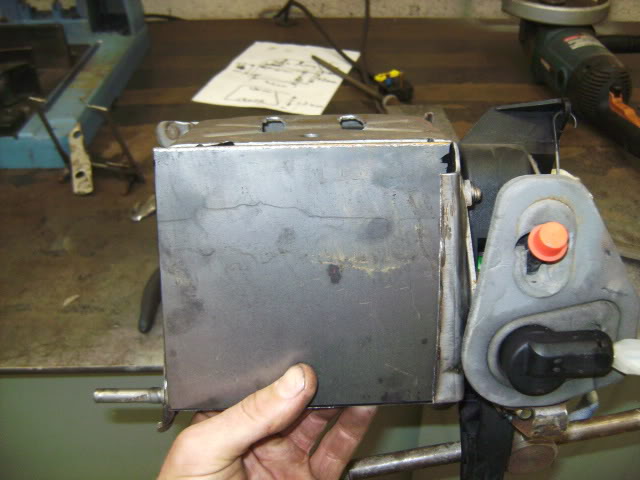
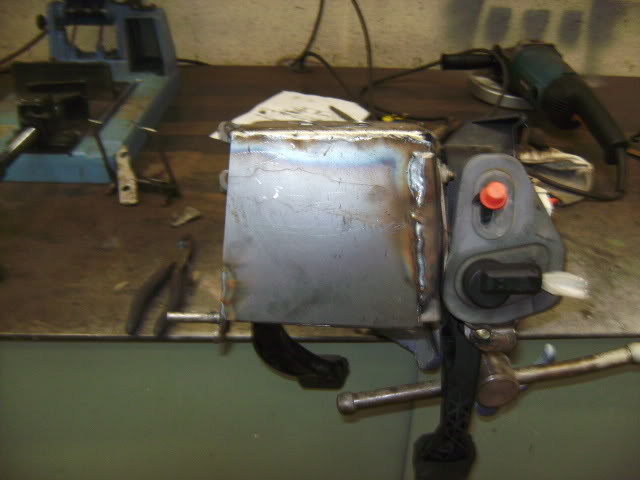
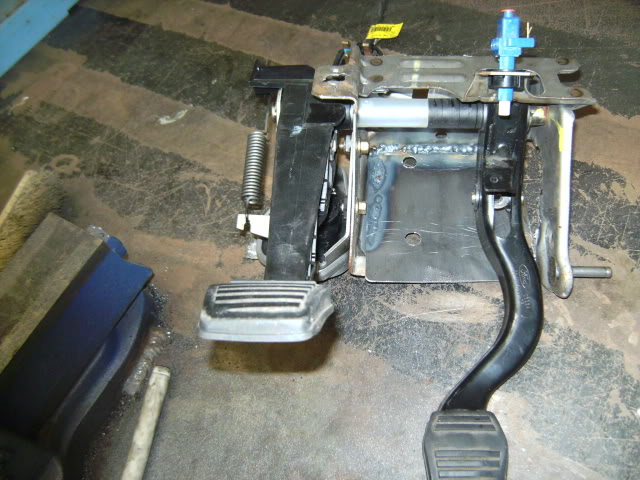
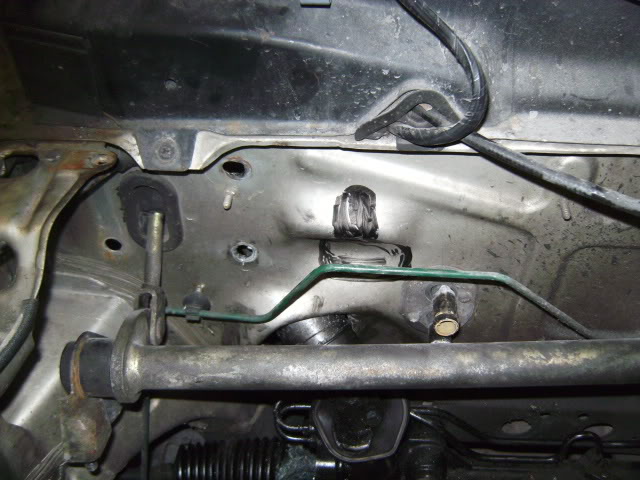
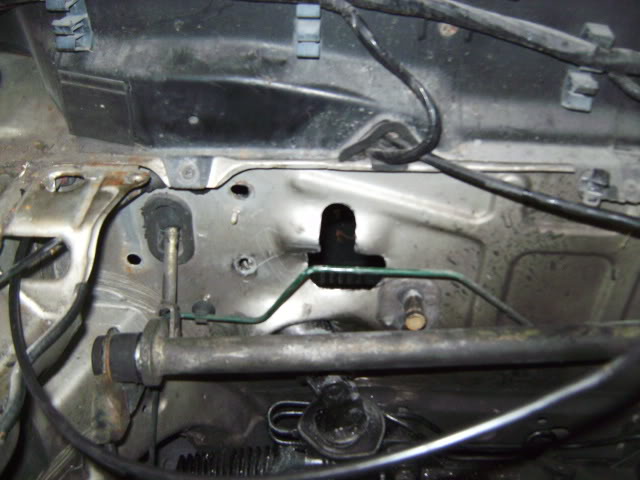
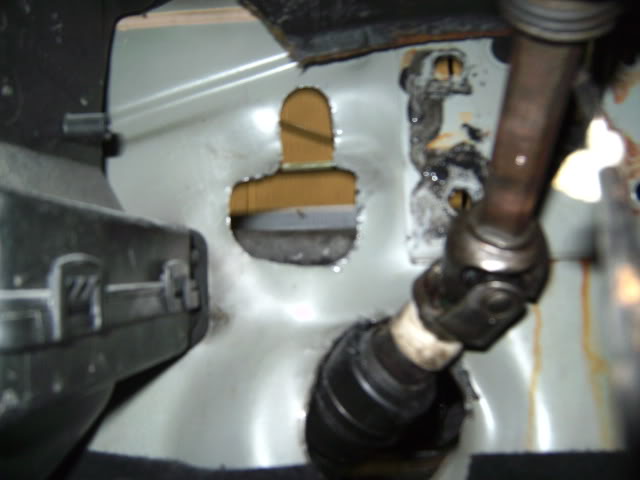
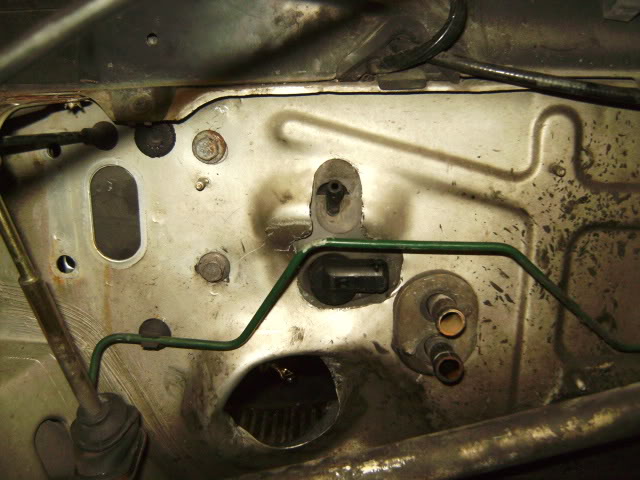
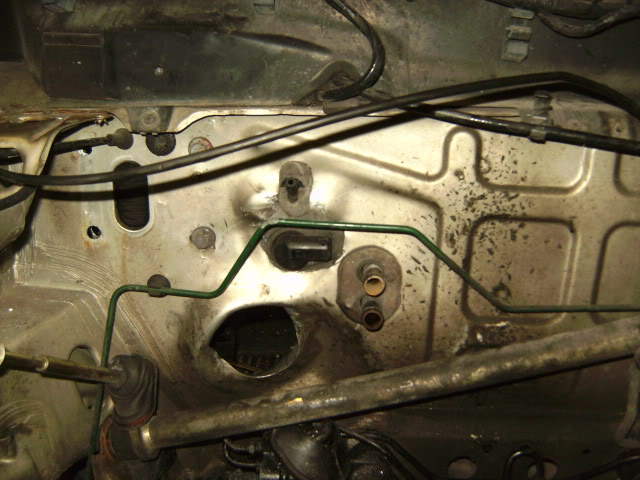
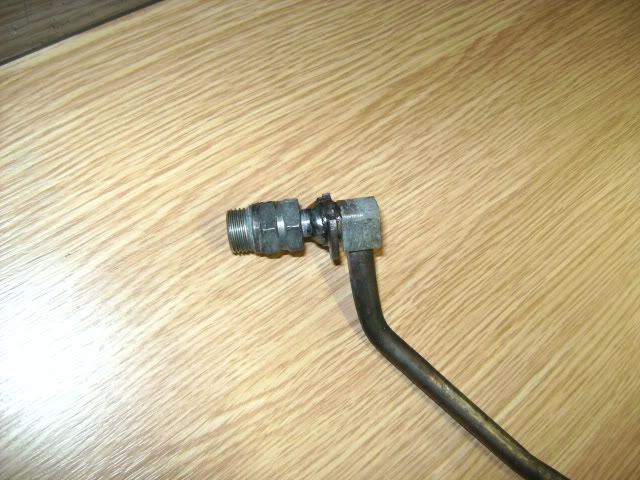
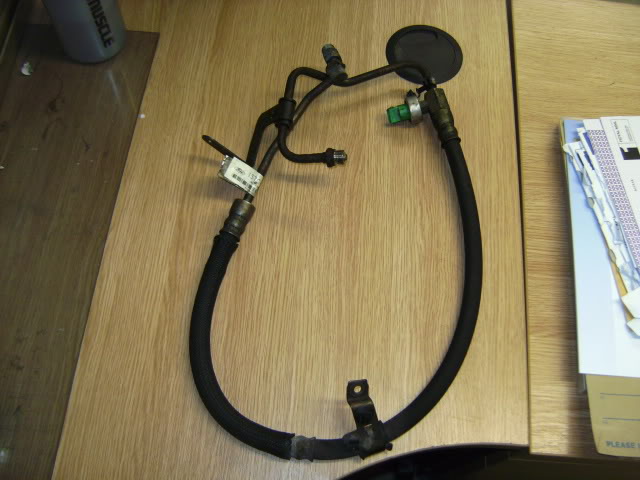
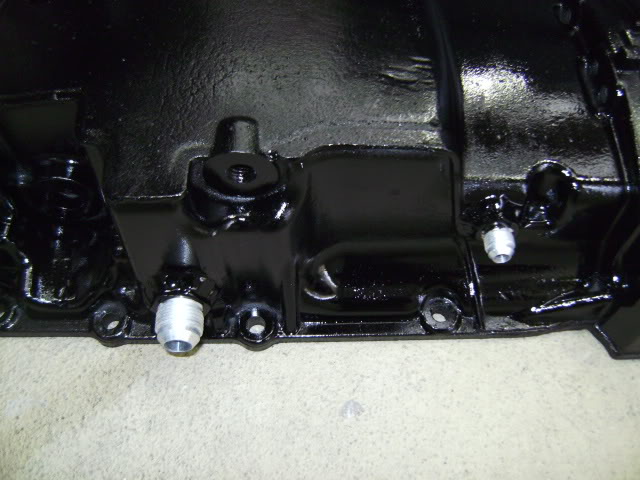
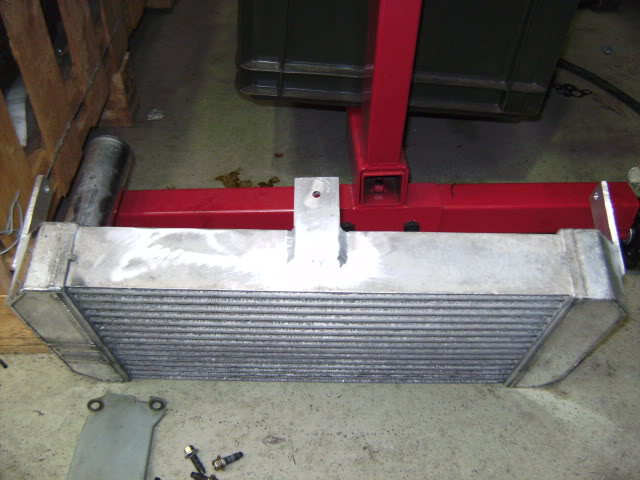
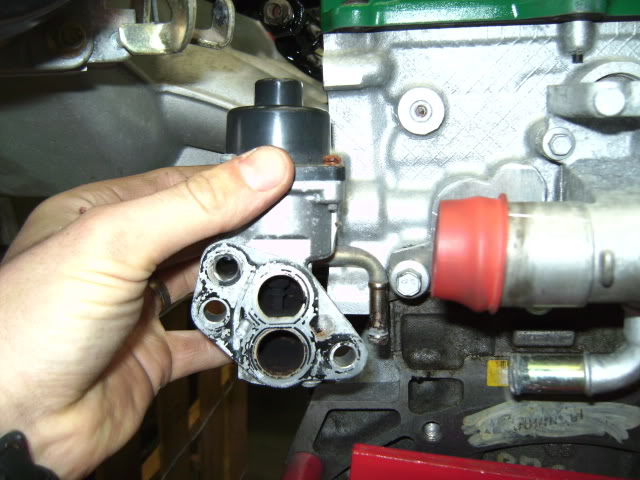
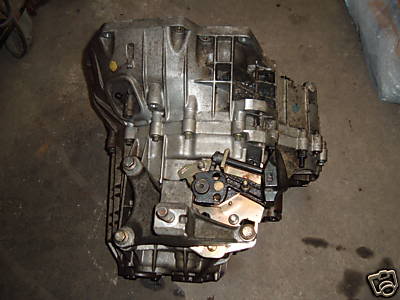

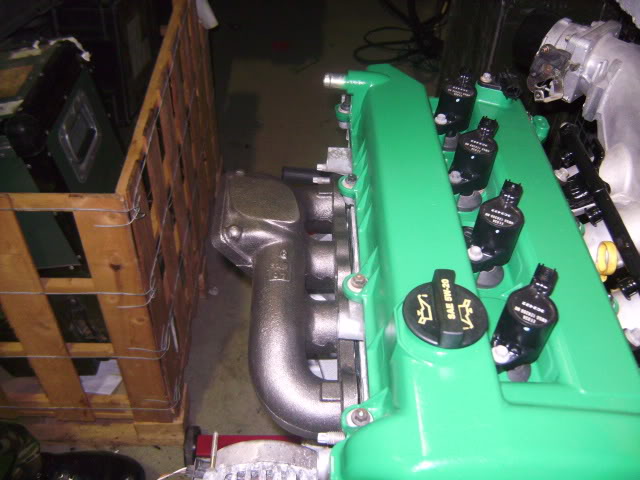
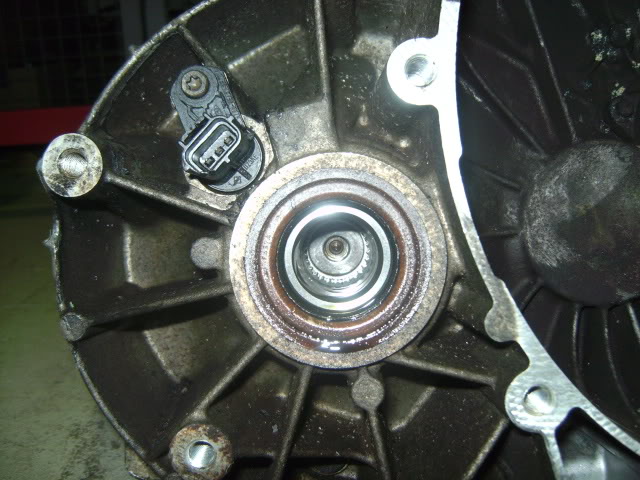
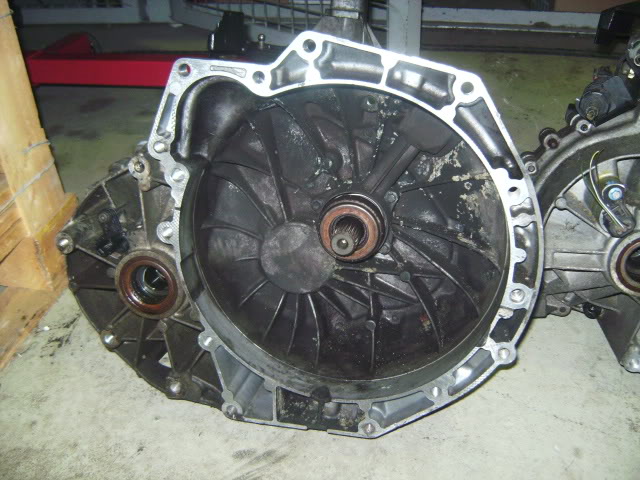
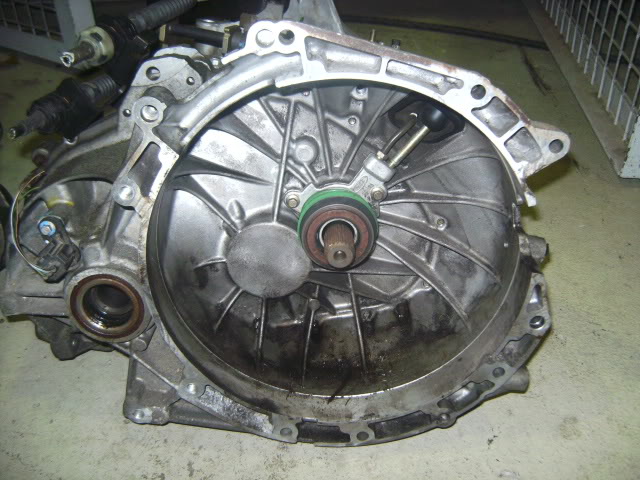
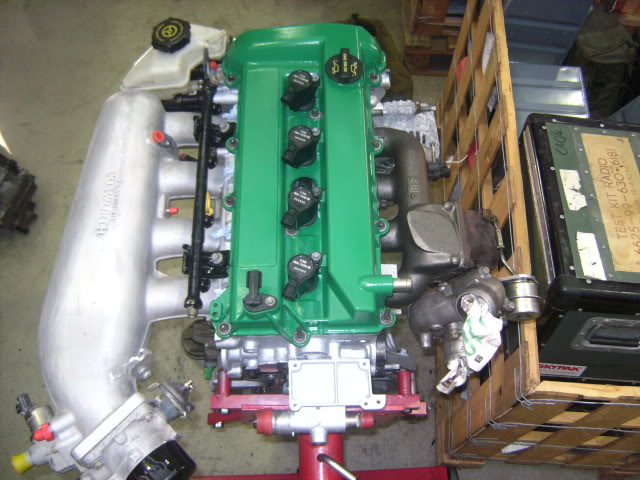
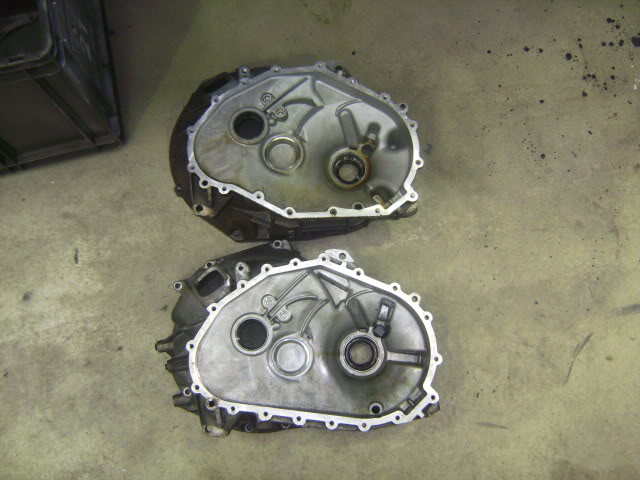
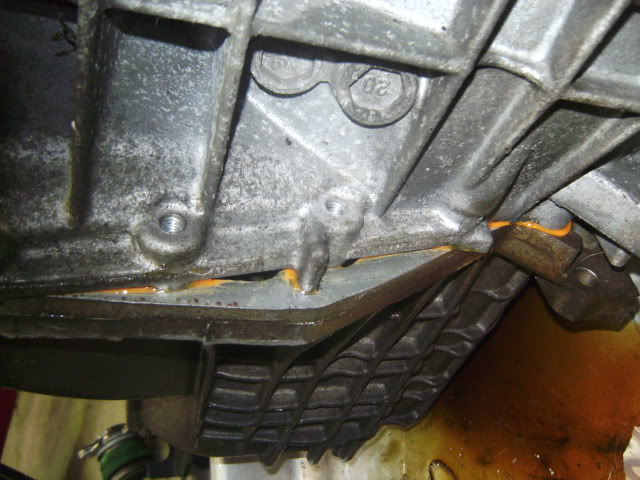
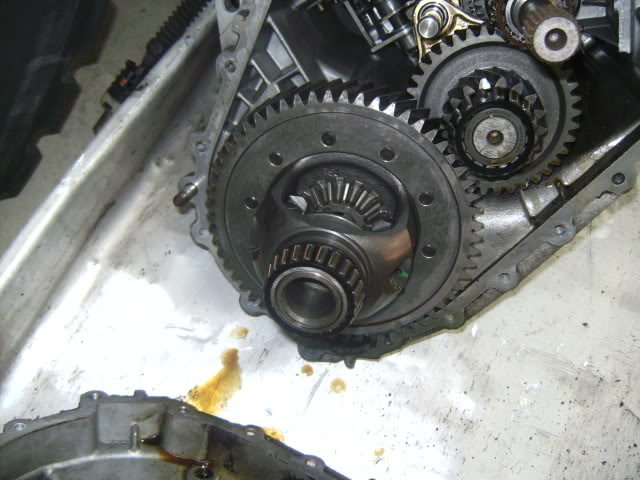
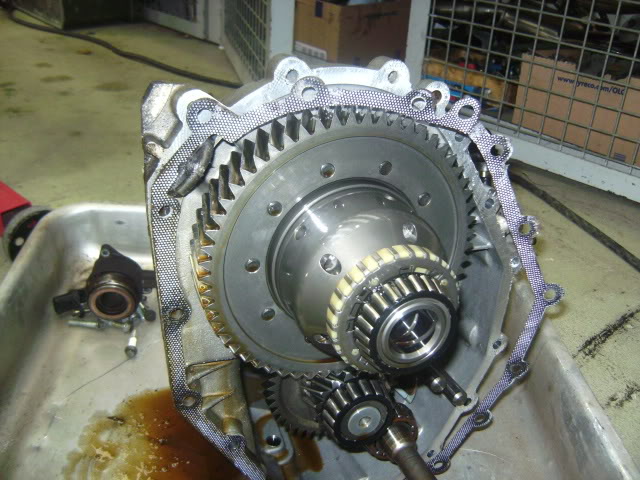
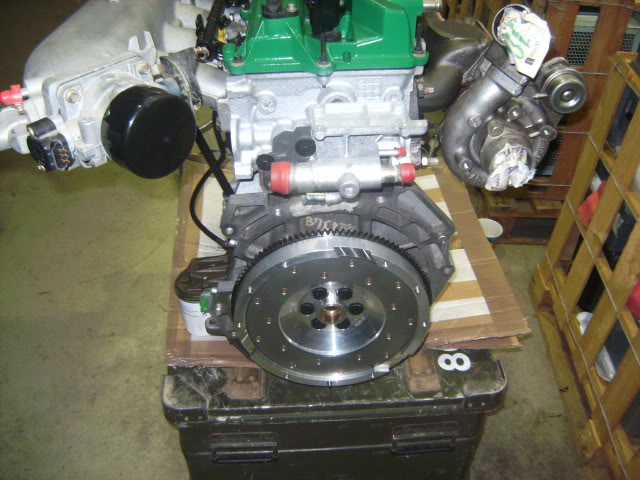
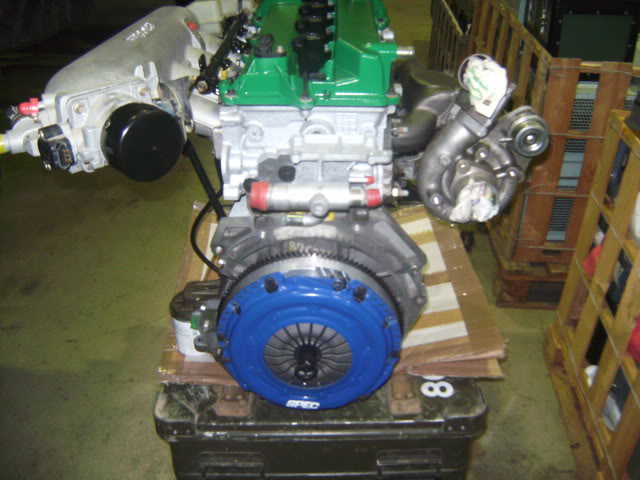
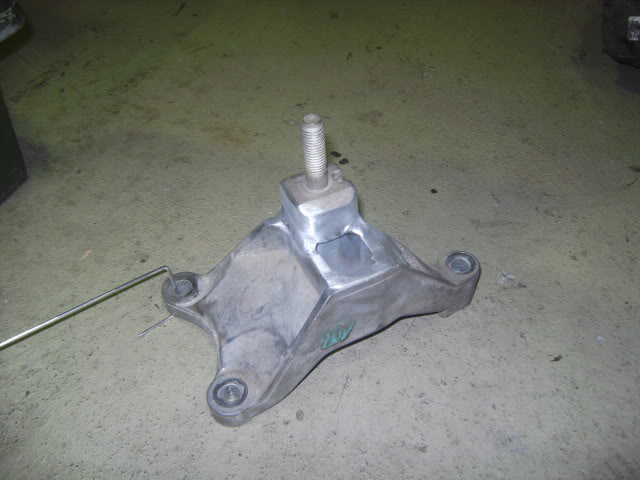
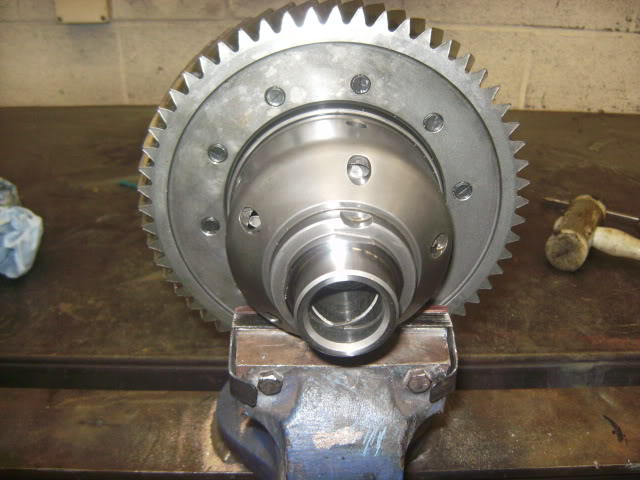
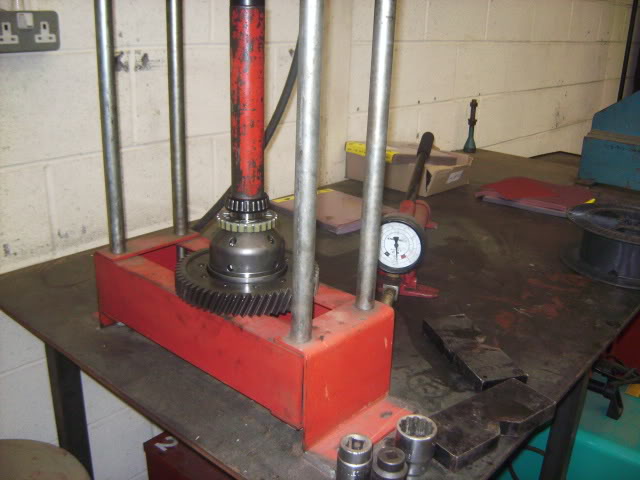
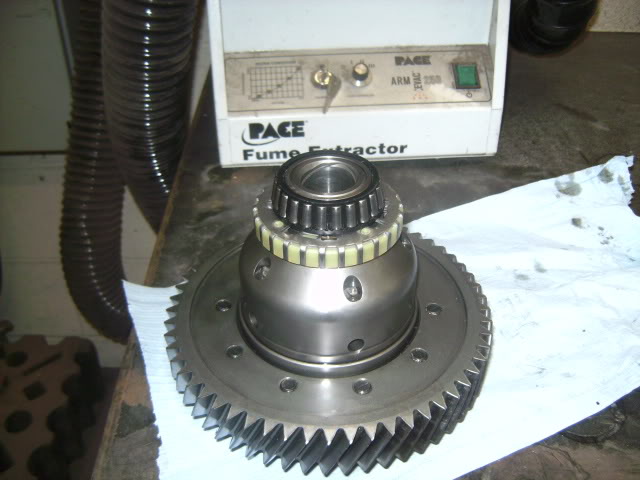
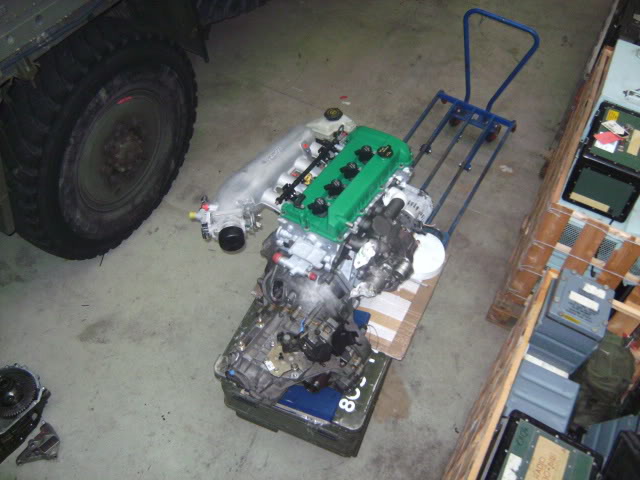
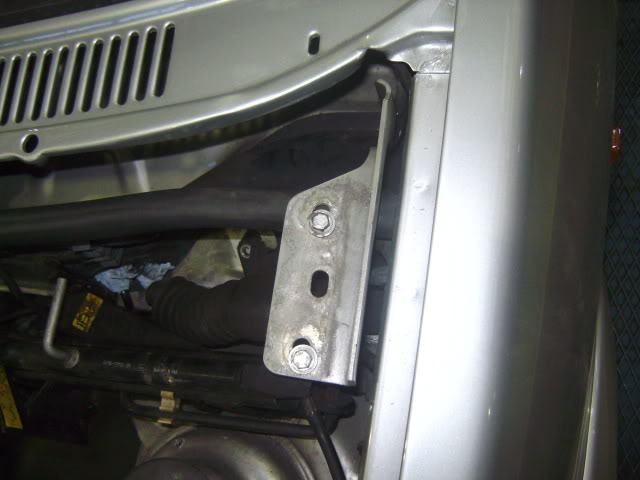
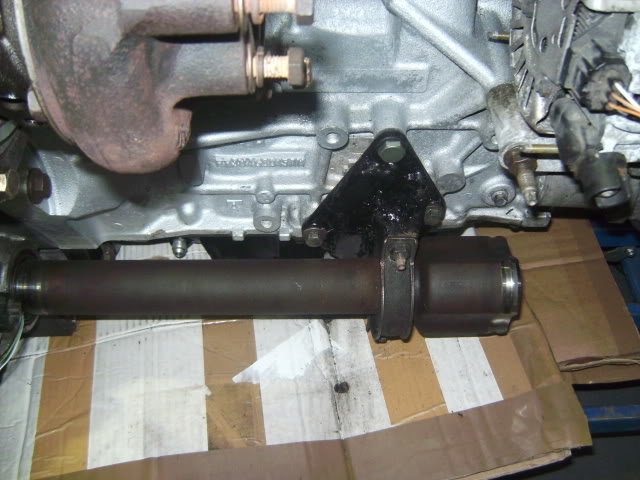
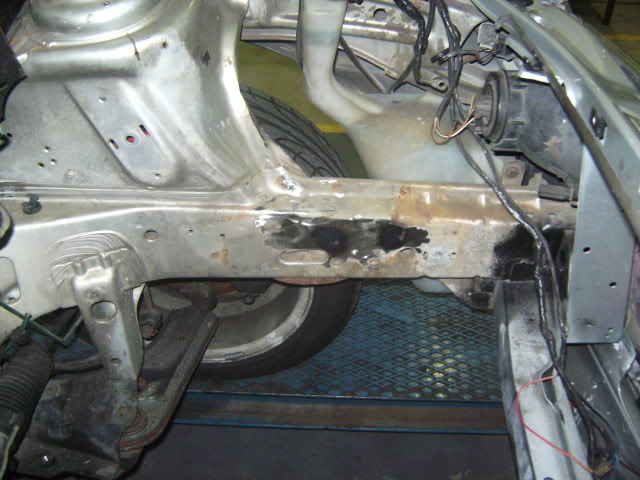
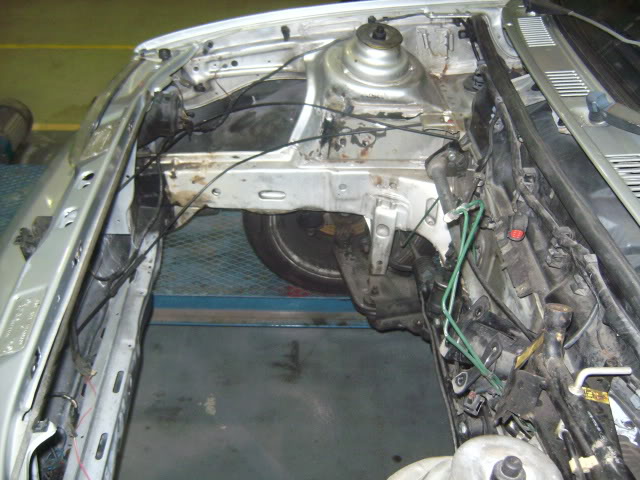
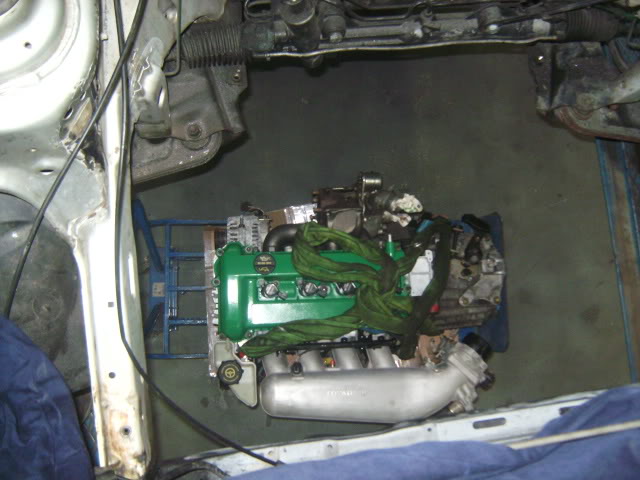
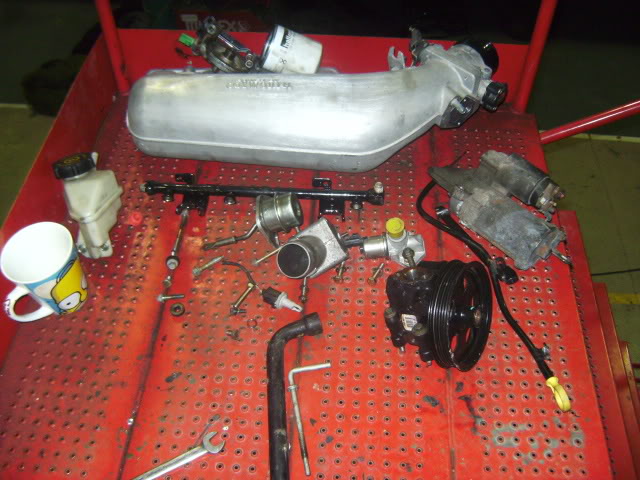
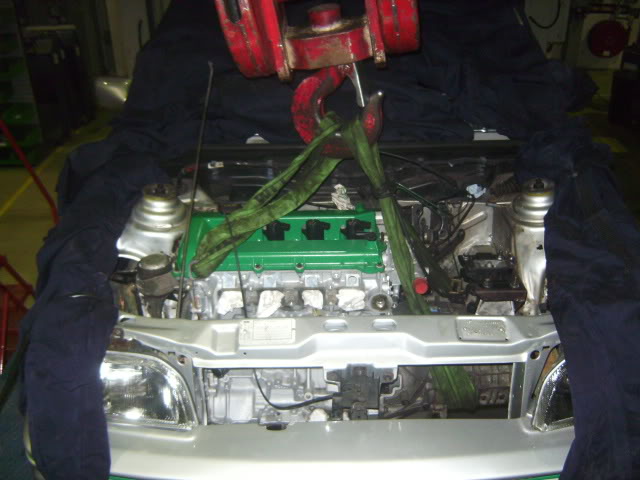
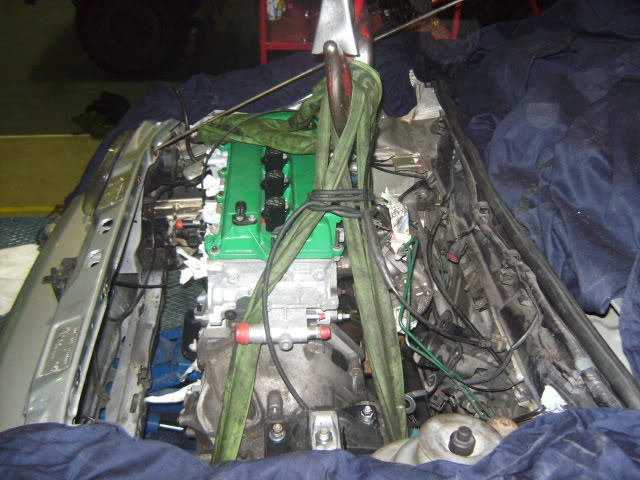
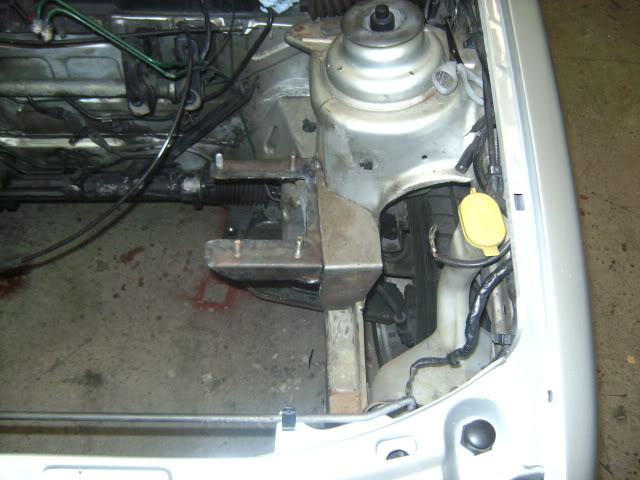
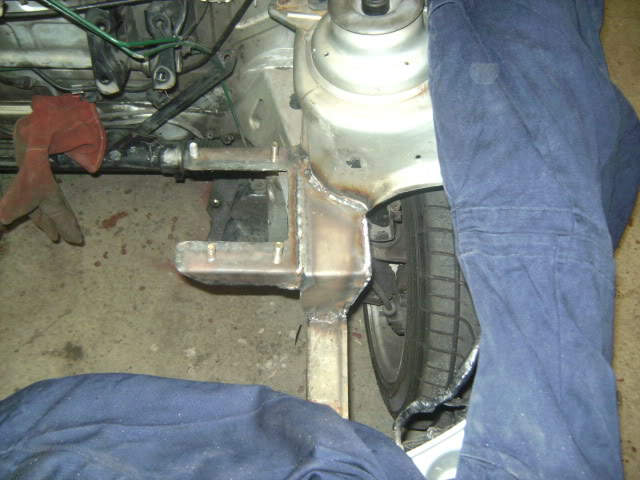
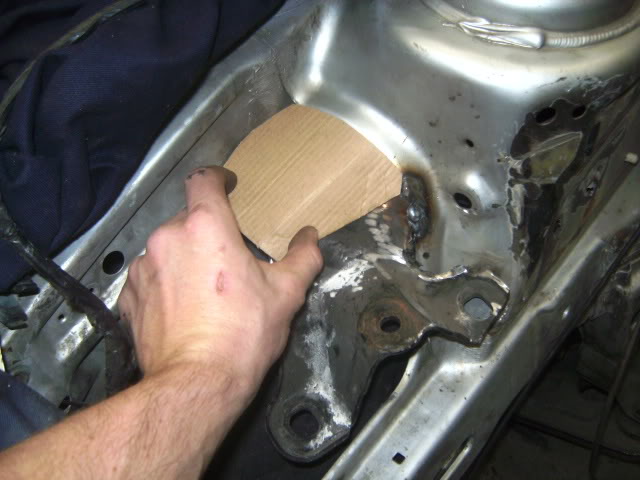
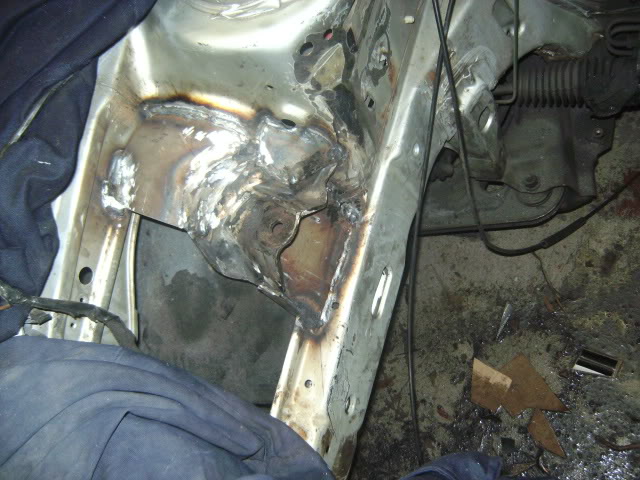
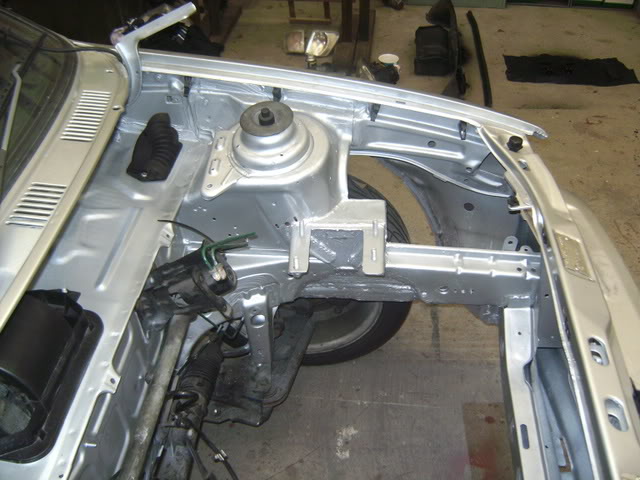
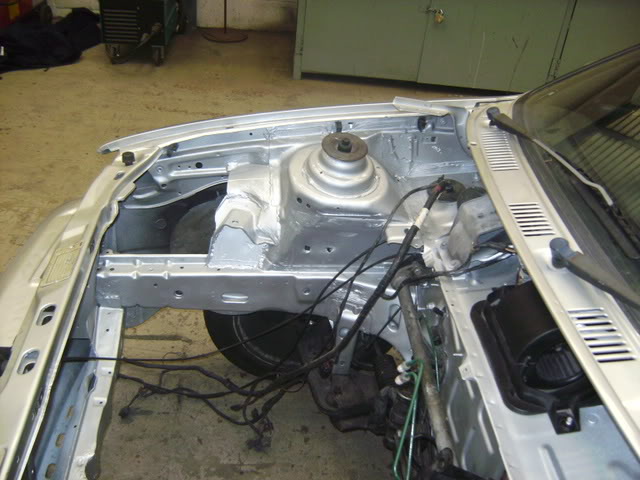
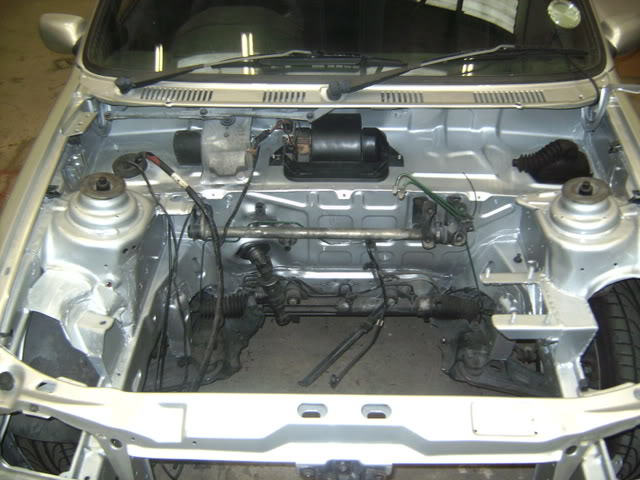
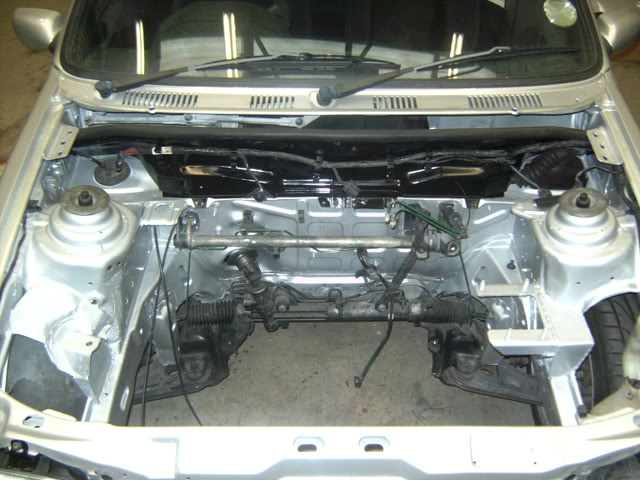
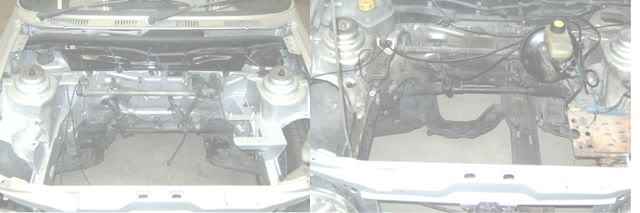
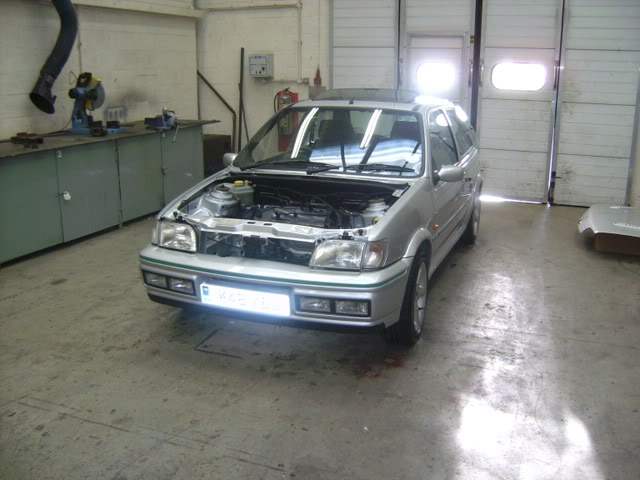
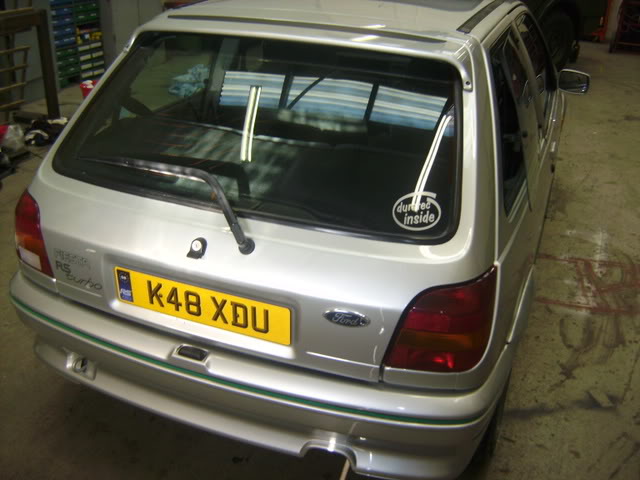
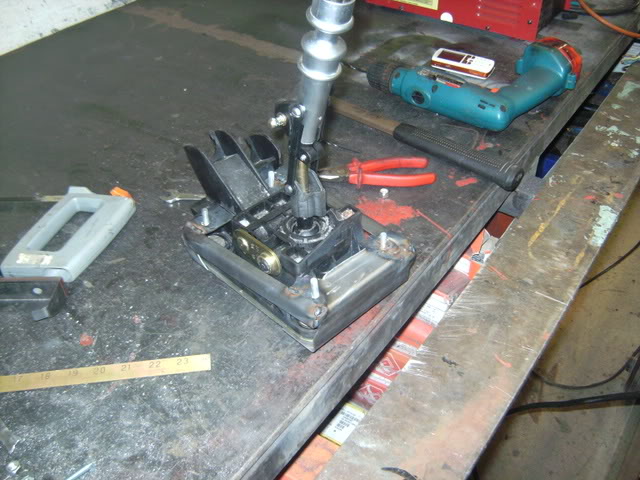
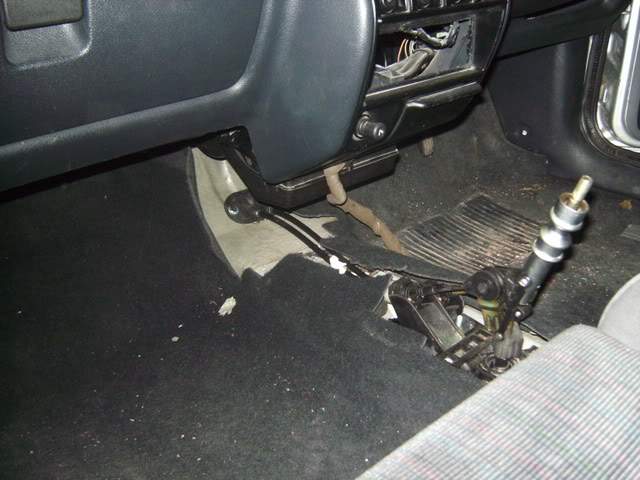
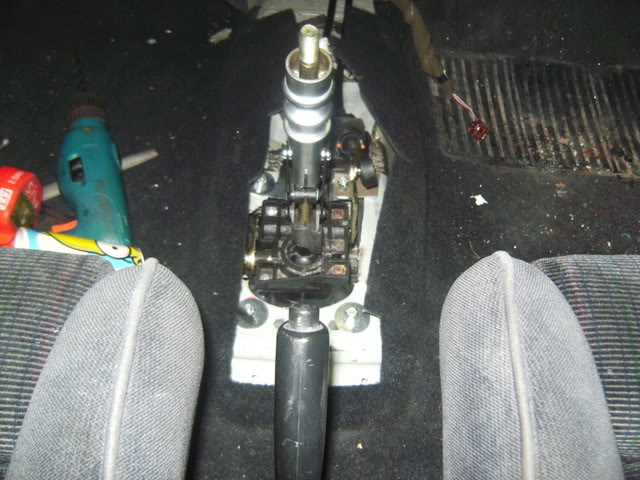
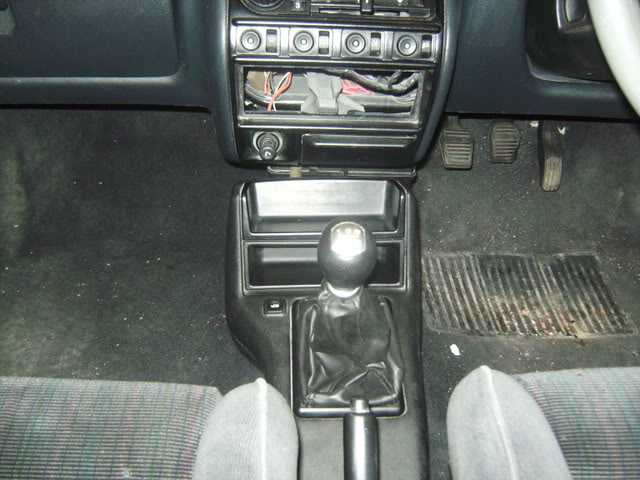
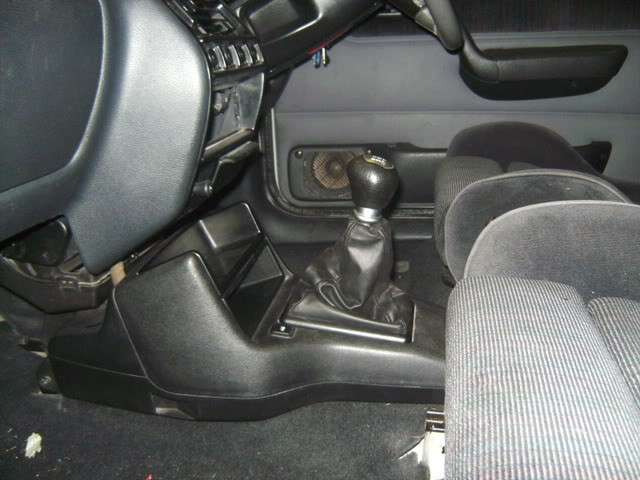
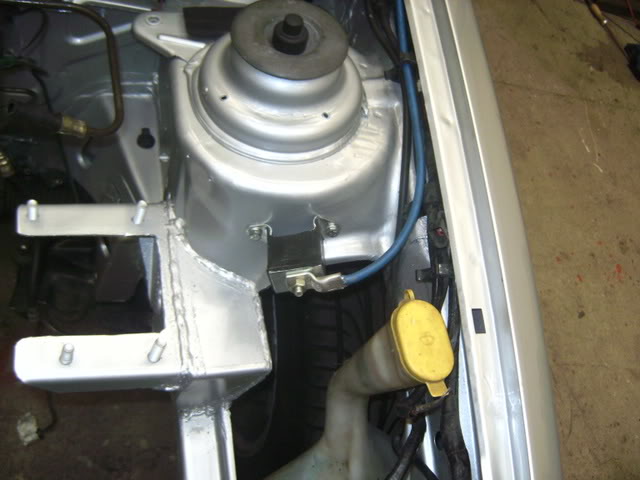
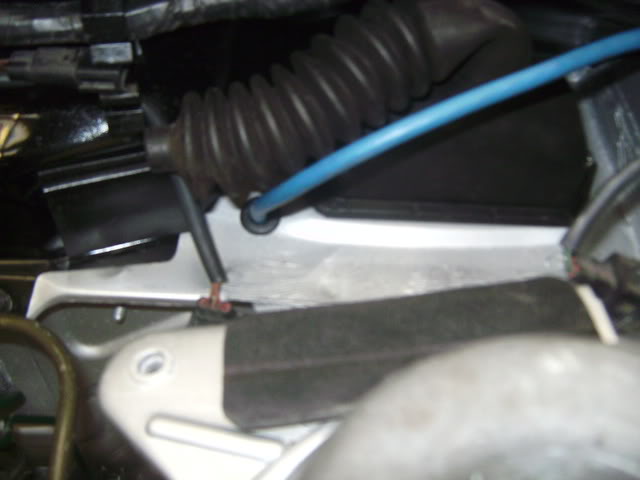
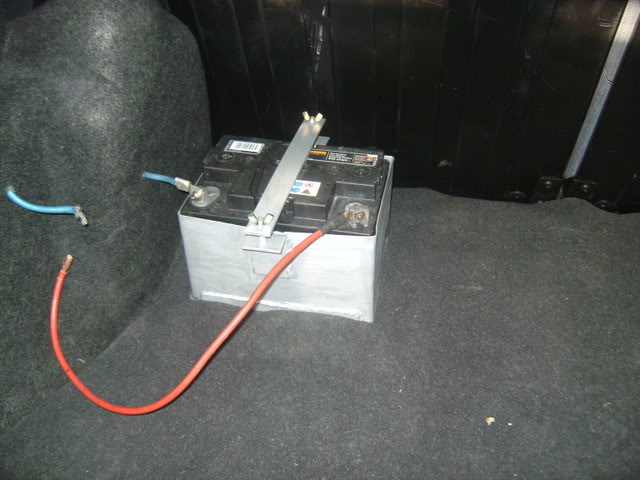
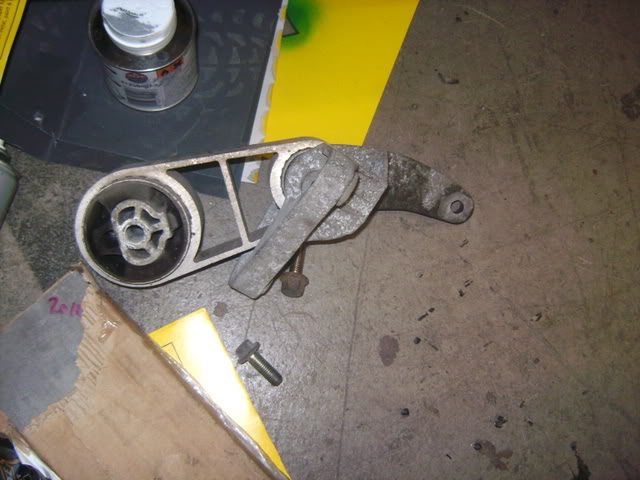
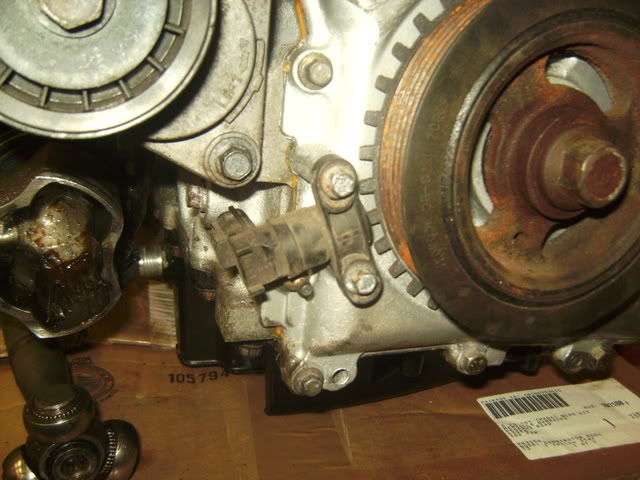

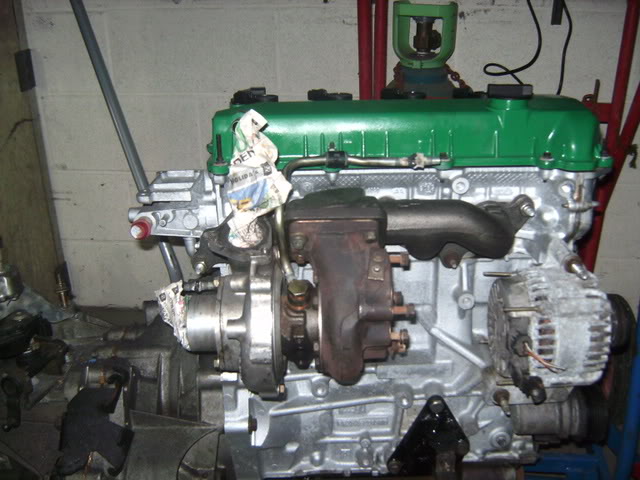
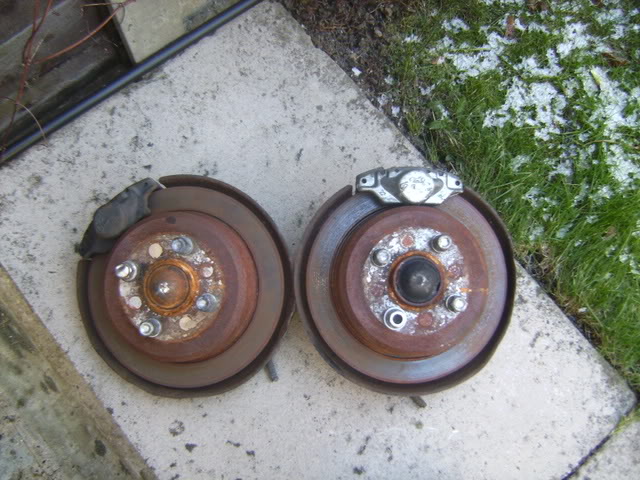

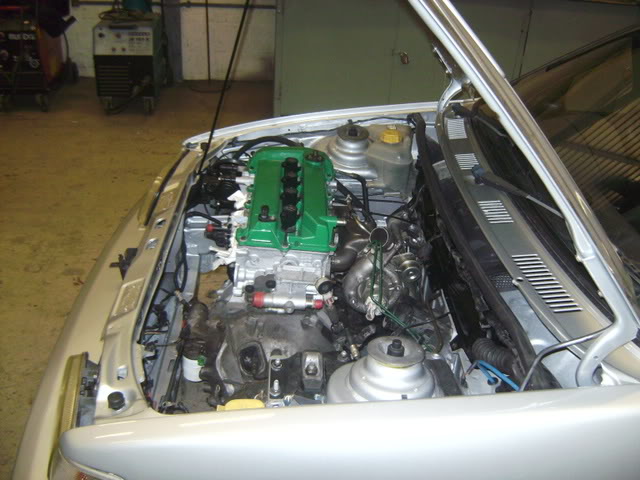
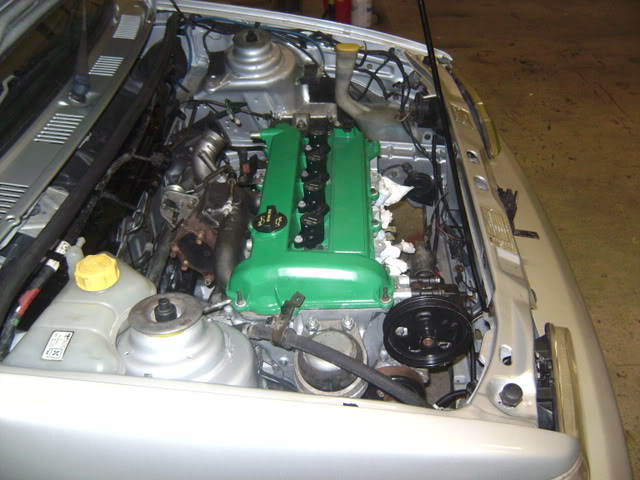
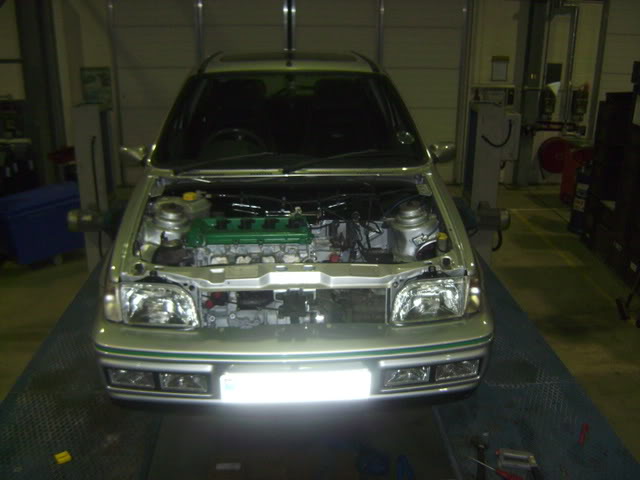
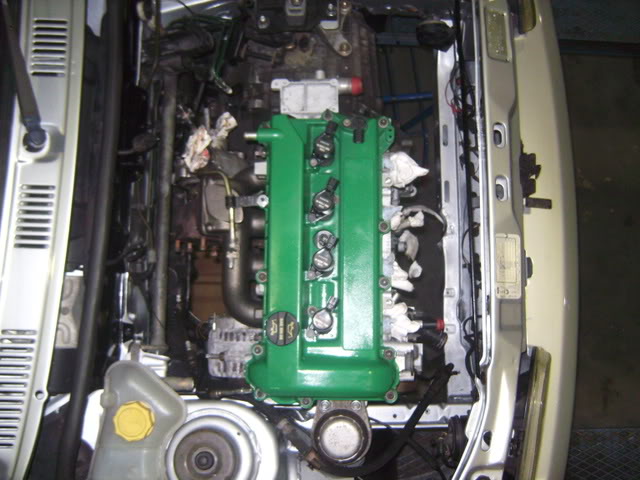
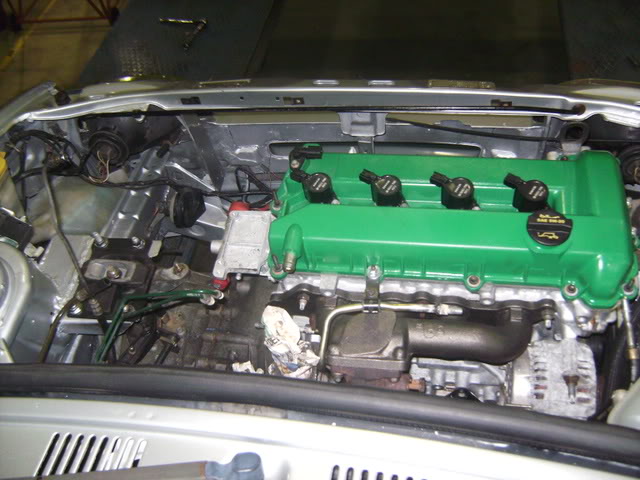
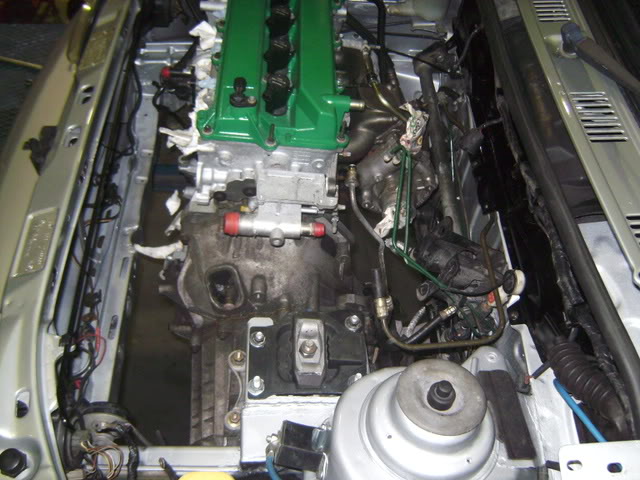
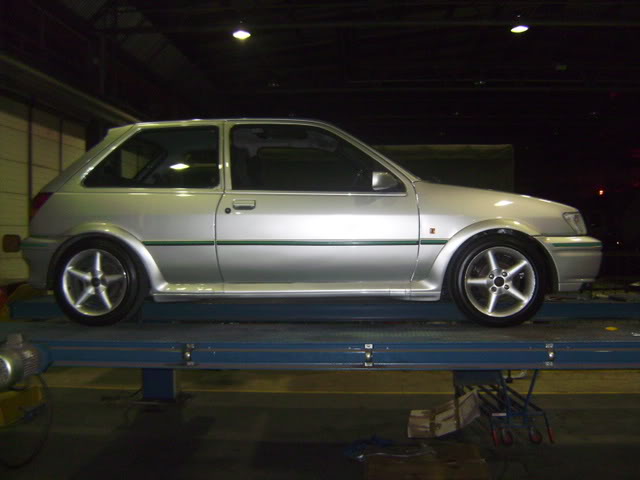
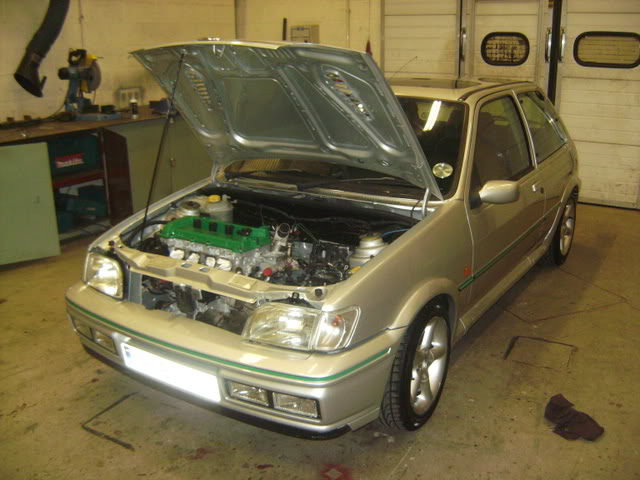
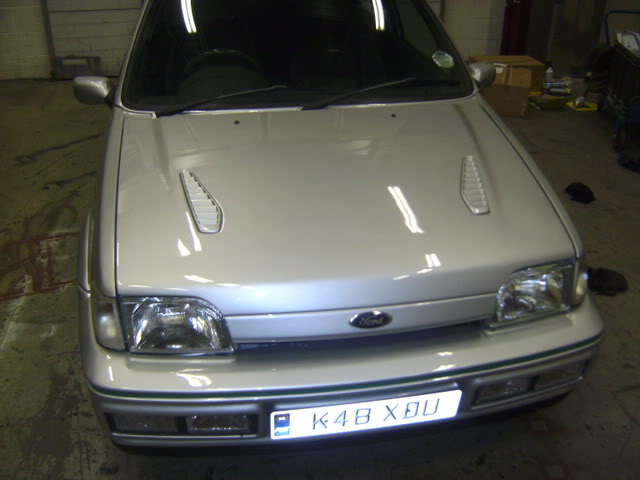
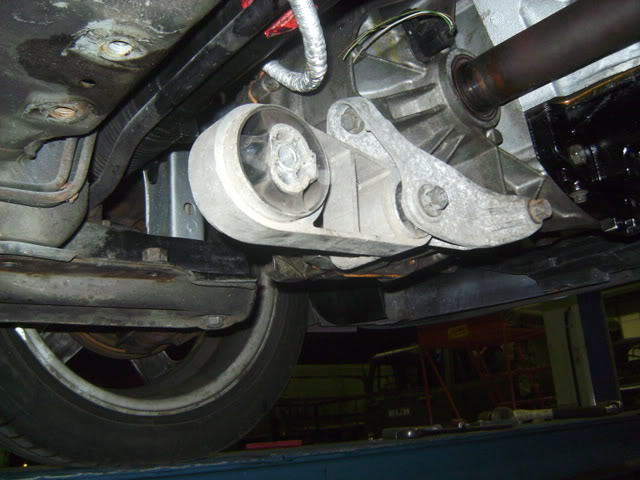
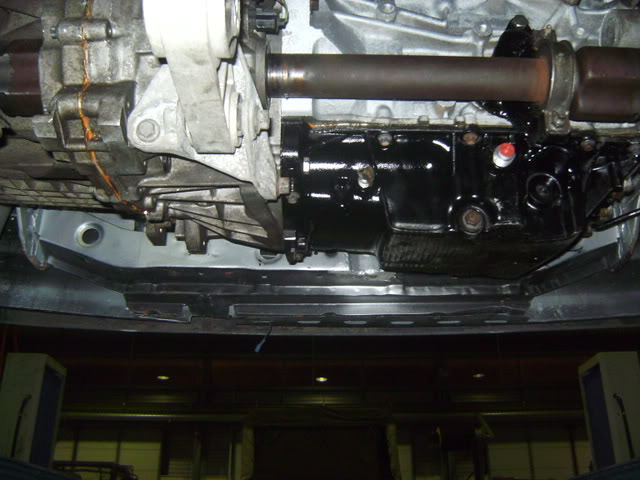
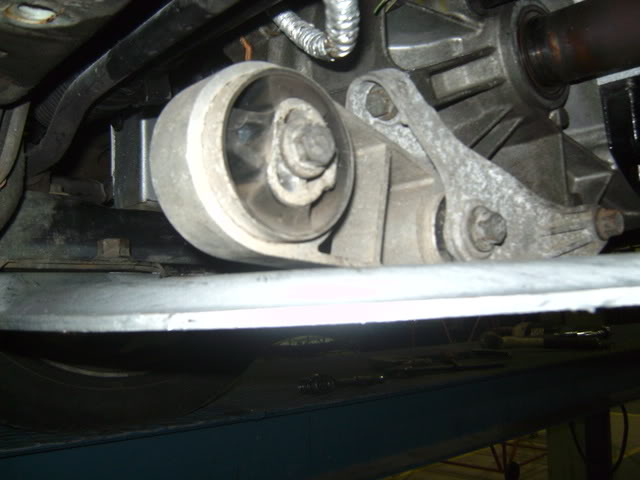
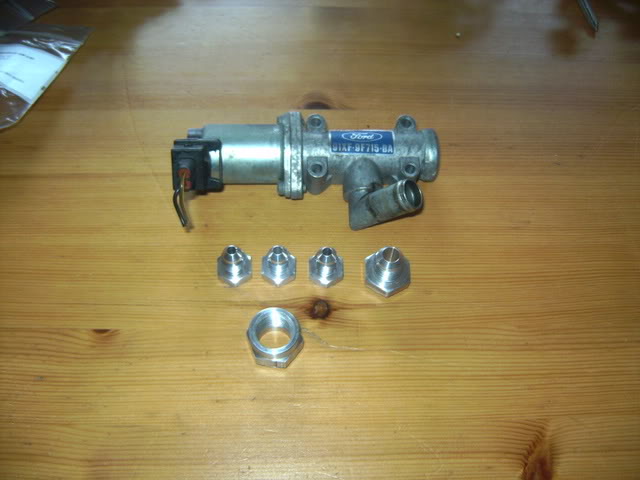
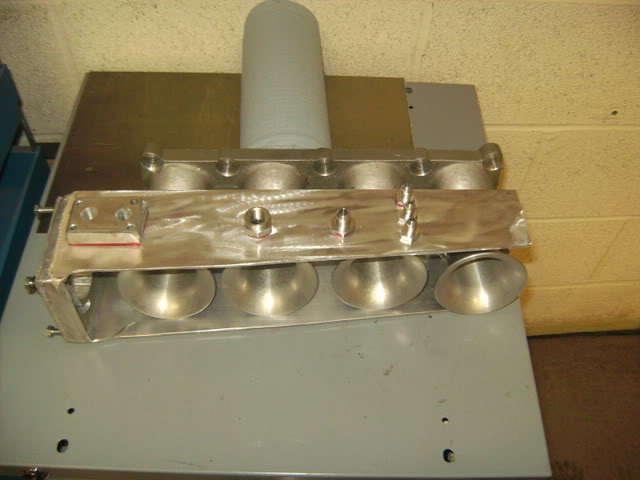
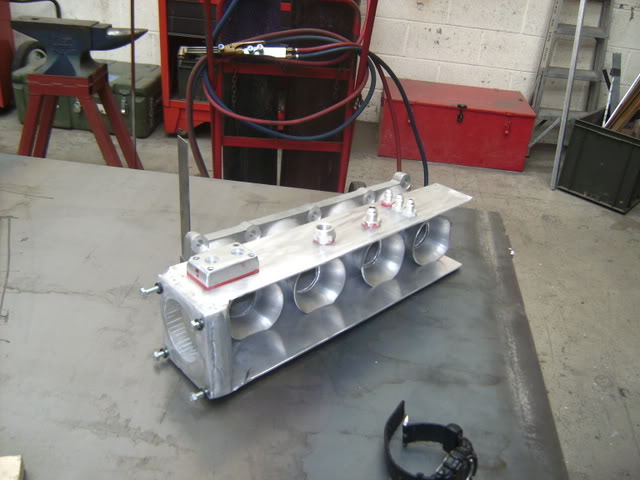
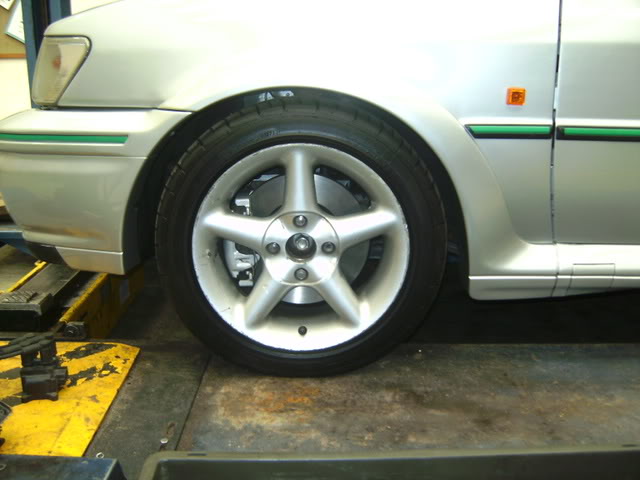

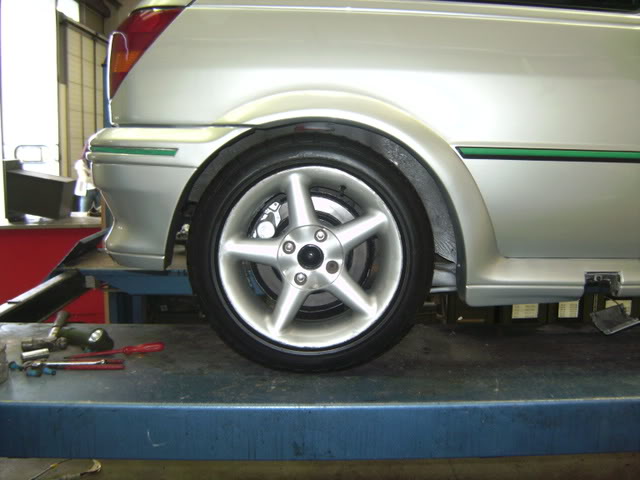
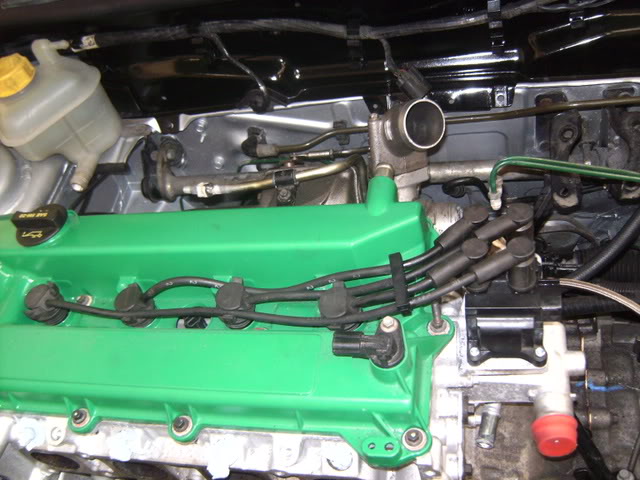

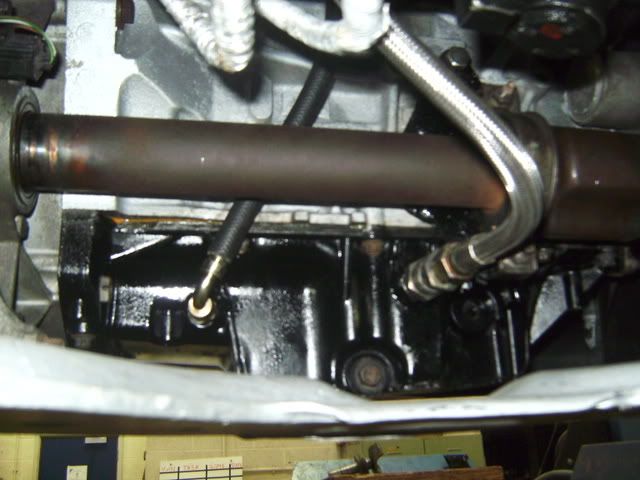
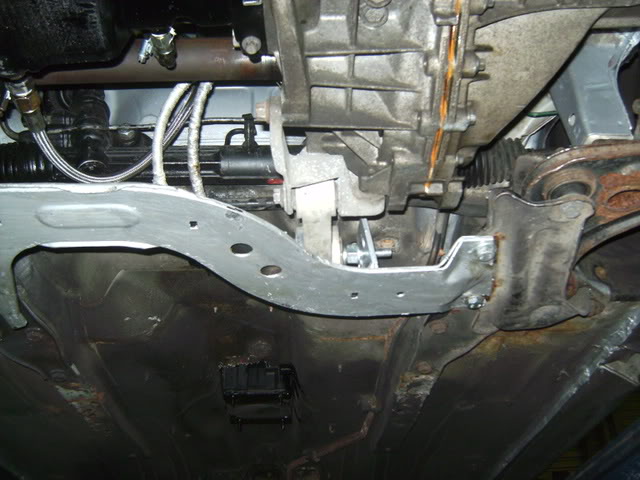
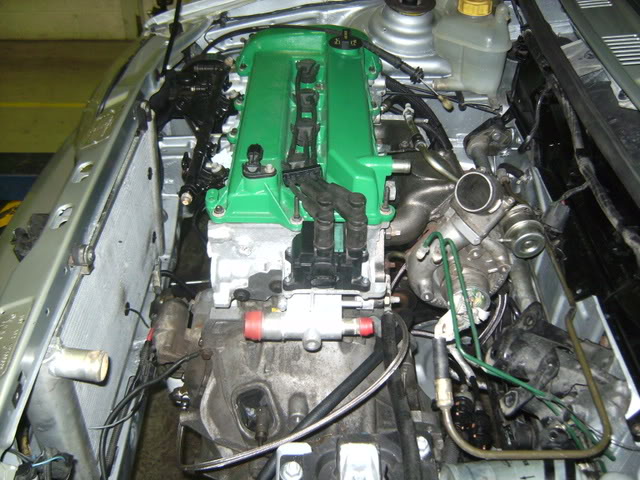
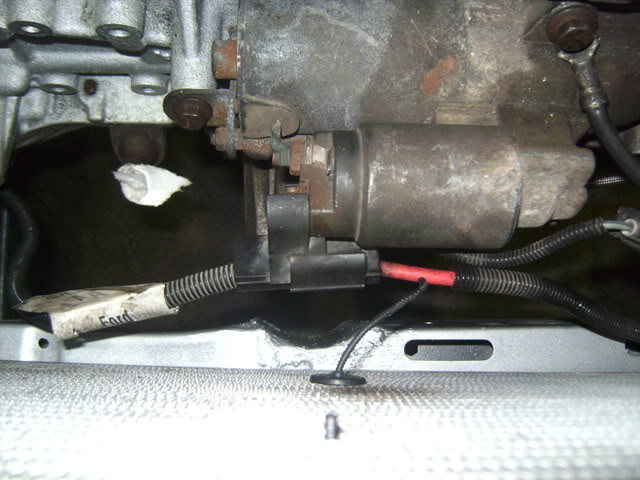
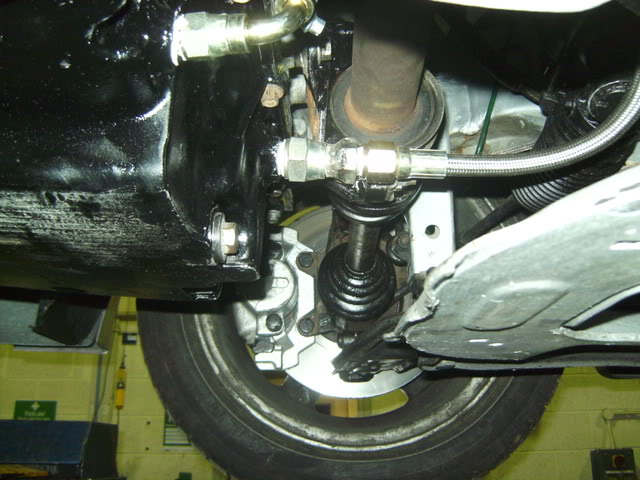
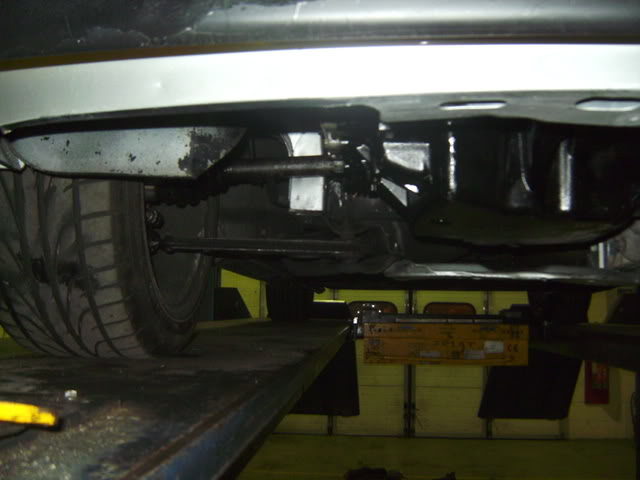
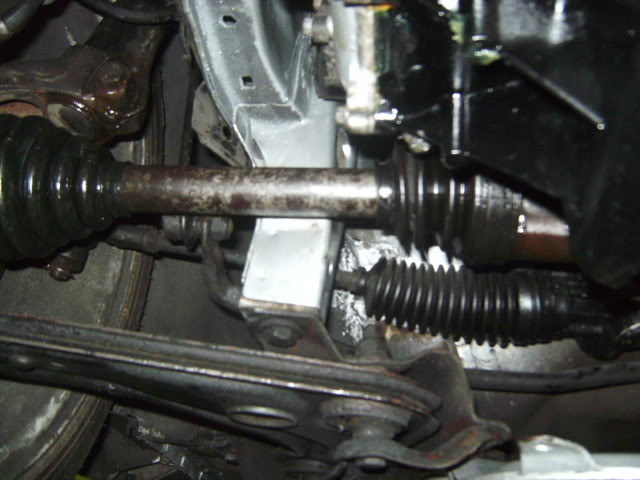
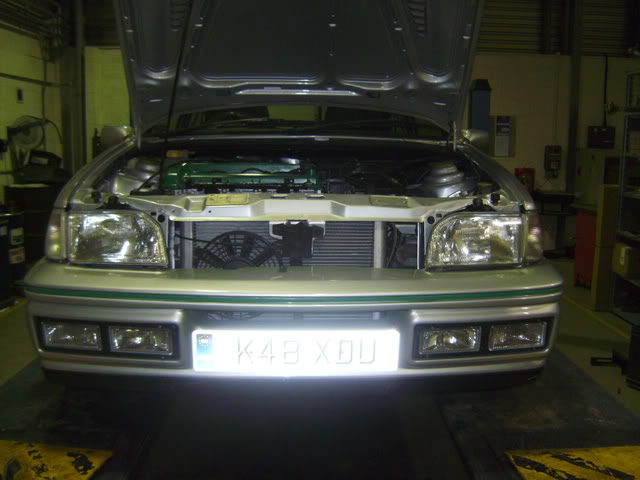

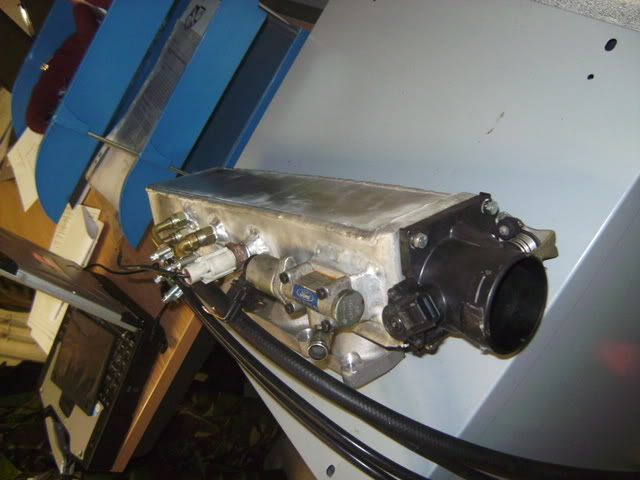
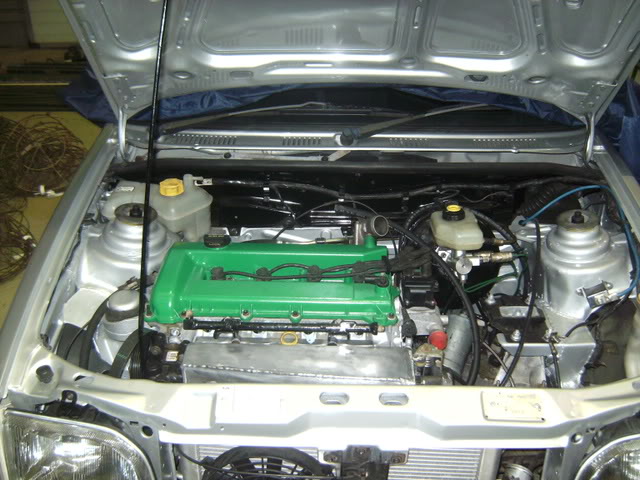


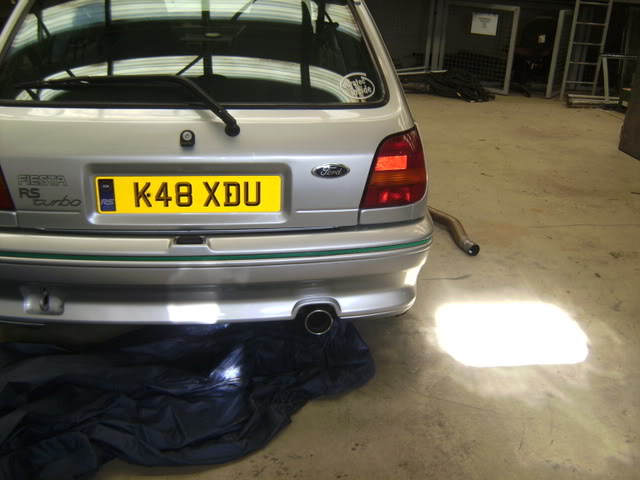
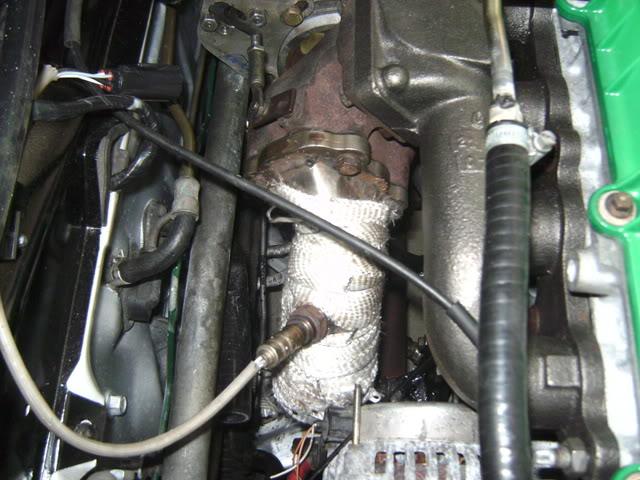
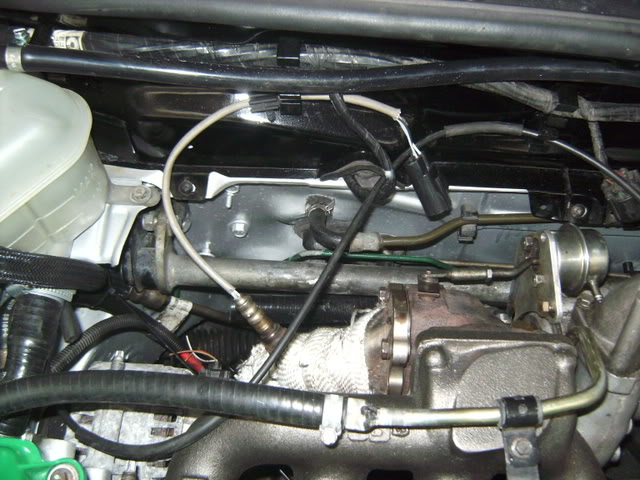
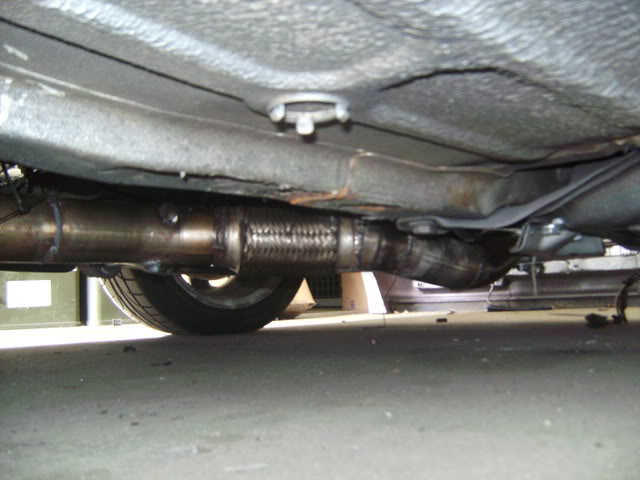
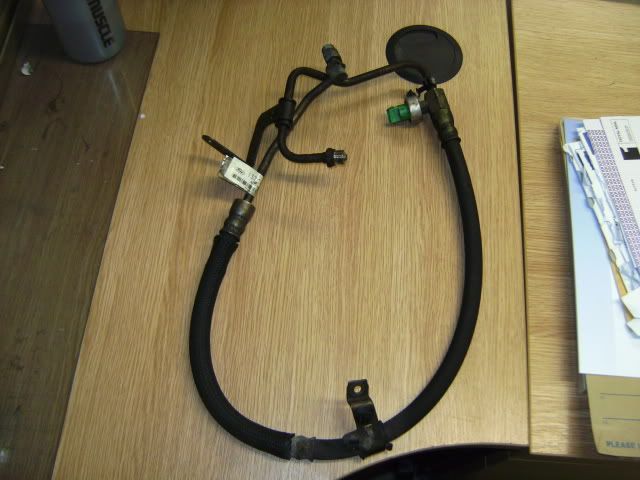
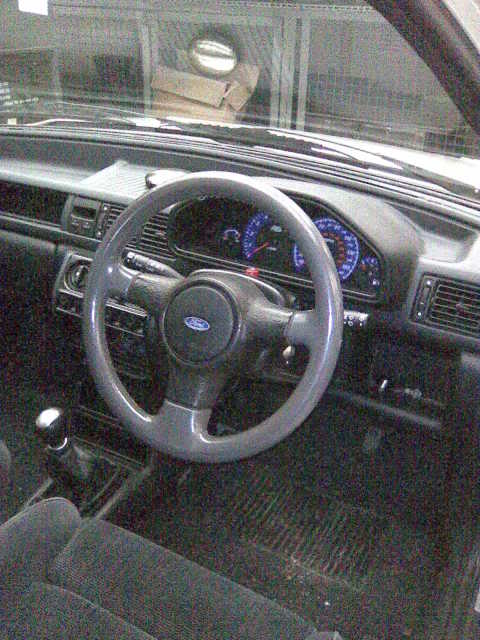
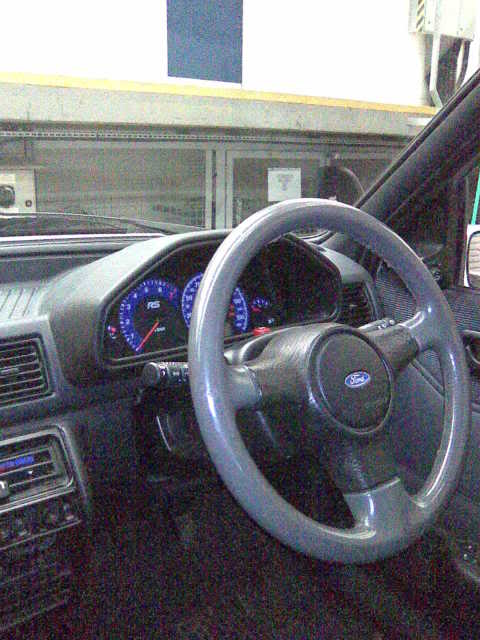
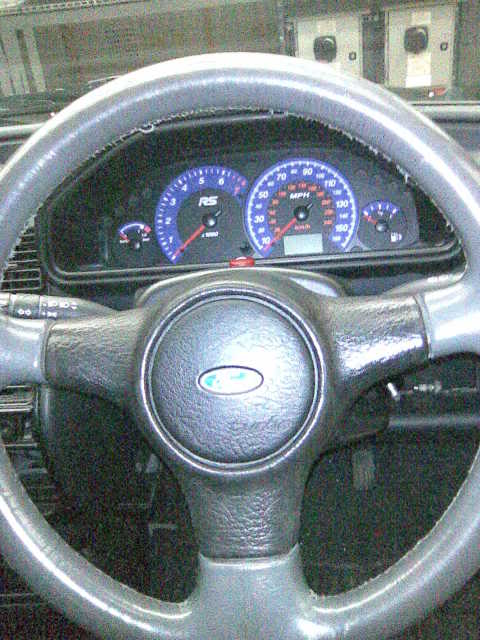
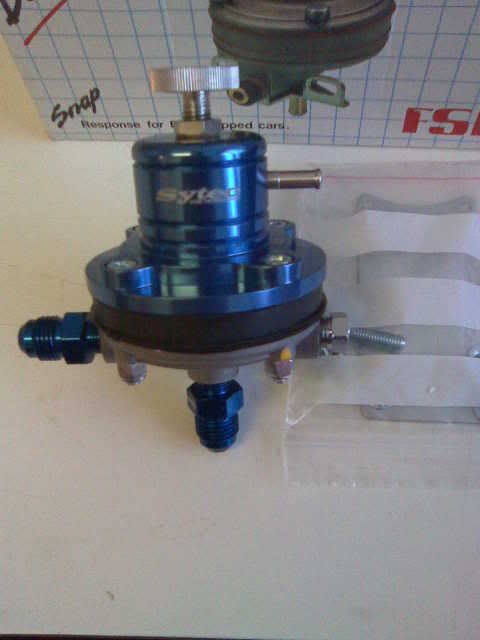
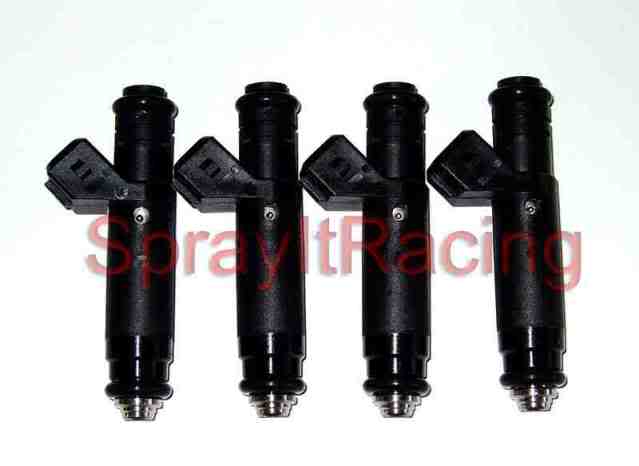

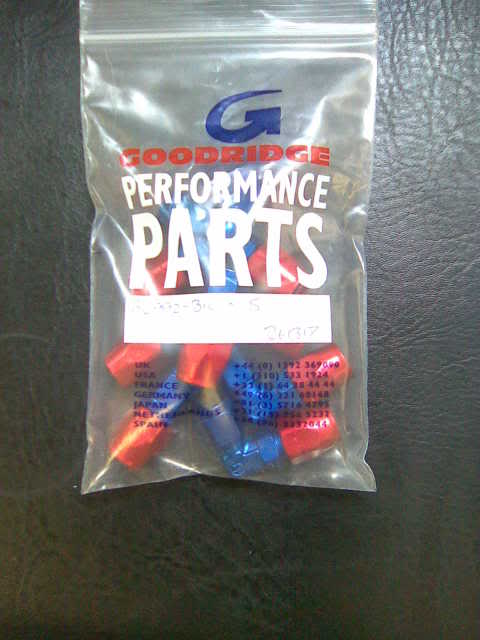
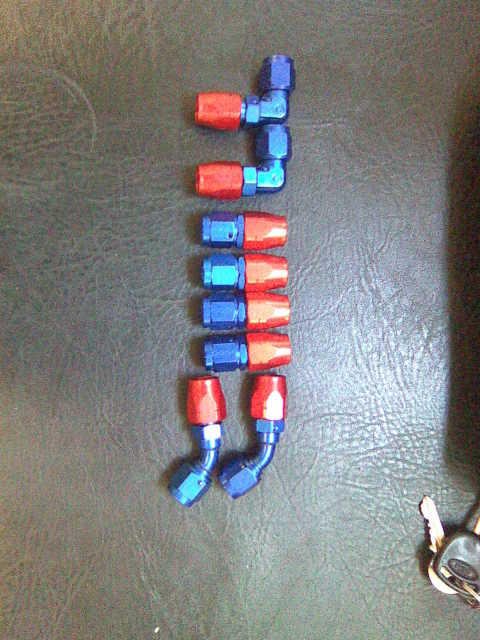
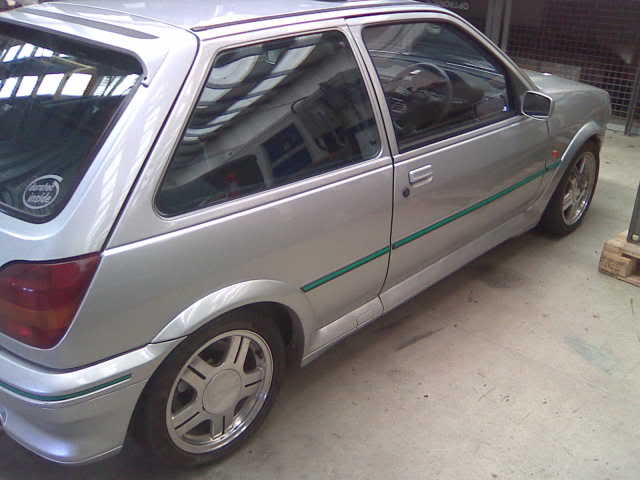
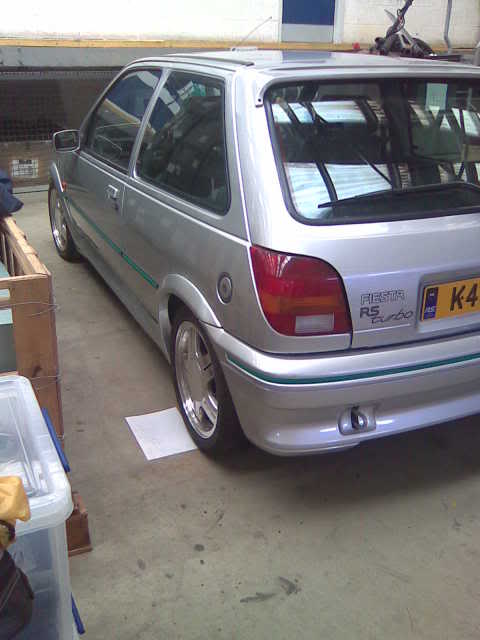
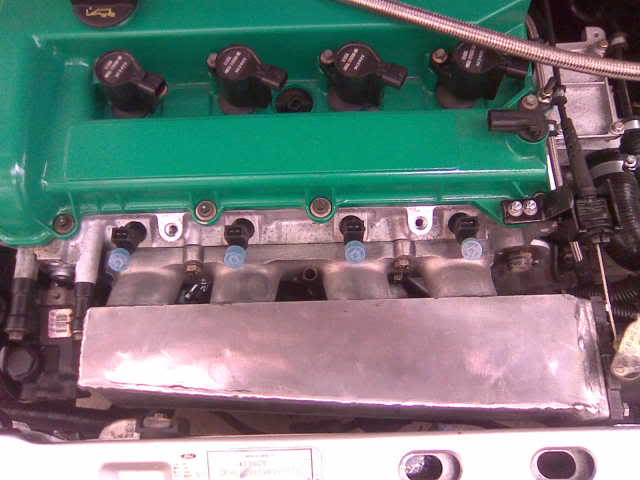
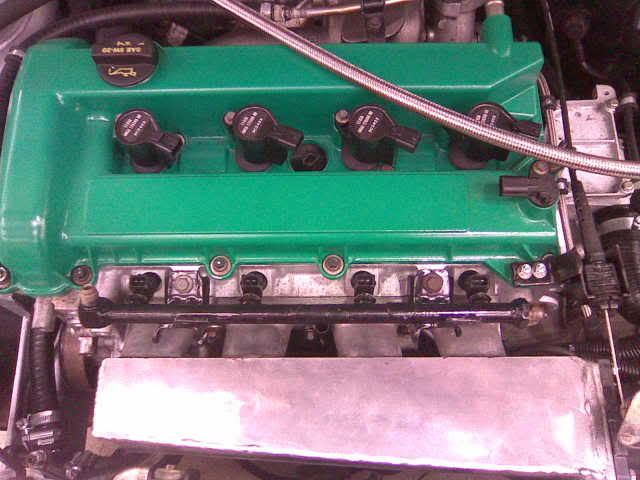
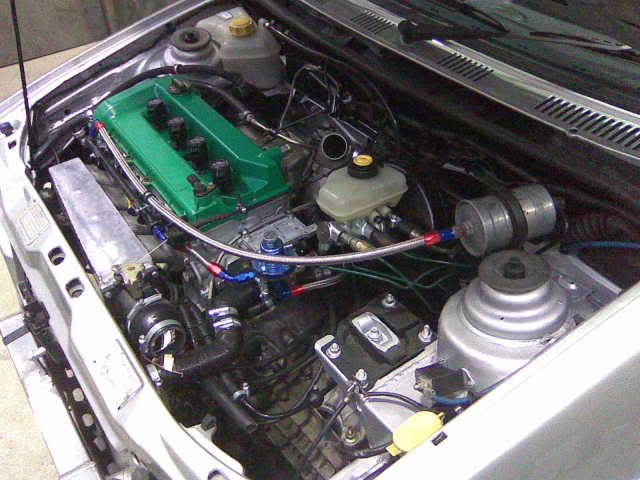
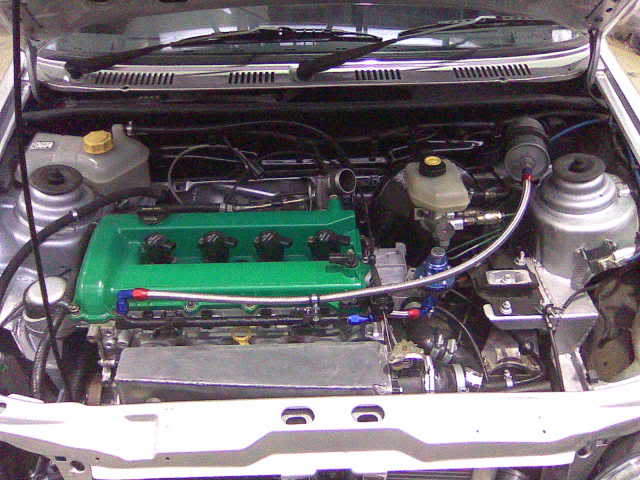
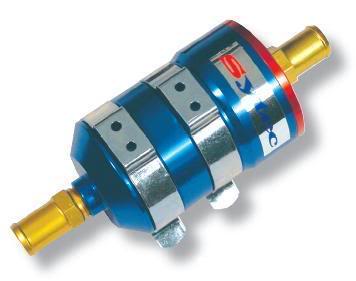
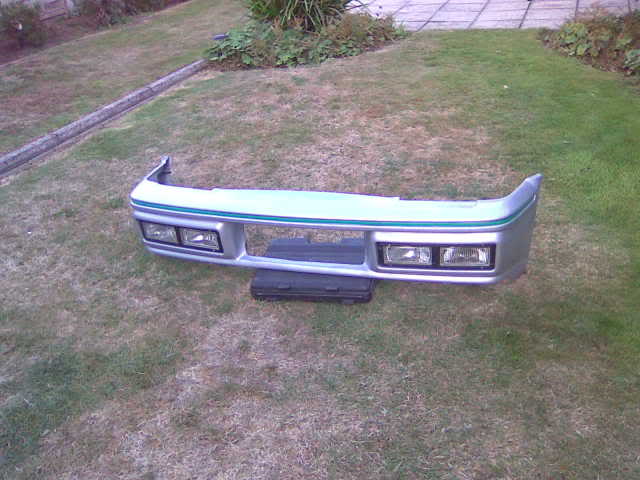
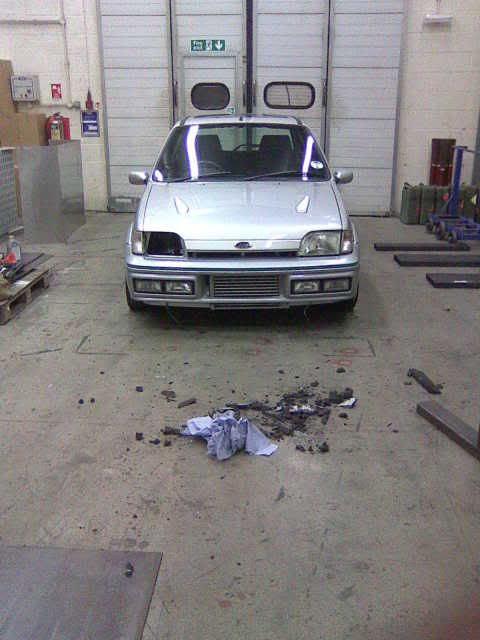
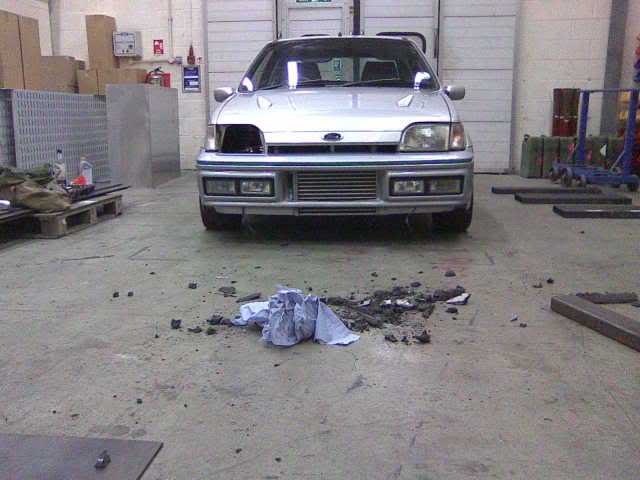
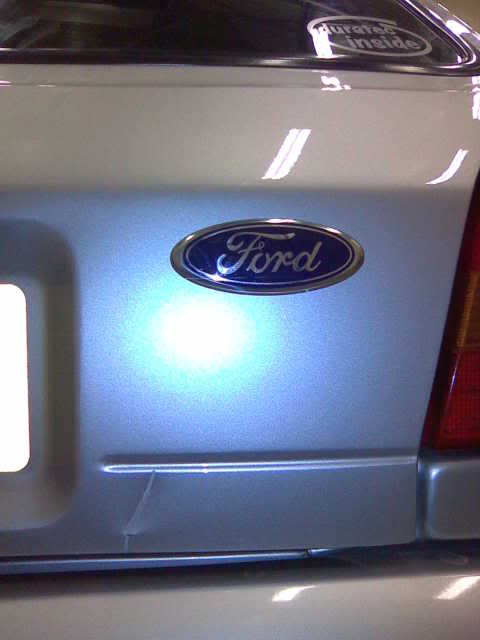
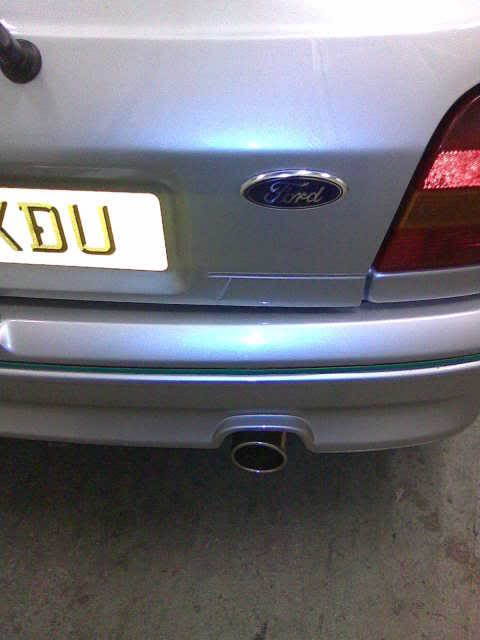
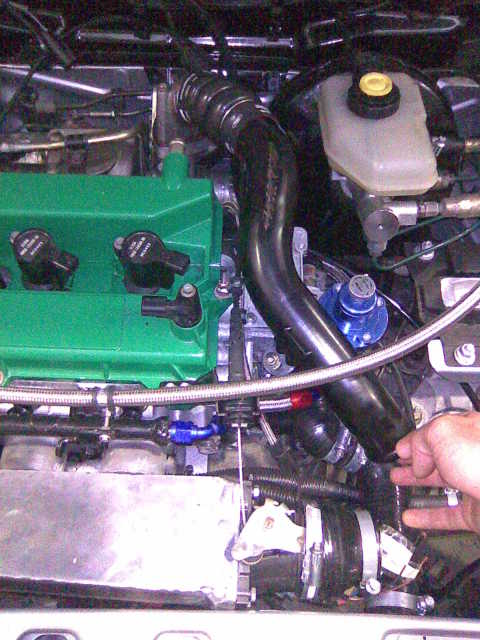


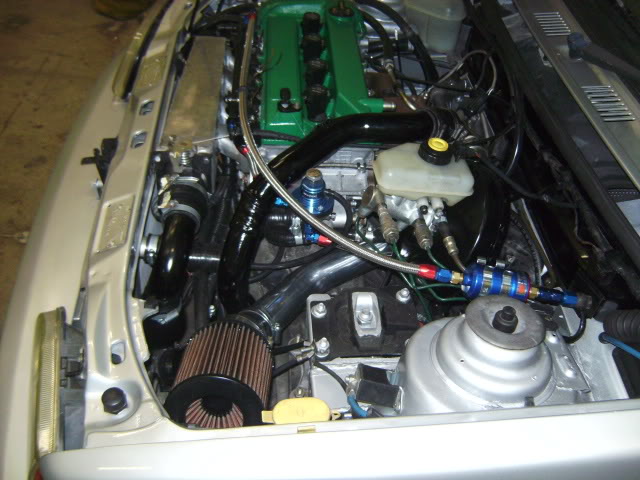
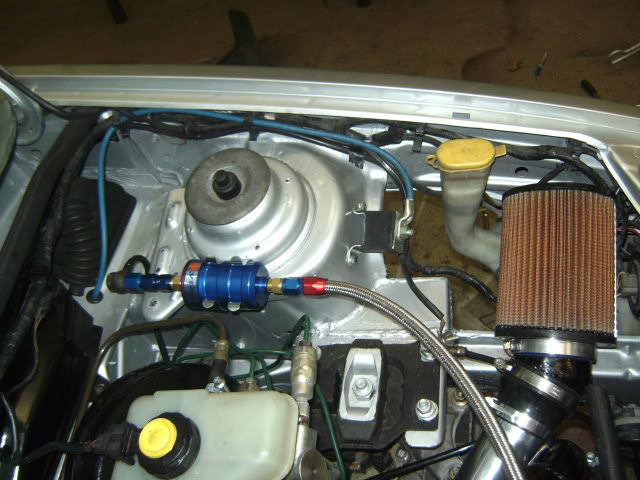
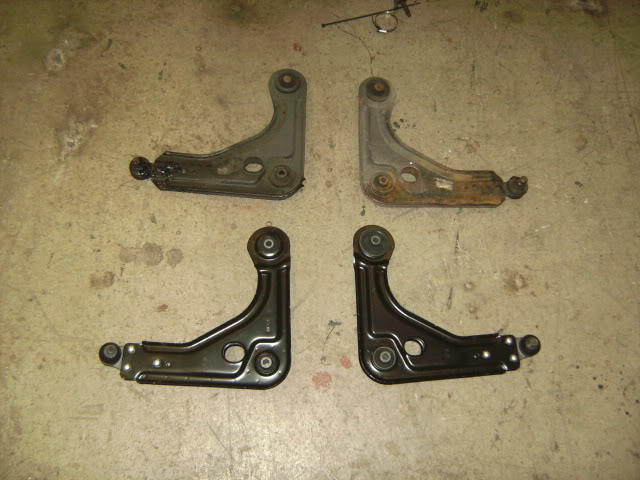
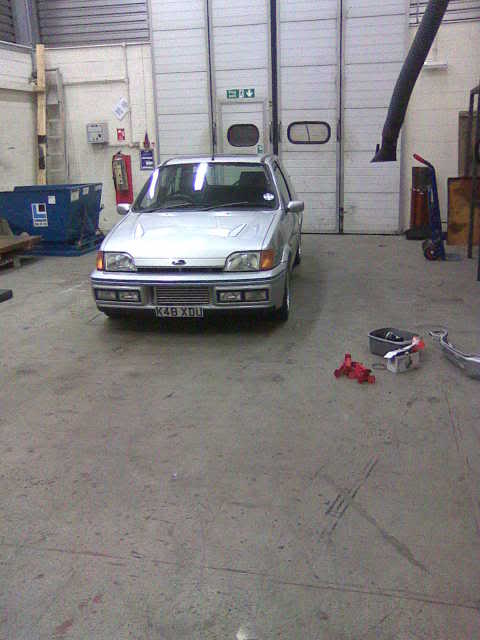
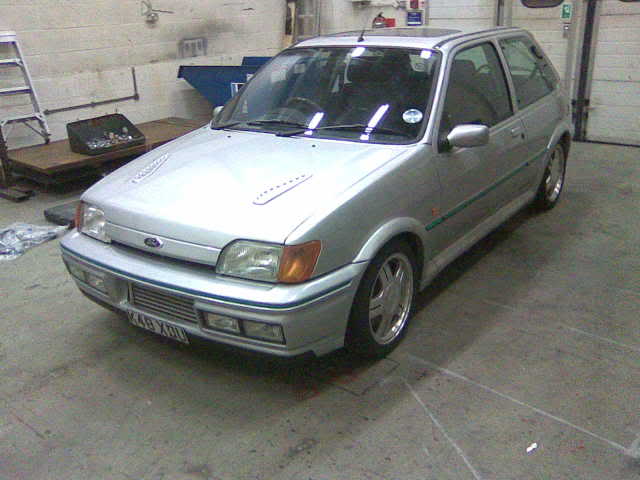
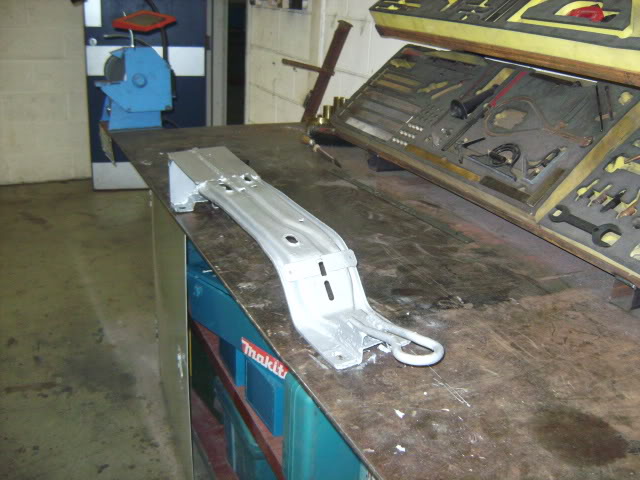
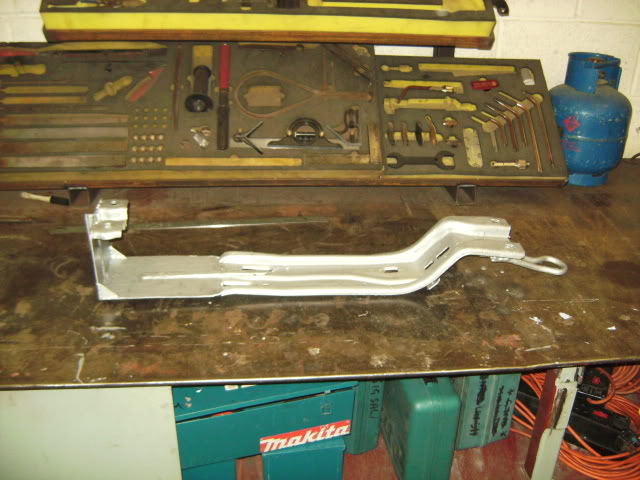
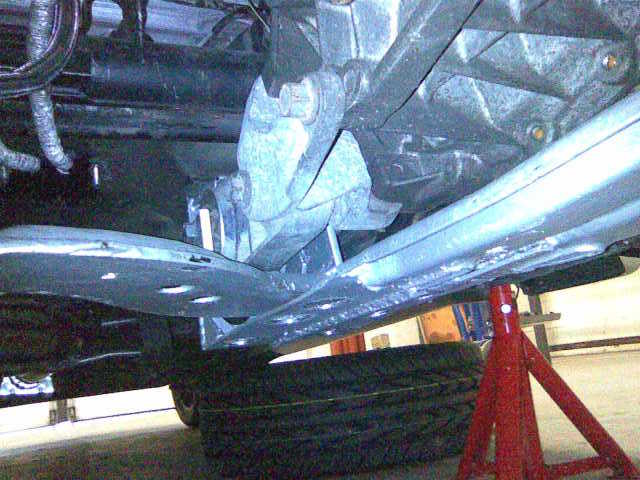
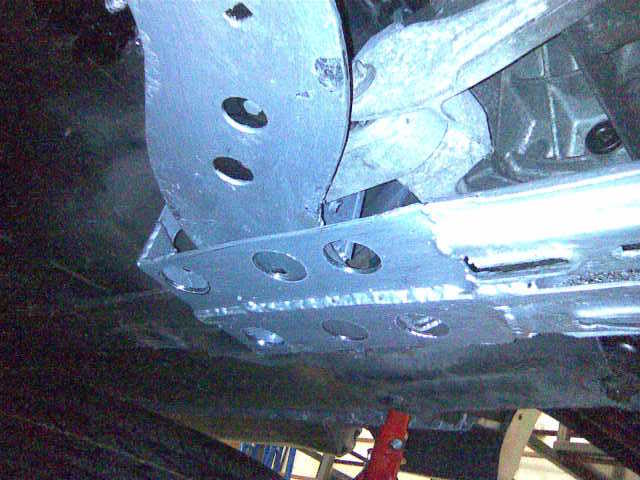
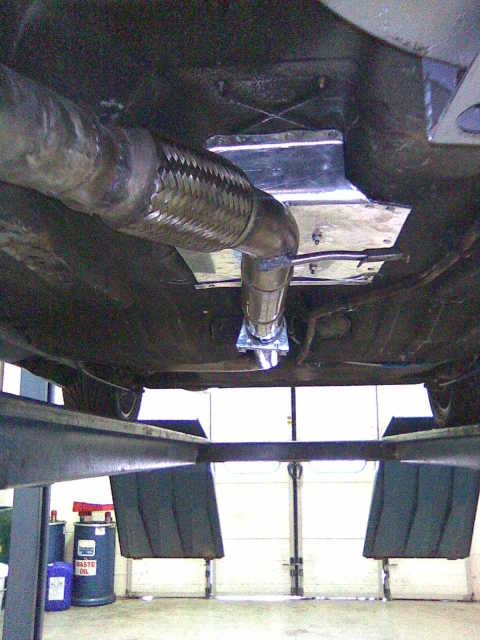
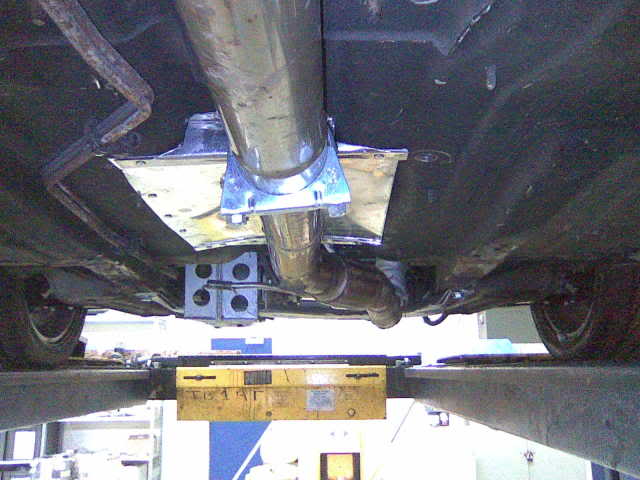
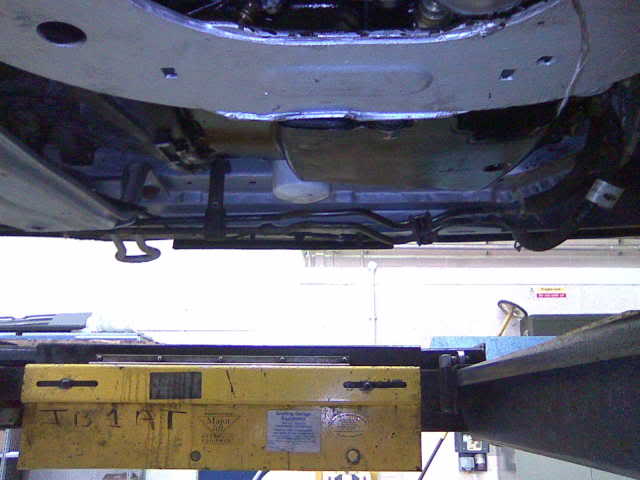
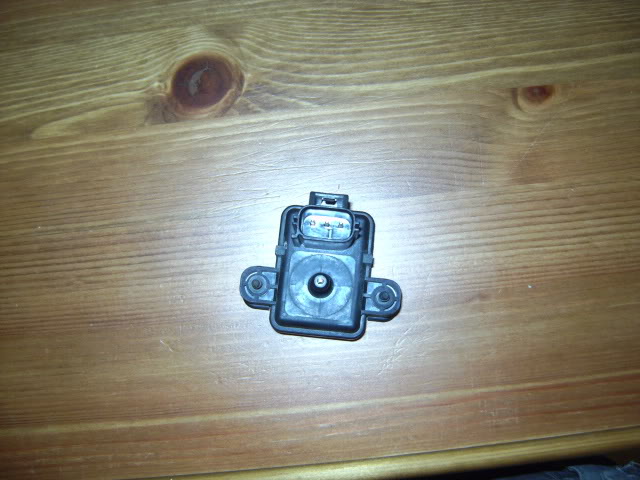
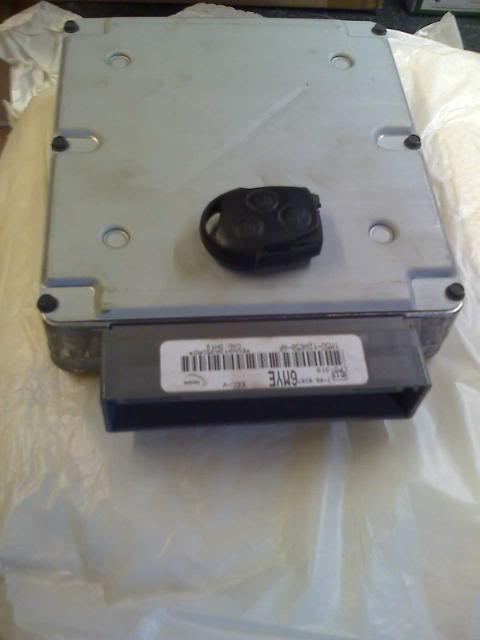
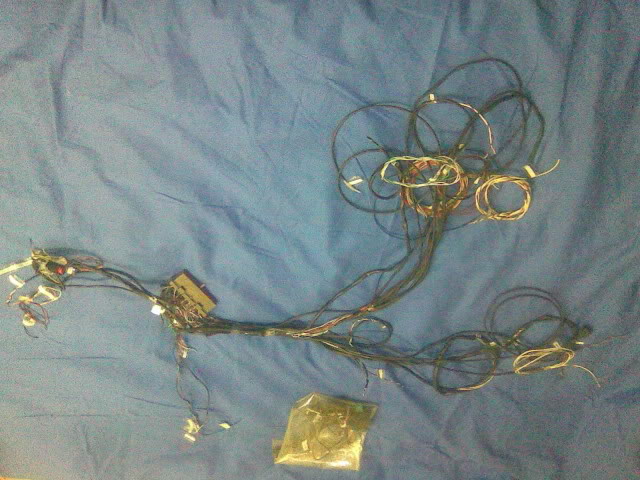
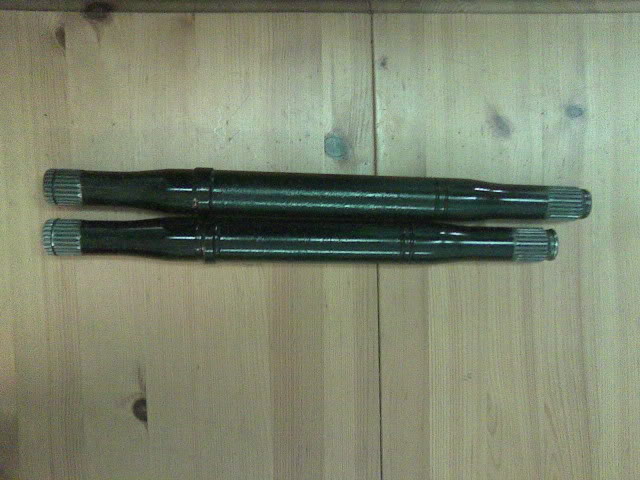


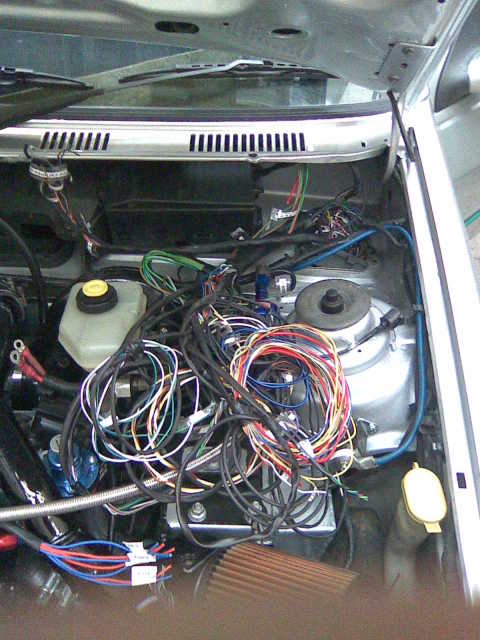
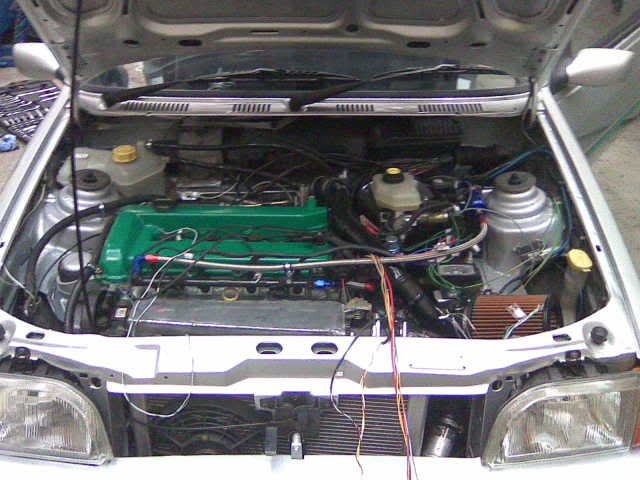
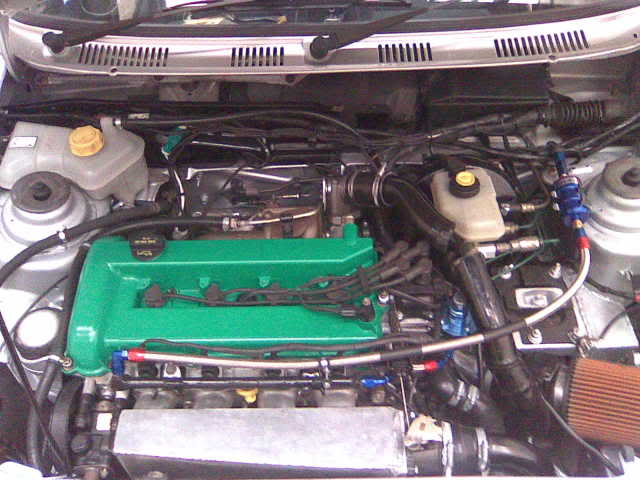
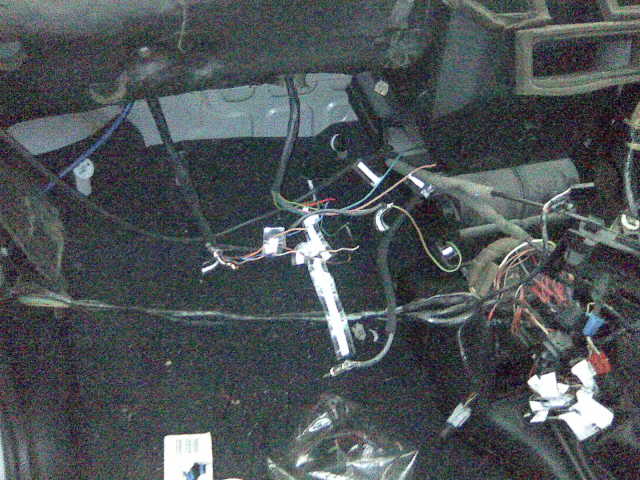
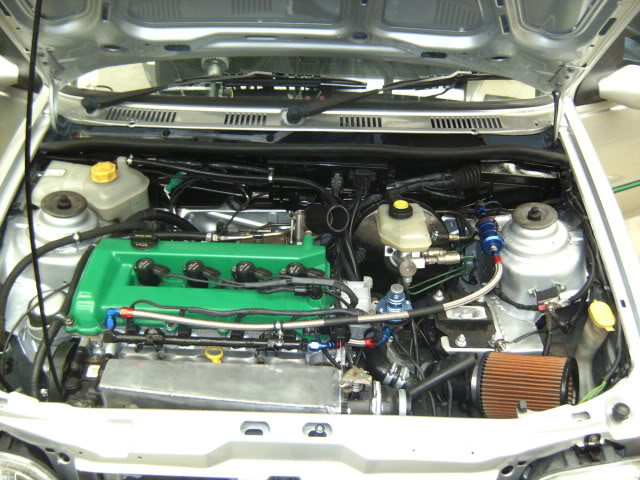
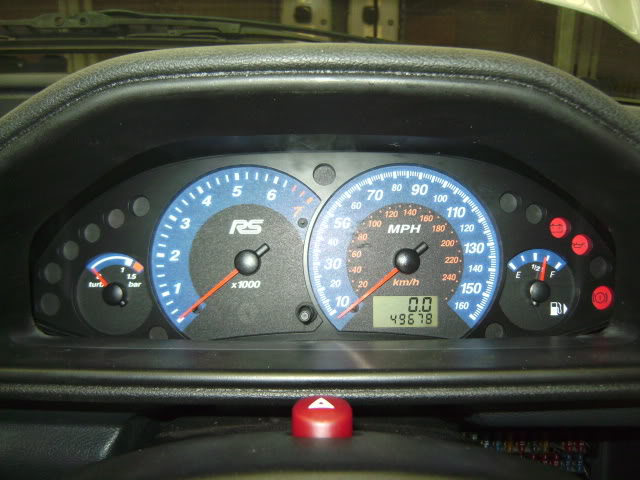

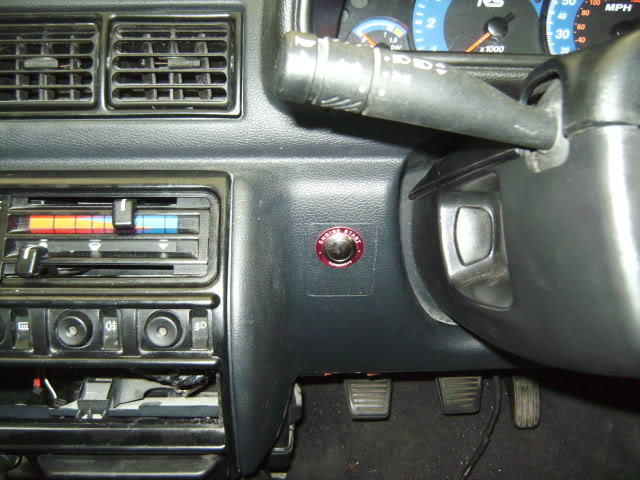
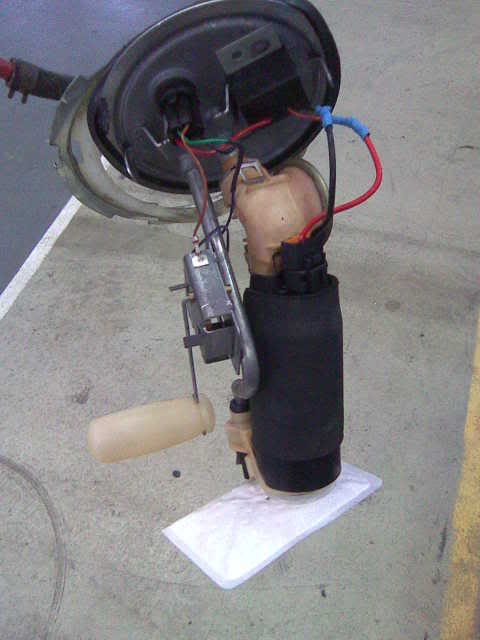
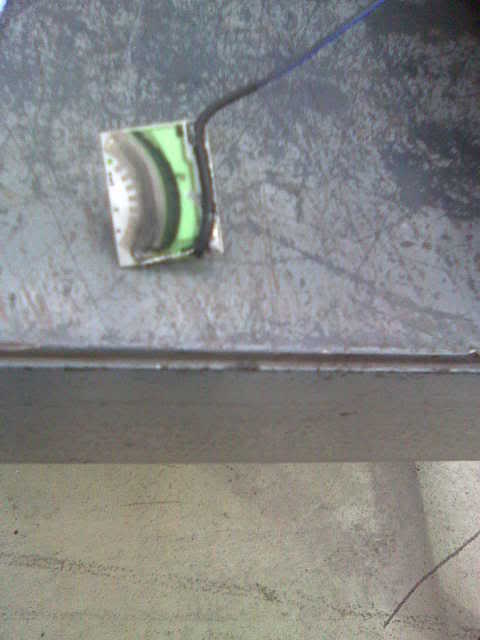
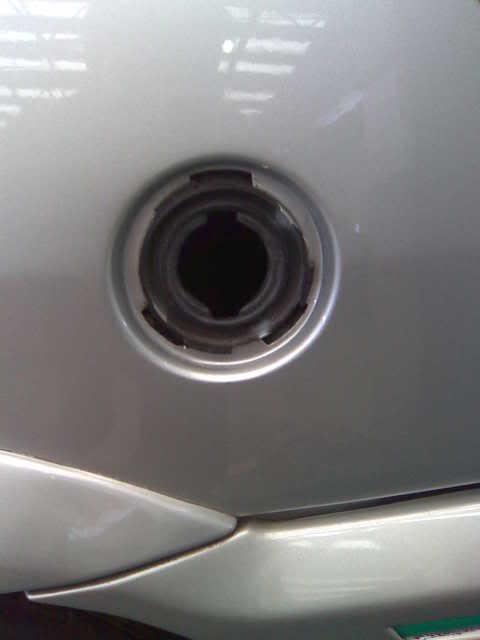

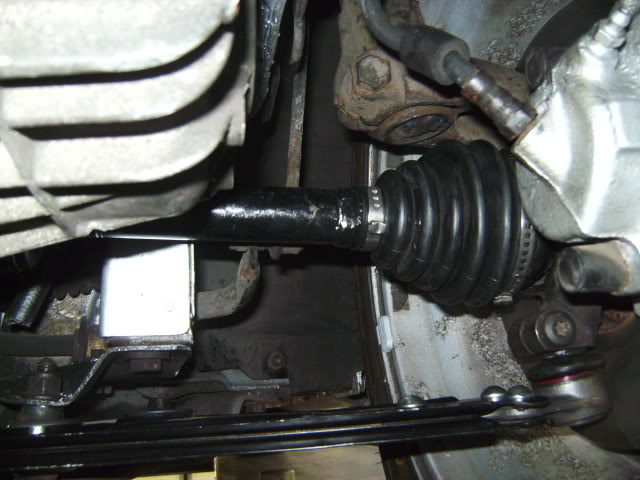
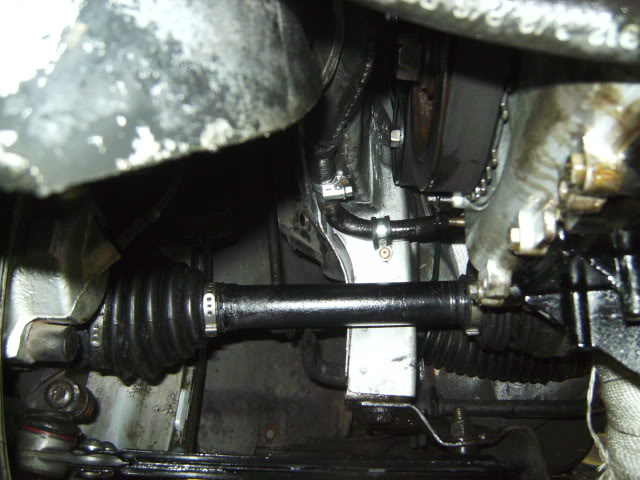
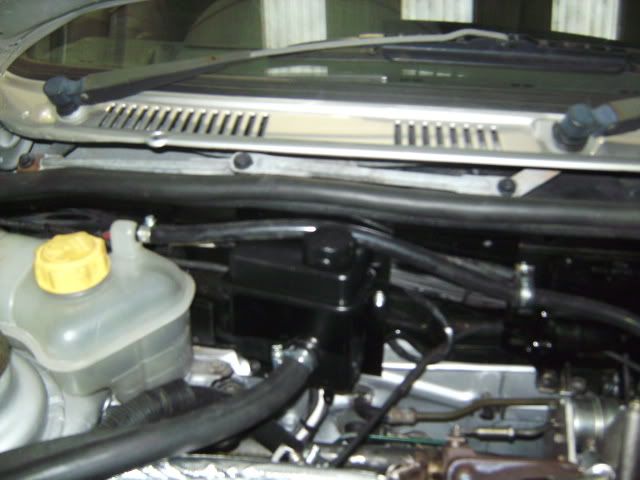
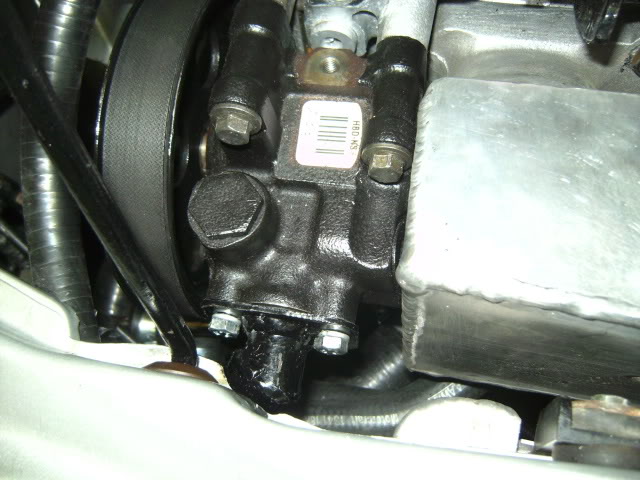
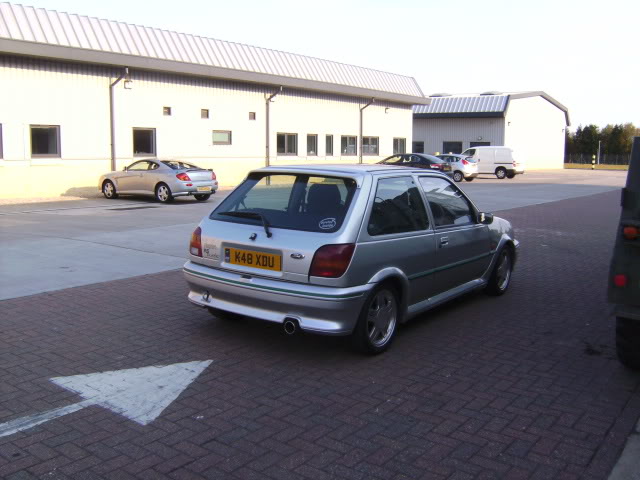
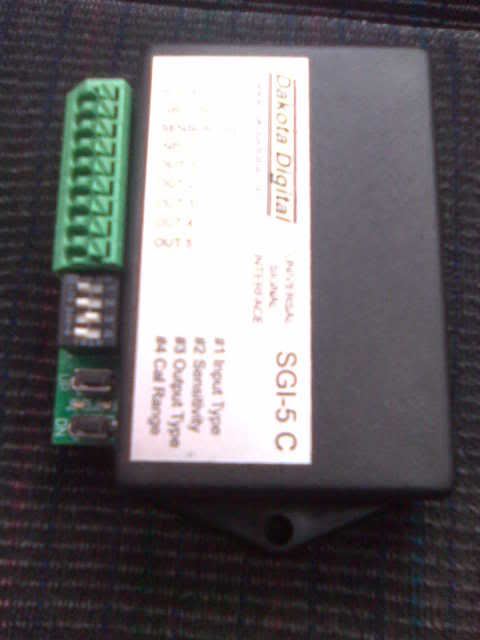
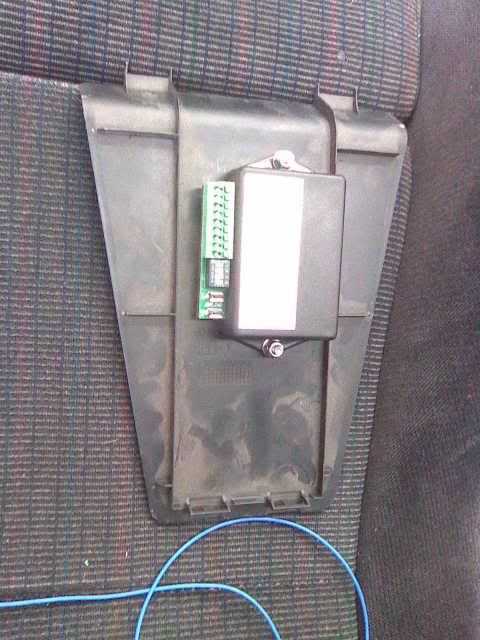
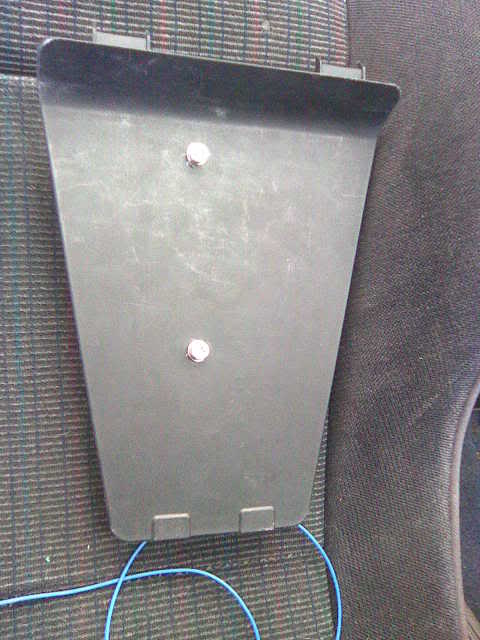
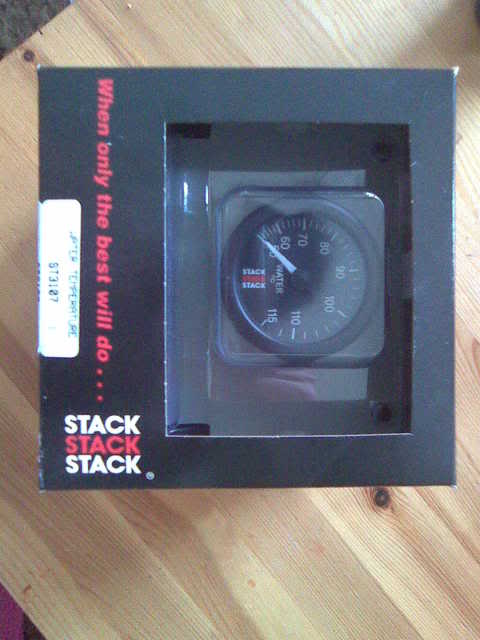
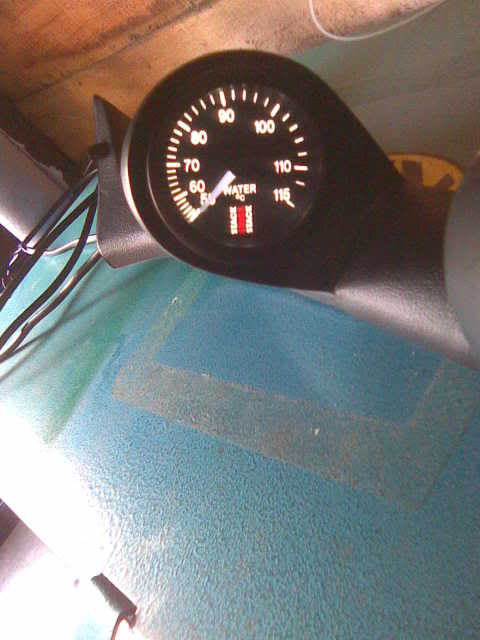
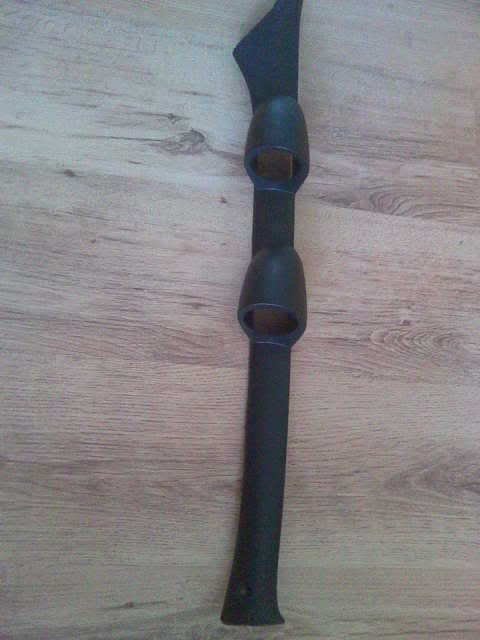
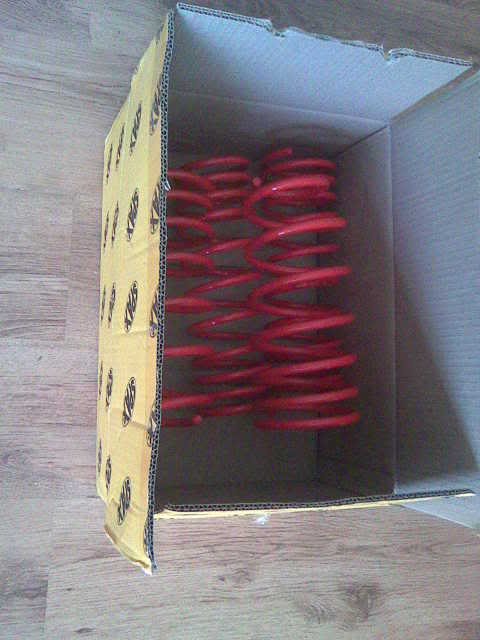
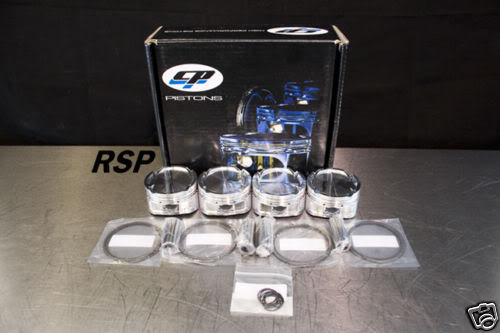
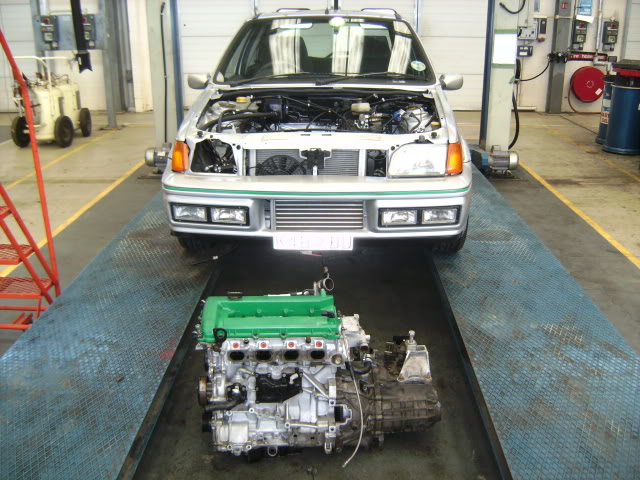
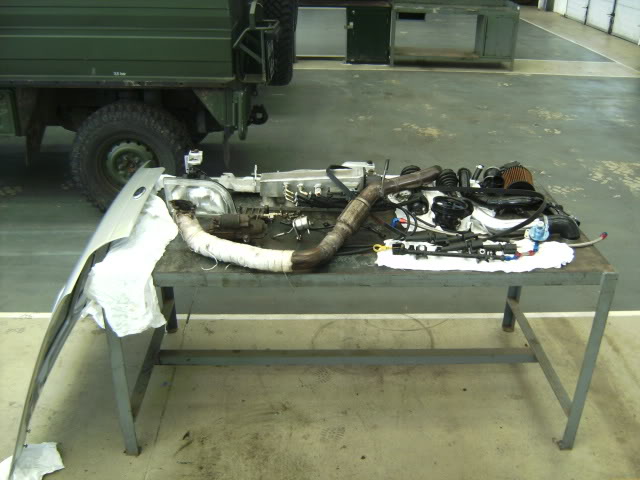