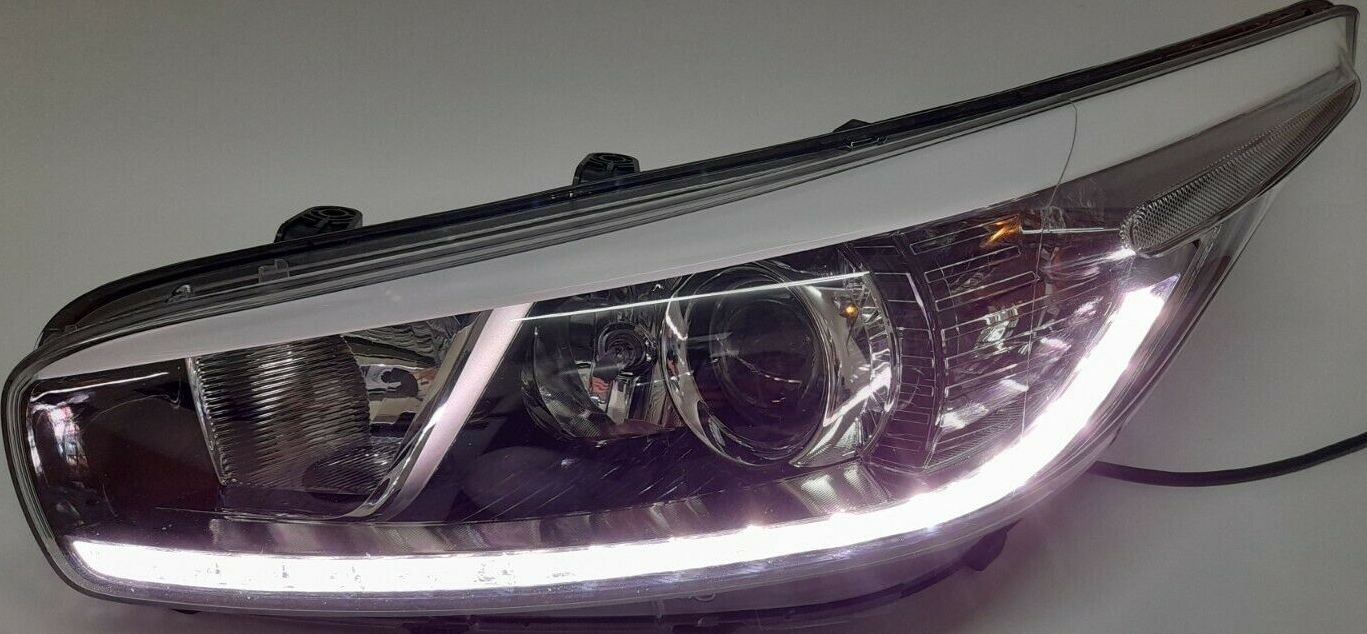
Kia C’eeds from 2012 – 2018 suffer with a daytime running light fault, reportedly due to a inherent issue with the circuit board within the headlamp that provides power for the LED strip in question – it overheats and fails. There is no manufacture fix for this other than to replace the headlamp, however options have come up within the aftermarket – replace the circuit board. Much better option than new lamps at small fortune.
I can do this, give me links to the part!
Whilst doing other repairs to a friends C’eed (broken timing chain guide), repairing the headlight ended up on the list of things to do. This has been an intermittent fault – symptoms from simply not working at all, to being dim, to flickering, to only half the strip working.
First port of call was to remove the headlight. Two 10mm bolts at the top to undo on our 2014 model and then it needs to slide towards the front of the car and up and out. Really you need to remove the front bumper cover – it can be done without doing this but would not recommend as you are likely to damage the bumper cover or break the mounting points on the lamp.
With the headlamp removed we needed to get the LED circuit board out. On a bench with it upside down, a few basic tools and its not to bad to do!
Tools required; Drill, drill bits 3 / 6 / 10mm, magnetic phillips screwdriver, picks – straight / right angled end.
The circuit board is held in with two screws, one on each opposing corner. They are not accessible, a hole needs to be drilled in the headlamp to get access. There is an access cover for unplugging the board from the internal loom – twist and remove to reveal! Shame that they didn’t make a removal cover for whole thing!
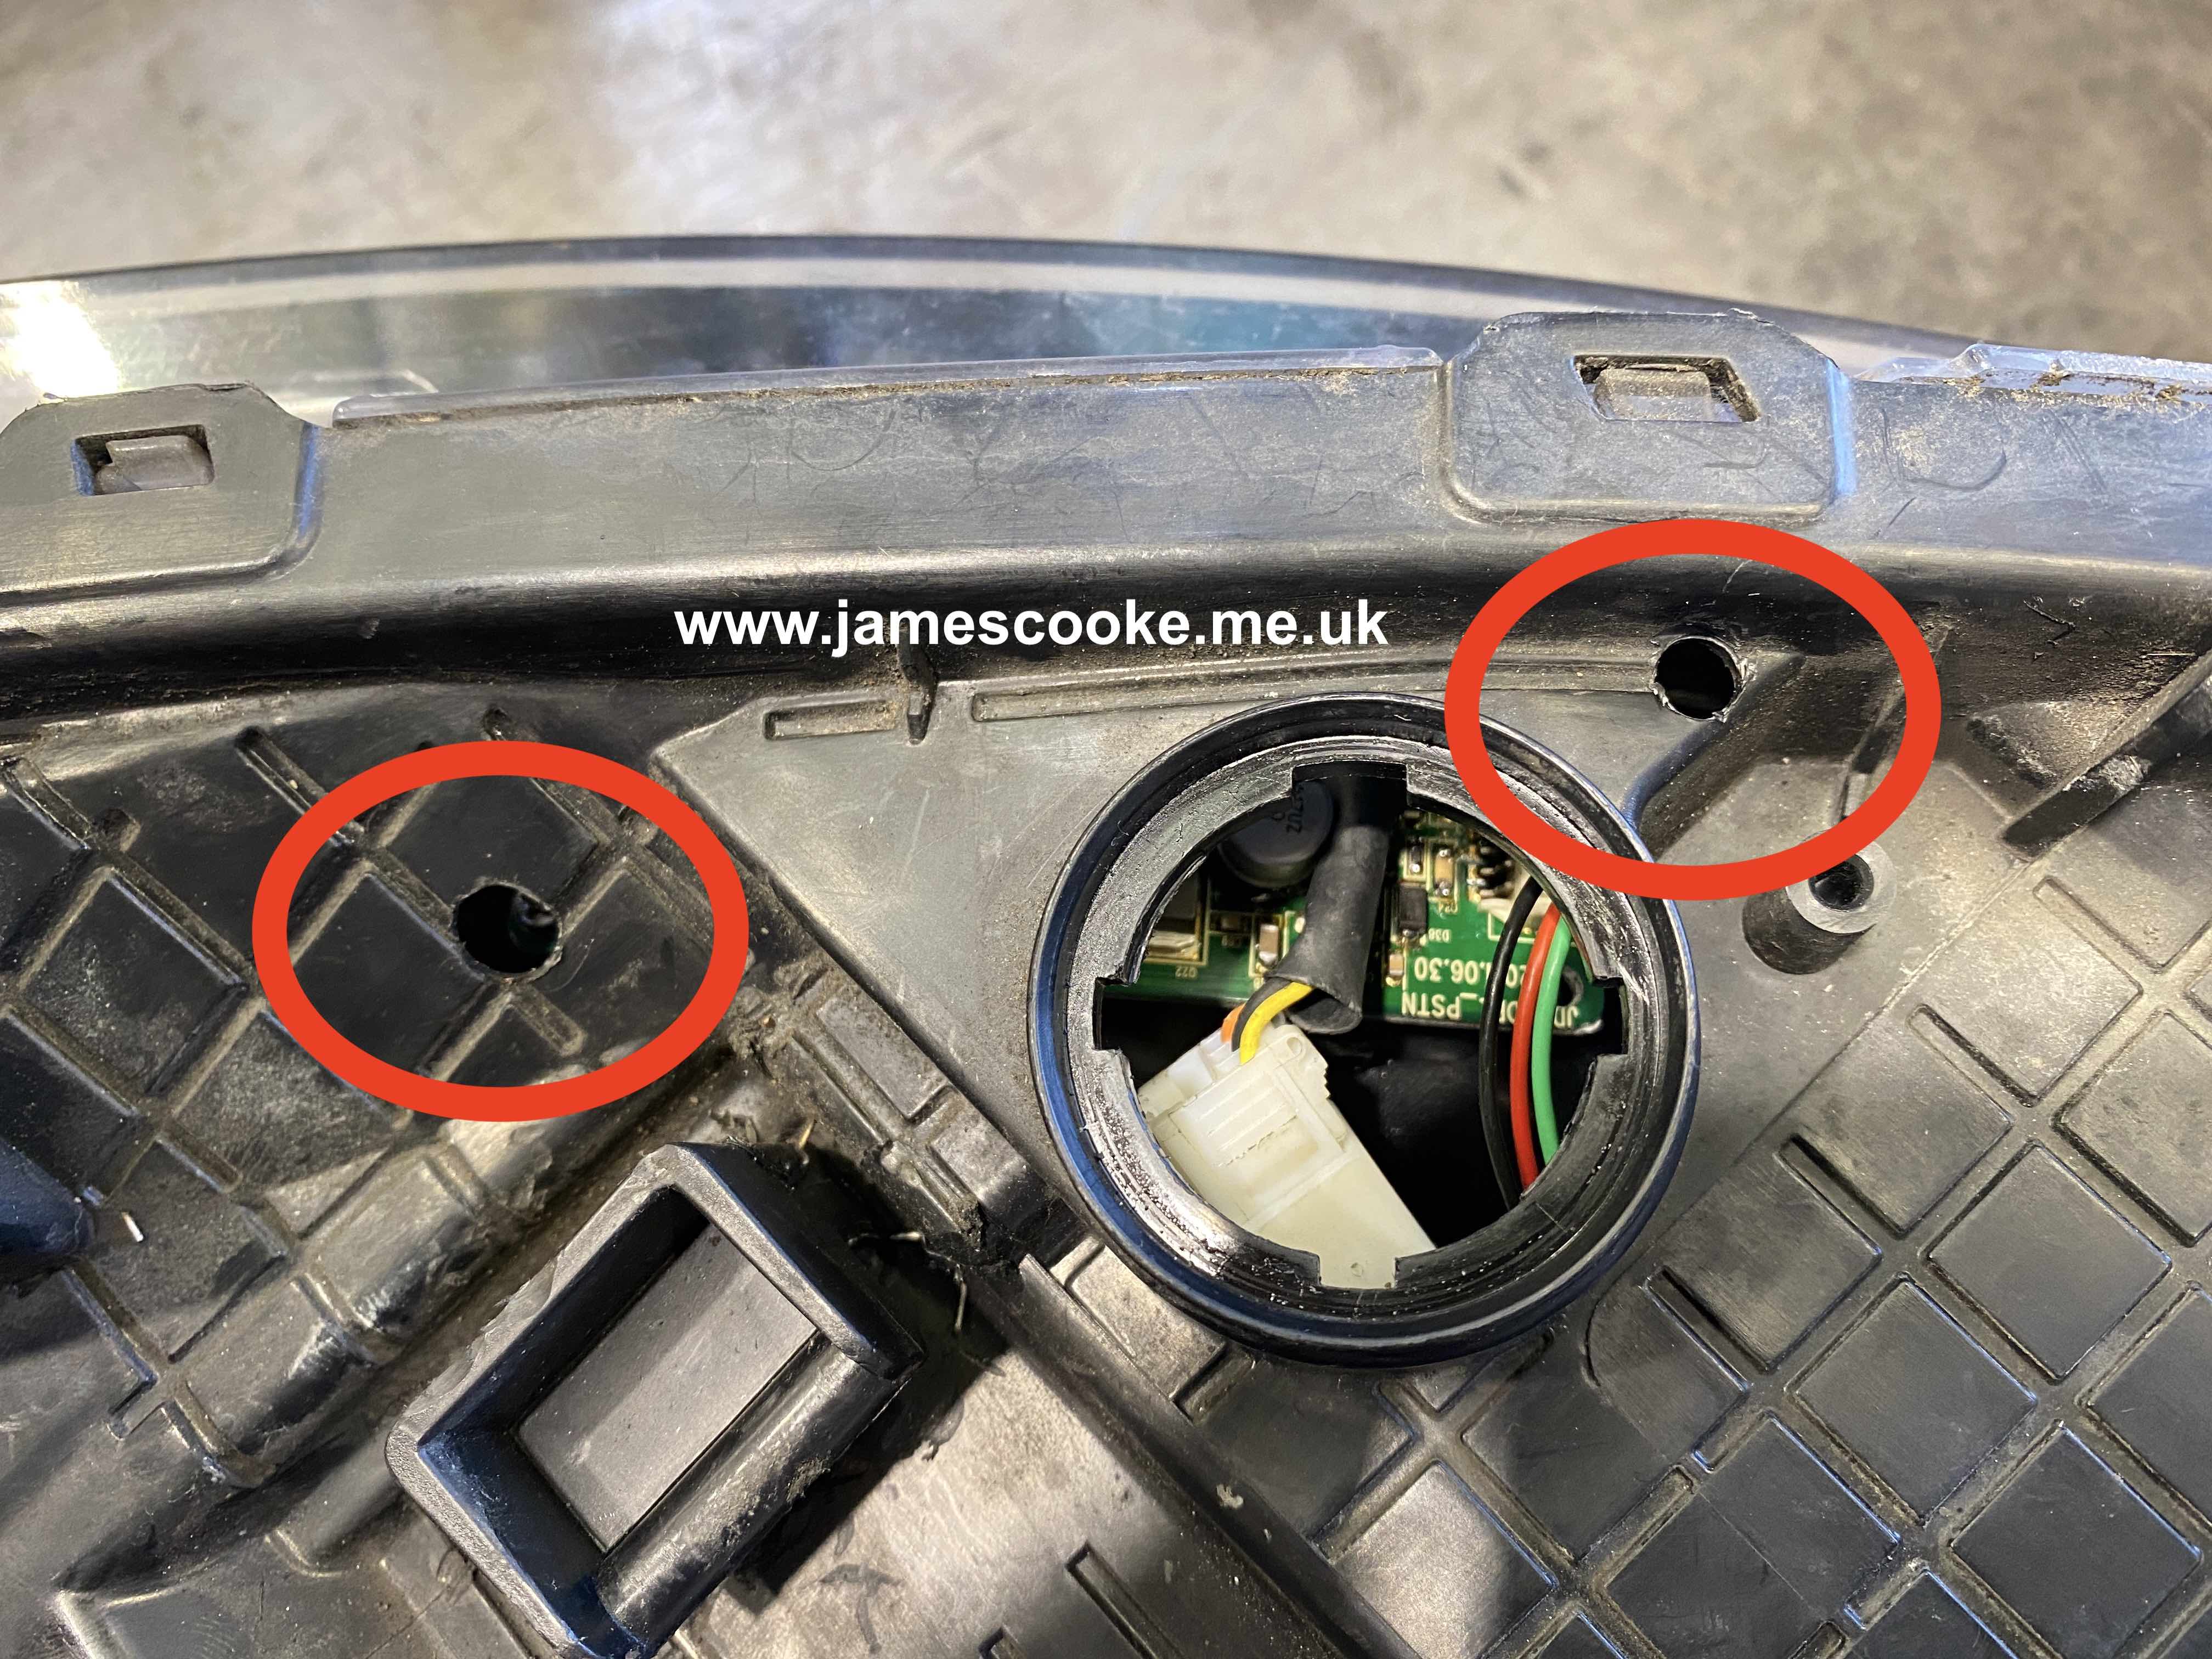
Mark out your holes, drill a little pilot hole, then a 10mm hole and you have access to your screws. Go easy and don’t use to much pressure. I would say that my hole to the left should have been slightly higher, but it done the trick. Don’t remove them yet – use your picks to remove the wiring connector that goes down to the LED strip, its a bit fiddly – get a second person to help / shine a torch in the back of the headlight access covers. Once out, use your magnetic screwdriver to undo and remove the retaining screws. Then the connector that comes from the internal loom in the headlamp just needs disconnecting, then the board can be fed through and out of the bulb access points.
On inspection of our board it was clear that this unit had suffered from corrosion, the joints on the board were going rusty – further inspection of the headlamp revealed a hairline crack around a mounting point, which had been sealed up, which is most likely where the water had been getting in the lamp in the past.
Installation is reverse of removal! (Of course you will need a new board, see below). Some kits come with plugs for the holes that have been drilled but we opted for some black silicone sealant over the holes. If your handy with a plastic welding kit you could probably do this instead
In my search for these, eBay has been my source.


Note- Updated 29.04.2025 – The old links were out of date…! But still same seller – ‘mdpartnership’
Also showing the headlamps they do as outright or exchange if you don’t want to take your headlamp apart.
Heres what i found on eBay; First ones from user ‘mdpartnership’ – buy two and get them cheaper. Or they do offer a repair service for your headlight if you send it to them.
This is what I used to repair my headlamp – From MD Partnership
Repair service, send yours into them, they repair and return
MD Partnership
Passenger side (UK) Outright genuine headlamp.
– LED module replaced for new
– Lens projector replaced for new
– New all bulbs
– Headlight lens cover has been gently polished
– This headlight operates like new unit
Drivers side (UK) Outright genuine headlamp.
– LED module replaced for new
– Lens projector replaced for new
– New all bulbs
– Headlight lens cover has been gently polished
– This headlight operates like new unit
Part Exchange
– Assume would do same as the outright units but advise to contact them to confirm!
Part Exchange
– Assume would do same as the outright units but advise to contact them to confirm!
Have also found these from a seller named ‘daria44’
Cant vouch for these, but sometimes ‘mdpartnership do not have in stock so may be your only option
And another seller, Germany based
I can happily recommend the parts from ‘mdpartnership’, that fixed my headlight – it is worth noting that I only done one, the old one is definitely dimmer than the repaired side, so worth doing them as a pair.
Any questions, happy to try and help – contact me via the socials.
Disclaimer – This info is for your own viewing pleasure, please follow guides at your own risk!
Views: 405