Our workshop floor was tired, almost paintless, had ground in dirt, oil (Cue Barry Scott) and a generally not much going for it. The whole floor had varying levels of paint left on it, some bits had been filled and left smooth in its time, some bits not so smooth. Having never painted a workshop floor, here be a show of how it went and what we did! This is by no means definitive, but its how it went…
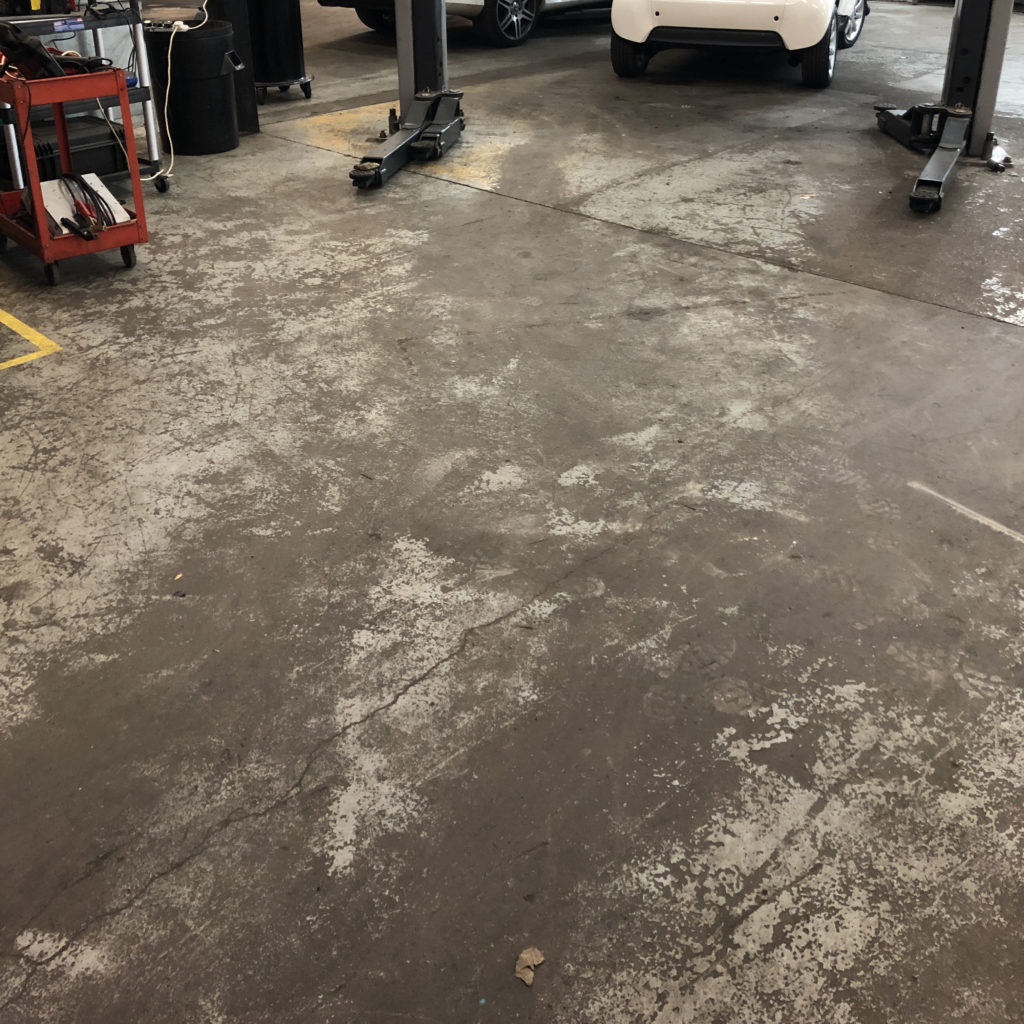
Old Tired Workshop Floor
Plan: Clear workshop. Clean floor to remove oil and grease. Use floor scraper to remove existing paint / rough up concrete. Jet wash out all concrete dust / leftovers. Leave to dry overnight. Paint. Hope to dear god that it drys.
What was needed:
– 2 pack epoxy floor paint (we used 10 5 ltr tins)
– DFG400 floor grinder (We hired from speedy hire services £150+)
– Truck wash / TFR
– Floor cleaner / washer (optional)
– Pressure washer
– Hoover/s
– Scrapers / Wire brushes
– Floor cleaner
– Brooms with hard bristles
– Large squeeges
– A warm weekend
Our workshop is busy and fast moving, so as best as possible we tried to avoid disrupting this – we planned it to fall over a bank holiday Monday as to give the most drying time possible. It took us a Thursday evening about 4 hours (Prepped a 1/3 of floor with floor grinder), a Friday night from workshop finishing till midnight and all day on the Saturday. (plus rebuilding the workshop on the Tuesday morning!
So the first night, Thursday, we set off with cleaning the first section of the floor. TFR down, mixed with water, scrubbed in with the brushes and then the floor cleaner / washer was used to suck up mixture. It dried pretty quickly as it was warm, but if you have no floor cleaner / washer your best bet would be to squeegee it all out. Next the big boy come out:
First section of floor grinded 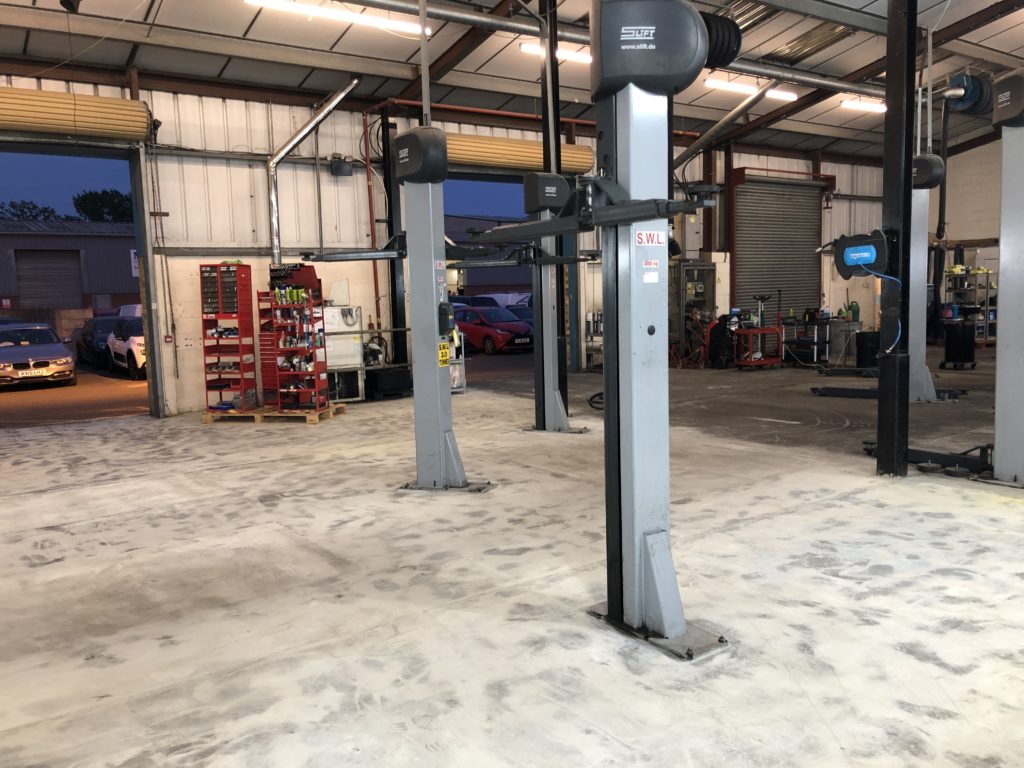
First section of floor grinded
The floor grinder has 2 heads, our one had a couple of diamond tipped heads although there are other attachment options for blocks and wedges (the hire place said that the blocks and wedges are not ideal as the paint tends to melt around them). After a couple of hours the above was the result. It gave us a good result, takes a little more going at in the areas with paint left. We could of probably gone a bit more with it but to give the surface a good key, get rid of nearly all the existing paint, it done well. Looking to the back of the pictures you can see the difference in colour from the old floor to the freshly ground up – this end of the workshop was brighter already. Then we used dry squeegees to push all of the remains dust into piles and shovelled it up. That was it for now.
Probably don’t need to tell you that concrete dust is not good for your lungs. The floor grinder has an extraction port – use it! We hooked it up to a bodyshop sanding vacuum, worked well. A lot of thicker dust just seemed to sit on the floor. Maybe a specific one for it would have performed better. Also we used some disposable face masks, really i think some proper fit ones would have been much better. I was already ill (man flu) before starting this, i think the dust made it much much worse!
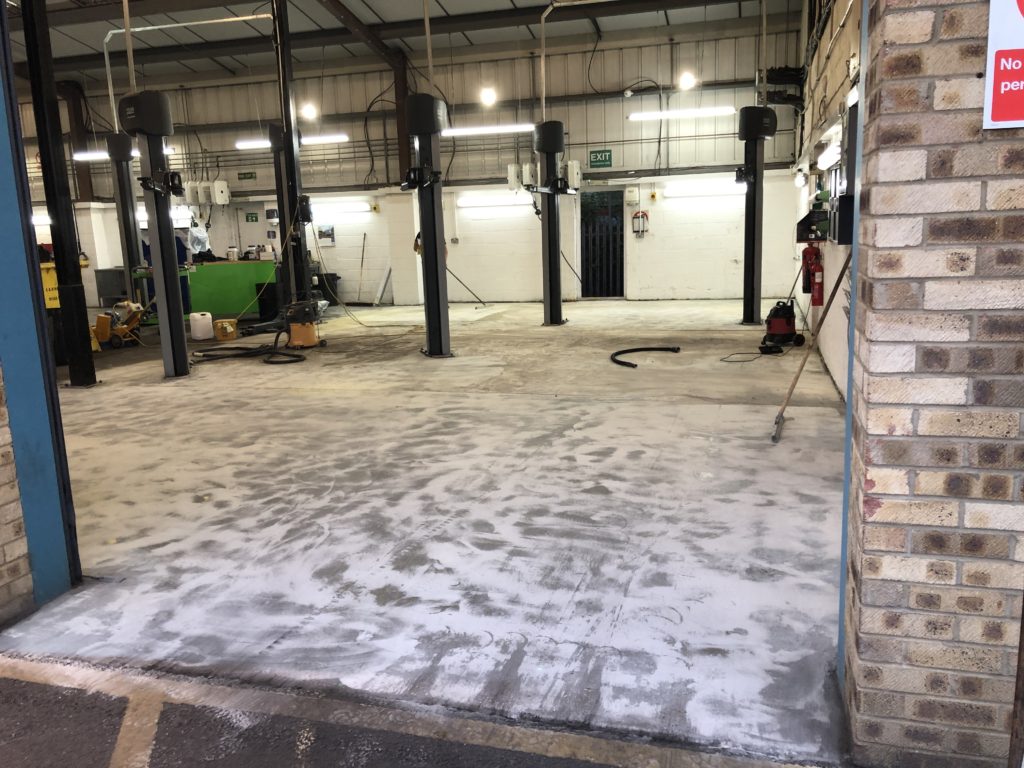
Second night (Friday) we basically repeated the first night for the rest of the workshop, with the addition of jet washing the whole place out. It took one man jetting and 2 squeegeeing the water out. We didn’t fancy using the floor washer / cleaner to suck it up in risk of it trailing a load of grease onto the floor.
Cleaning the 2nd night 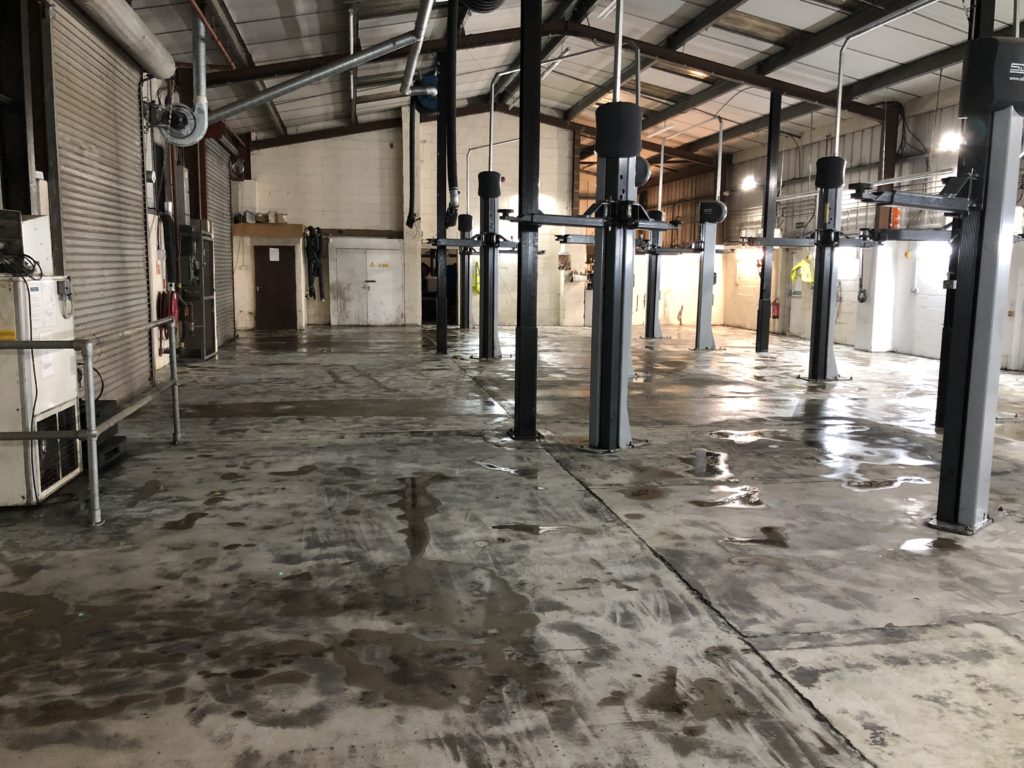
After jet washing out the whole workshop
On the Saturday morning we arrived to a fairly dryish workshop, the weather was on our side. There was a few little puddles but put a bit of rag over them, workshop doors open and it soon dried up completely. We was hoping to paint straight away however it appeared we possibly, well had, over looked cleaning around the ramp legs. They are a sore point for gathering filth:
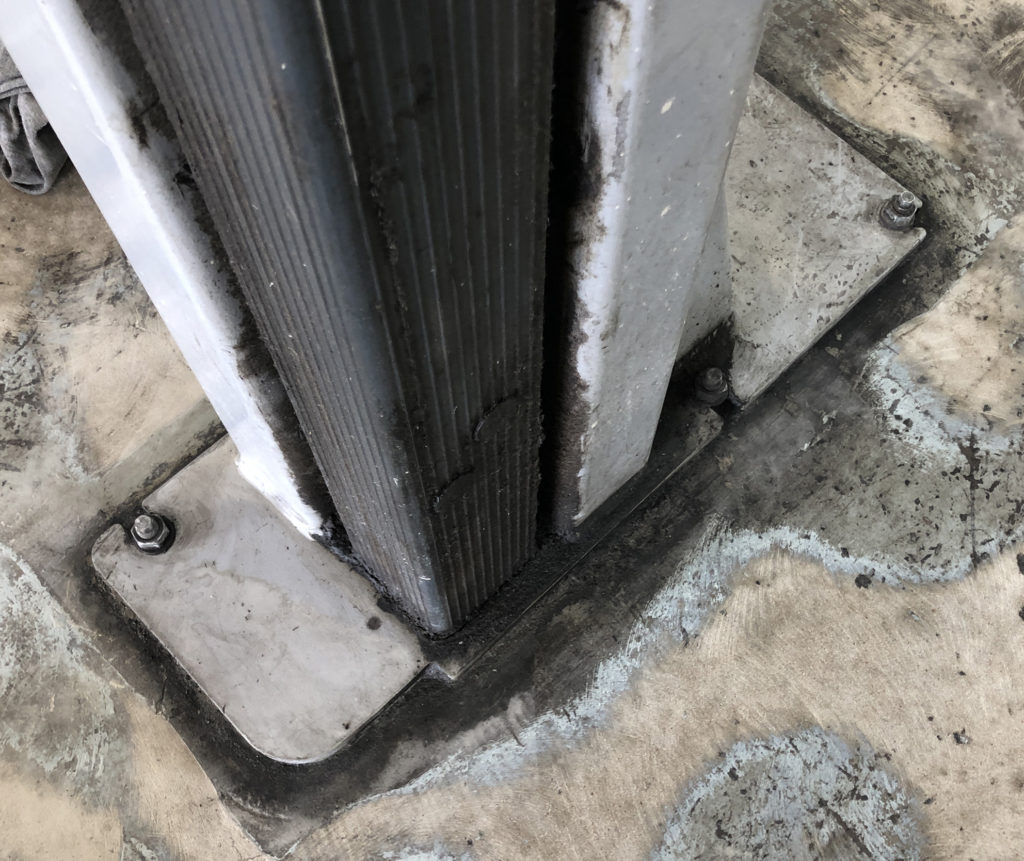
Ramp leg around floor before cleaning 
Ramp leg around floor after cleaning
We used a scraper / flathead / wire brushes to scrape it all out, hoovered it up and cleaned up with brake cleaner. Thinking about it now a drill with a wire wheel attachment would of gone down well and paying more attention to them before this point would be have been great as we could of started painting – 6 ramps, 2 legs each, 12 total x about 10 minutes each one wasn’t ideal when we wanted to start painting but theres no way you could paint onto it.
On with the painting, the most straight forward bit; One of us went round the edges and ramp legs at first, one painting the rest. We mixed up the paint as we went along – we found that the best way was as you was getting low-ish on a batch, mix the next lot up and let it stand. At first it was too runny, but after 10 mins it went down much better. Don’t forget to turn off lights, the radio and close shutters / fire doors as you go along – you won’t be going back across it after!

Our freshly painted workshop floor, 2 pack epoxy paint. 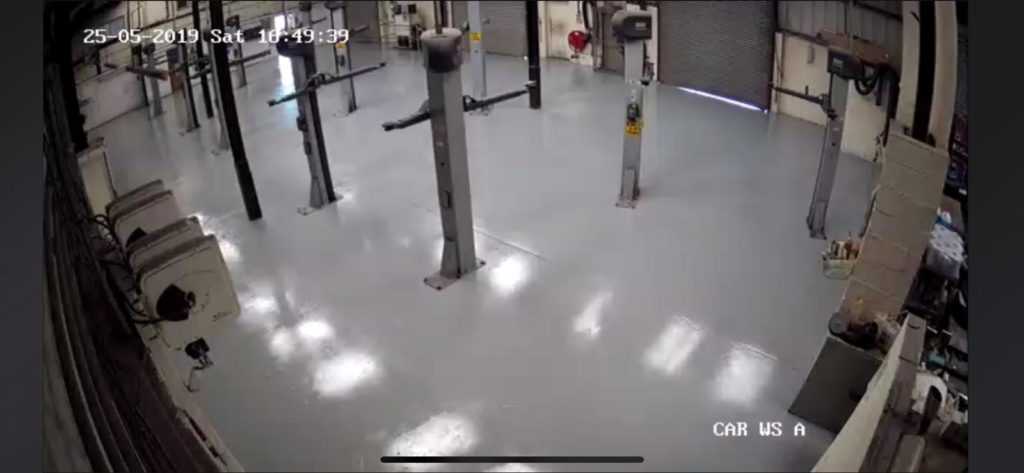
CCTV View 1 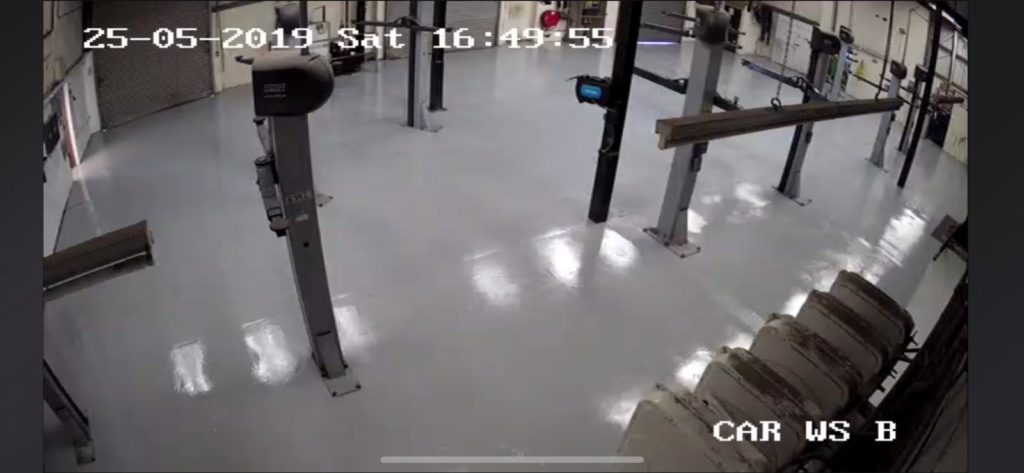
CCTV View 2
For us the difference that painting the floor made was magnificent, majestic, splendid, spectacular, grand, awe-inspiring, stunning, breathtaking (googled them). It did make a world of difference, its much lighter inside and now looks like a respectable workshop. Just need to get them to keep it clean…
Overall, the paint went down well and seems to of adhered very well.
Jams Top Tips:
- Check your paint well before starting, we had 2 cans that had ‘gone off’, the colour had completely separated and gone horrible in the bottom
- Wear gloves, this paint does not come off easily, I’m still scraping it off my fingers a week later.
- Get a couple of decent fitting masks. Lungs are not replaceable.
- At least 3 people needed, myself and a tech helped me do this, really we needed more for this size of workshop.
- We found that sticking everything (in the workshop) on pallets and moving them to our storage area with the pallet truck worked well
- Paint your walls too, ours now look well out of place!
- Don’t be afraid to go to much with the grinder, there was couple of spots i wish we went harder on.
I will leave you with the sad moment of dropping some gingernut biscuits into a freshly painted patch:
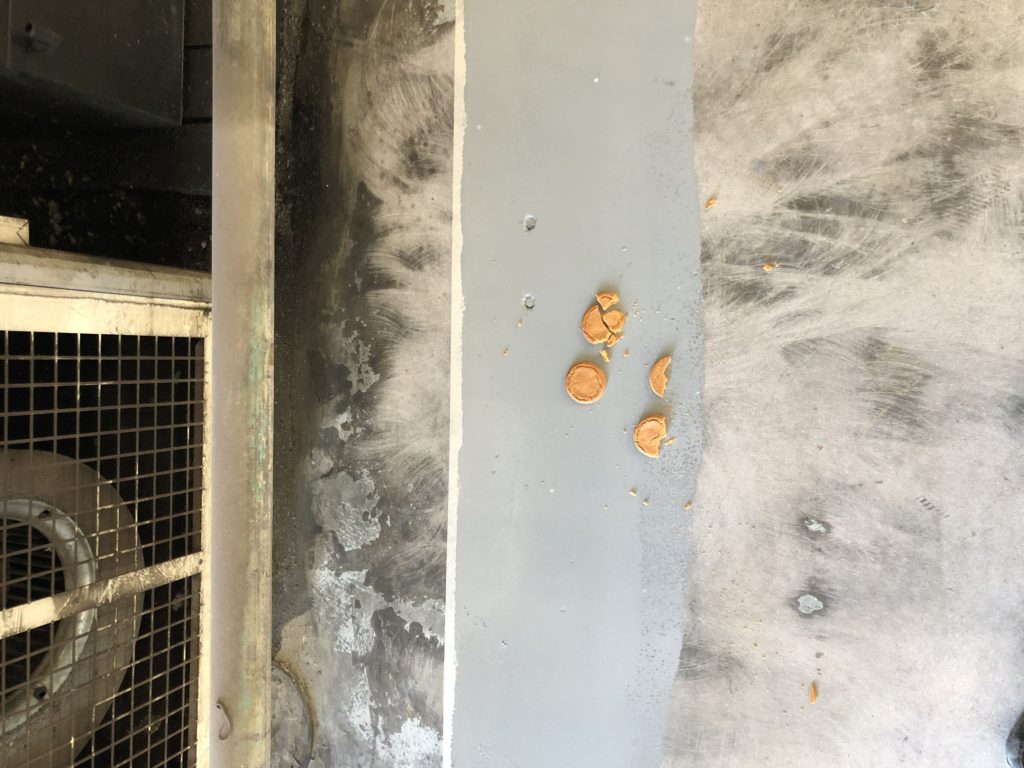
Absolutely gutted.
Views: 26