Intro
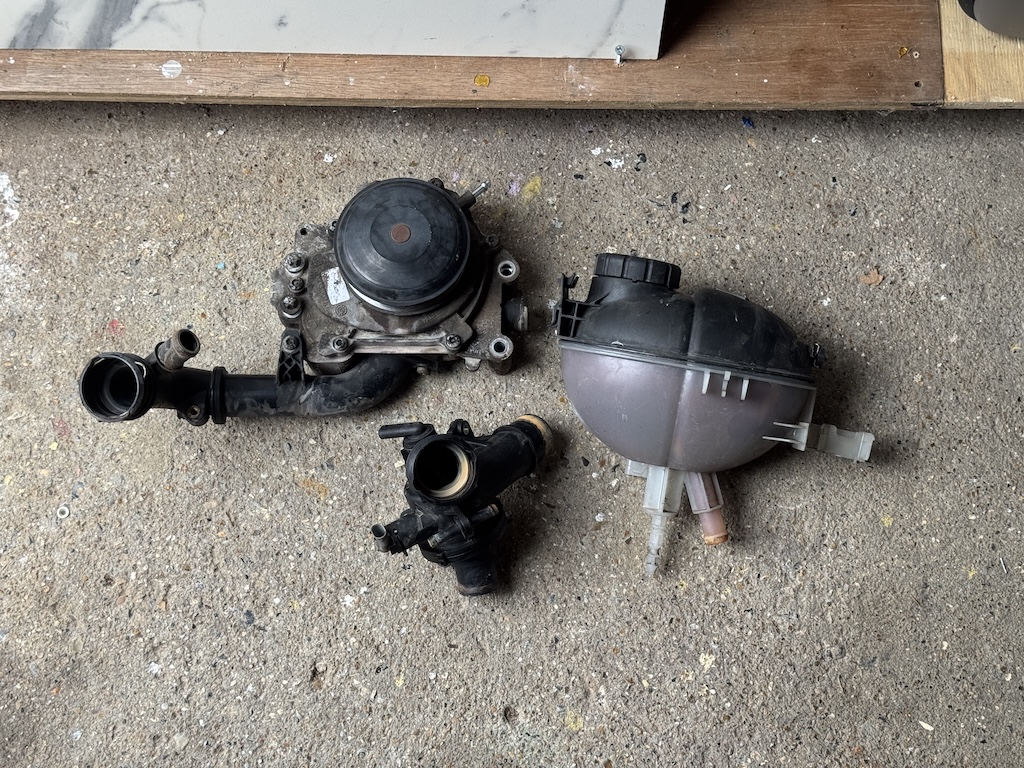
In its continued fashion, this car has been fighting against me and this time the thermostat housing has cracked and the water pump is leaking through the bearing.
The thermostat was replaced a year ago and was a genuine one. We have had some hot weather but that shouldn’t really be an excuse for it to crack!
When I replaced the AC compressor, belt tensioner and drive belt I told myself the water pump would be next – maybe the new belt tensioner was too much for a water pump bearing that had covered 384,000 miles.
Also replacing the header tank / coolant bottle and cap, as it’s getting old and I can no longer see the level very easily.
Parts required
Going against my own ‘use genuine’ stance, have opted for Febi parts on this one – the mileage is too high and it’s hurting my pocket too much at the moment! Price differences as below
Note – sometimes eBay prices are inflated for genuine items. Prices correct as at 16.08.26. Sometimes it pays to pop down to a dealer.
Expansion tank – A2045000749 (Genuine MB £52.00 + vat)
Febi version – 38808 (got for £37 inc)
Coolant cap – A2105010615 (Genuine MB £21.40 + vat)
Febi version – 30533 (got for £12)
Thermostat – A6512002800 (Genuine MB £73.50 + vat)
Febi version – 108840 (got for £60) – comes with both sensors and o-ring for the top hose
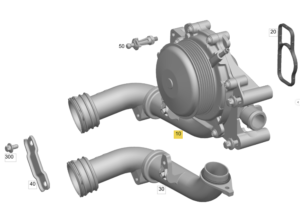
Coolant pump – A6512007701 (Genuine MB £240.00 + vat) – worth noting that MB only sell as complete with housing/pipe
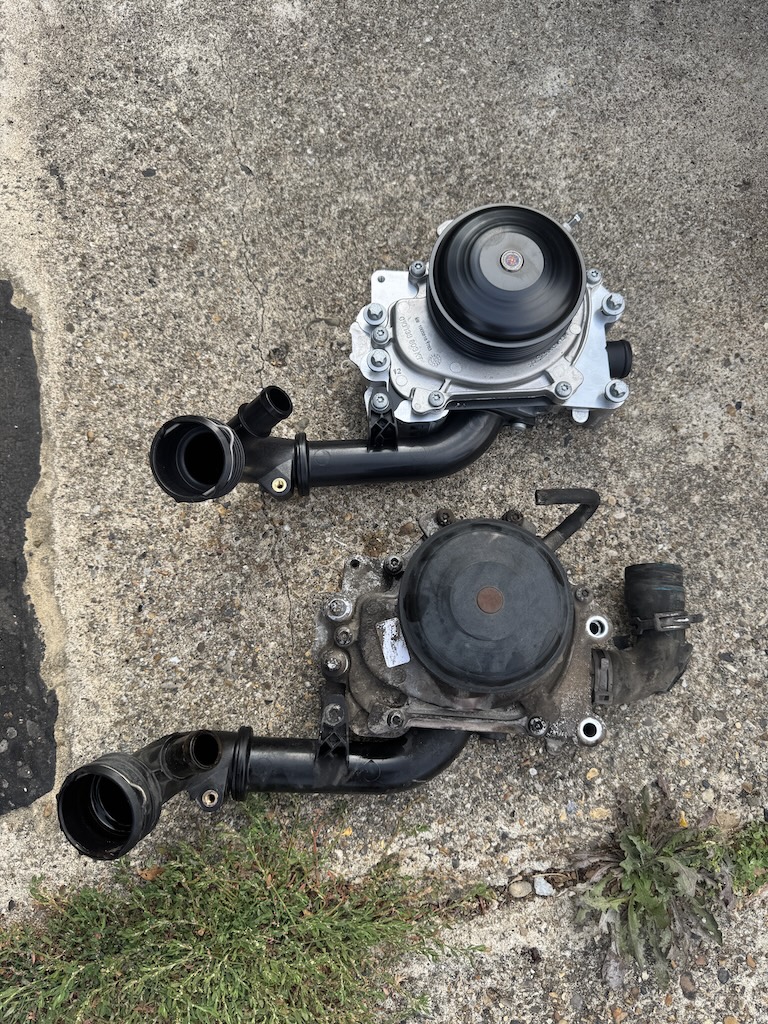
Febi version – 1005818 (got for £170) this is the complete version, comes with housing / pipe, includes seal to engine
Febi version – 188401 (around £95) this is just the pump, but comes with seals
Note – all of the above water pump references are for the later version which is ‘switchable’. (if your pump has a vacuum pipe going to it, it is this type). Not sure? Feel free to contact me and I will check the part number for you.
Info; The later OM651 uses a switchable water pump rather than a conventional permanently-driven pump. The vacuum actuator controls the pump’s internal mechanism, allowing the ECU to reduce coolant circulation during certain operating conditions. This helps the engine warm up more quickly and allows coolant flow to be controlled when required.
I opted for the complete version as I’ve had enough of taking it apart recently and thought I may as well just cover all bases – I’m glad I did as the seal from the housing to the engine was very flat and probably would have ended up leaking at some point. You could, of course, replace the seal on its own.
Pictures / Guide
I have written these as separate guides but there is a little bit of overlap between the thermostat and water pump if being done together.
It can be done on the floor. In an ideal world I would drain from the radiator drain but as there wasn’t any coolant in it anyway it saves getting it up in the air and removing the under tray.
Tools required
Hose clamp pliers – it’s ideal to have the correct type of pliers for the spring clamps. You can do it with standard pliers but it can be a bit tricky.
Torx sockets and bits
A small flat head screwdriver
Silicone spray will be handy but not essential
US Pro has been good to me over the years so opted for the bits and sockets below as didn’t have any in the current tool box!
Also will need some Torx sockets
Soft wire brush and silicone spray.
Header tank / Coolant Bottle
Remove the small coolant line by releasing the clip and pulling the line out. You may need to work it gently, twist it a little to initially release it. Sometimes the end breaks off the line and you will need to replace it. (A2125013725 – £49.10+ vat)
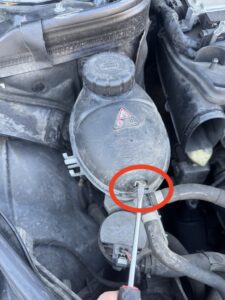
Release the clamp on the return line
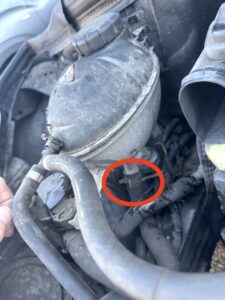
Remove the circulating pump / rubber mounting, it just pulls upwards off the coolant bottle – no need to disconnect wiring.
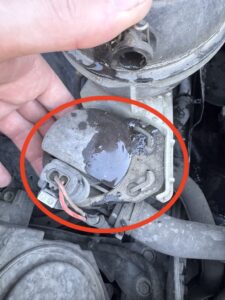
Release the level sensor wiring plug. It can be awkward in situ – but you can do this after releasing the bottle from position.
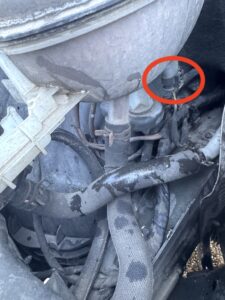
Use a screwdriver or pick to release the locking tab on the connector
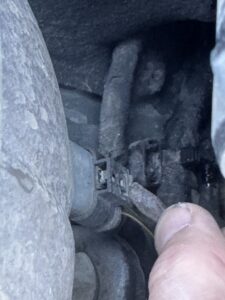
Then release the bottle tabs from the strut area and the bottle will pull out. May need to use two screw drivers as two tabs to release.
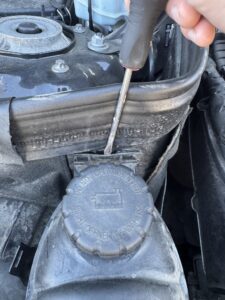
Installation is the reverse of course – my new bottle came with a new rubber mounting already on the bottle which I didn’t realise until putting it in – the old one was still in the bracket. Easy enough to swap over should you wish to.
Old bottle vs new bottle;
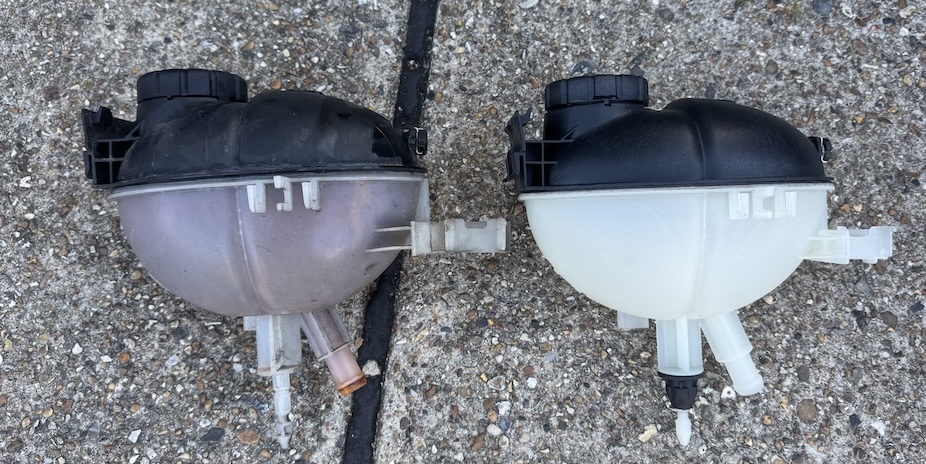
Thermostat
Remove the engine cover – release the screw at the front of the cover, turn 90 degrees, then lift the front a few inches and pull it towards you to remove.
Remove the air intake pipe. Small clip at in the centre needs to be turned 90 degrees, then release the clips on the front panel and pull off the other end gently.
Remove the coolant hose from the radiator connecting to the thermostat – release the clips on each end pull out. They may be a bit stuck, go easy and wiggle / twist gently otherwise you will risk pulling the rubber out of the metal joint.
Remove this engine cover mount in red. If you don’t have a deep Torx socket a deep 10mm socket will get you out trouble.
Then remove the small 10mm bolt and remove the wiring cover in yellow
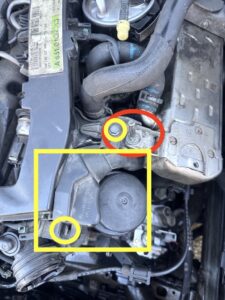
Remove the wiring clip as it will allow us to release this wiring a little which will help in the next steps
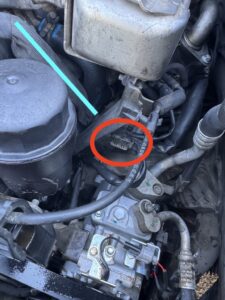
Release this clip and pull the wiring harness / cover upwards a little to create access underneath. It won’t lift a lot, but gives enough room for the next steps.
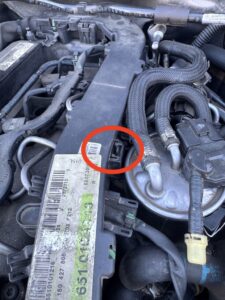
Now remove the two bolts and bracket arrowed.
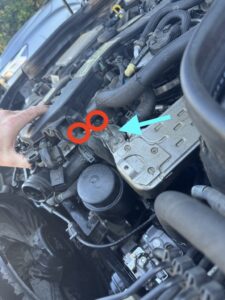
Remove the bolt securing the thermostat to the head. This also holds a small wiring clip which will need unclipping from it.
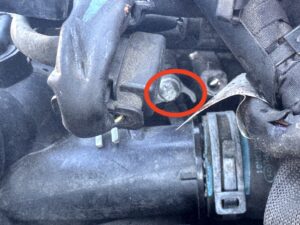
Remove the two bolts securing the thermostat to the front of the engine. One bolt has a wiring connector bracket, which will need to be unclipped and moved out of the way.
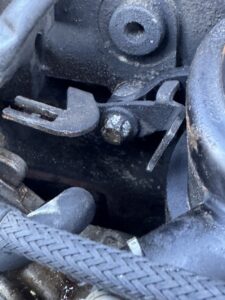
Remove the two sensor wiring plugs on the thermostat.
Release the two small hose clips and pull off the pipes.
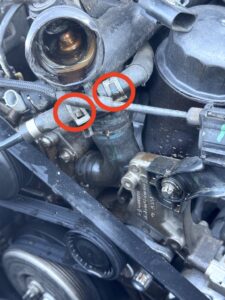
Release the upper main hose clip and slide towards the fuel filter
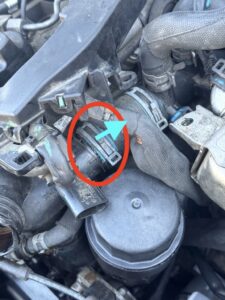
Release the lower main hose clip and slide downwards
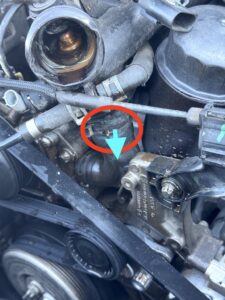
At this stage, it is only held in place by the two main coolant pipes. They may be a bit stuck on so may require a bit of persuasion with a flathead to push off.
Refit is reverse of removal. Spray a little silicone spray inside the coolant pipes to make them easier to slide back on. Get the thermostat in position in the main pipes before tightening up the securing bolts. On the radiator hose clean up the joints/seals and spray a little silicone spray on them to help them slide in as well.
Waterpump
As with the thermostat; Remove the engine cover and air intake pipe.
Disconnect the coolant pipe from the radiator at the water pump intake
Disconnect the coolant pipe from the header tank at the water pump intake.
Release the hose clip for the pipe that goes from thermostat to coolant pump at the thermostat end and bring downwards.
Remove the drive belt. Tip – pull the belt upwards between the water pump and AC compressor to pull the tensioner in and pin it in its open position with a drill bit or punch (3mm) (1 in picture)
Remove bracket (2 in picture)
Remove belt guide pulley (3 in picture)
Unclip wiring harness (4 in picture)
Disconnect vacuum pipe at waterpump (5 in picture)
Remove waterpump housing bolts (6 in picture)
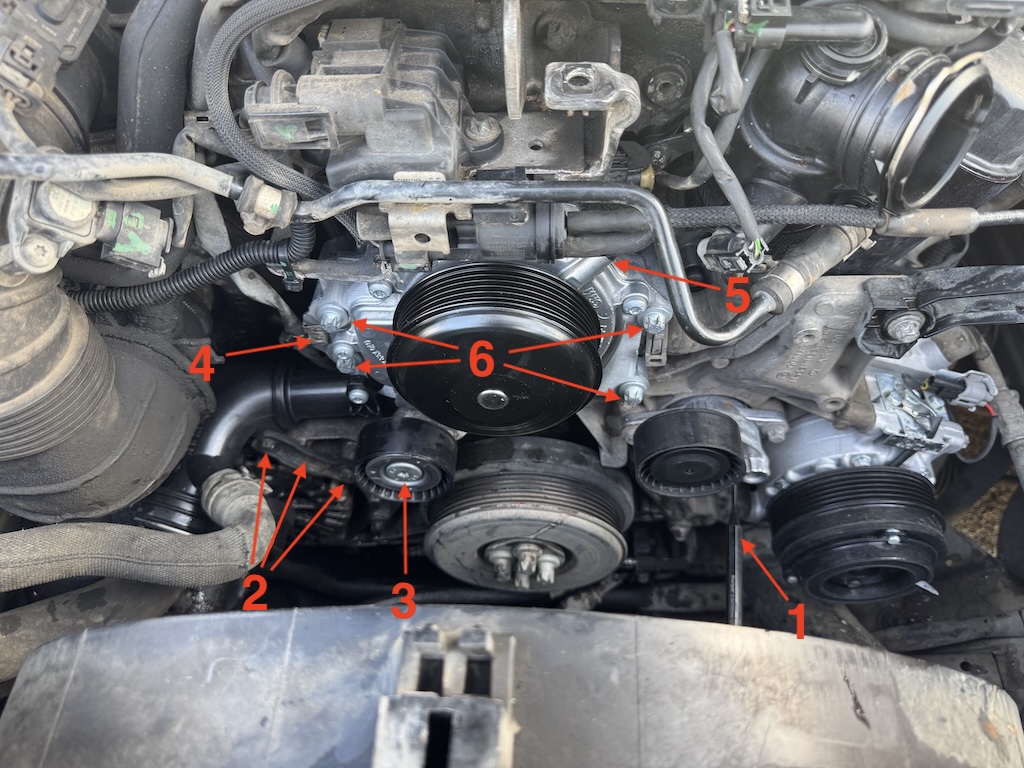
At this stage the complete pump and attached pipe will come out.
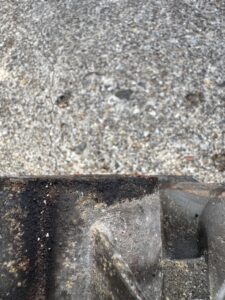
Clean up the mounting area where the gasket meets the block with a soft wire brush
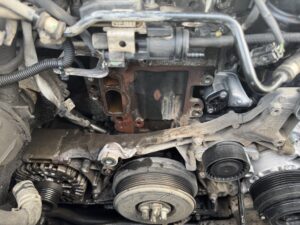
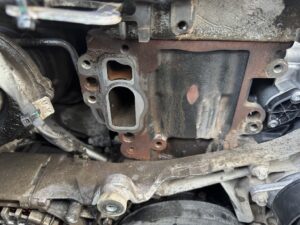
Refit is reverse of removal.
Old vs new;
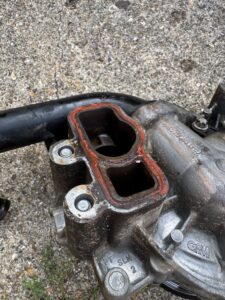
Flat ish seal from pump housing to block – doesn’t look like it has much left in it. If you are just changing the pump, I would recommend removing the housing and replacing this seal as well. A6512030480 – £2.30+ vat
Adding coolant
Refill with coolant – MB Spec 235.6, mixed 50/50. Alternatively, use a premixed coolant meeting MB spec 326.6
Run the engine up to temperature with the heaters on and make sure you have heat from the cabin heater.
Turn off and leave to settle, recheck.
Recheck coolant level next day, top up to just under the top half of the bottle – there is no min / max mark on the bottle.
Replace while your’e there if you can
As you already have the belt off, inspect the belt for cracks, damage and wear. Replace if needed.
Also worth checking the tensioner and guide pulley – spin them with the belt off. If either is noisy, rough or doesn’t spin smoothly, replace it.
Last words
And that’s it.
On a can I do it myself note, yes you probably can – this wasn’t too bad, particularly with the car being on the floor.
The biggest surprise was just how flat the pump housing-to-engine seal had become after 380,000 miles, so if you’re replacing the pump alone I’d definitely replace that seal as well.
Total for the main parts: £279
Going genuine would have been considerably more, particularly with the complete water pump at £240 + VAT on its own.
The biggest question is what component will fail next!
Views: 123